If you want to use Windows Photo Viewer to open pictures but find it missing in Windows 10, how can you get it back? This usually happens after you do a clean install of Windows 10. Actually, the Windows Photo Viewer application still exists, but its registry entries are removed from Windows 10 so that by default the Windows Photo Viewer is unavailable in Windows 10. To get Windows Photo Viewer work, you need to add its registry entries to Windows 10 Registry. Now, this page will show you how to get back missing Windows Photo Viewer in Windows 10 by the following two ways. Either way, you are recommended to firstly backup your Windows 10 registry just in case you make mistakes.
Step 1: Download the Restore Windows Photo Viewer file from http://www.avoiderrors.net/Downloads/restorephotoviewer.zip, and then open the zip file.
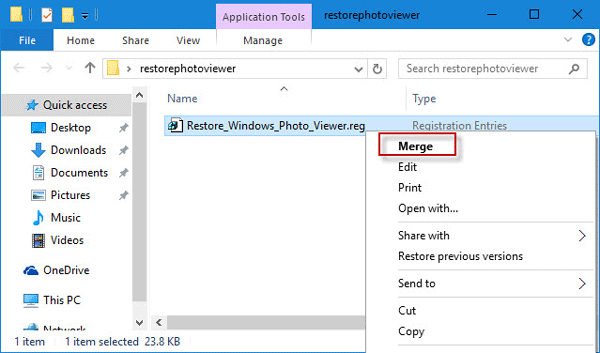
Step 2: Right-click on the Restore_Windows_Photo_Viewer.reg file and select Merge. Confirm the User Account Control dialog if prompted.

Step 3: Click Yes to continue.

Step 4: Registry entries are successfully added to Registry. Click OK. Then Windows Photo Viewer gets available in your Windows 10.

Step 1: Create a new text document and open it.
Step 2: Copy the codes from http://windows.intowindows.netdna-cdn.com/wp-content/uploads/My%20uploaded%20files/PhotoViewer.reg and paste them into the text document. Save the text document as a .reg file; for example, WindowsPhotoViewer.reg.
Step 3: Right-click on the .reg file, and select Merge from the context menu. Confirm the User Account Control dialog if prompted.

Step 4: Click Yes to continue.

Step 5: Click OK. Then the missing Windows Photo Viewer will appear in "Open with" menu, in "Default apps", and in "Set Default Programs".

After Windows Photo Viewer gets available in Windows 10, you can use it to open pictures or set Windows Photo Viewer as your default image viewer.