On the Windows-based operating system, administrator rights are required to perform many tasks, such as making system changes, installing and launching the software, etc. Here are four ways you can quickly check if you have administrator rights in Windows 10.
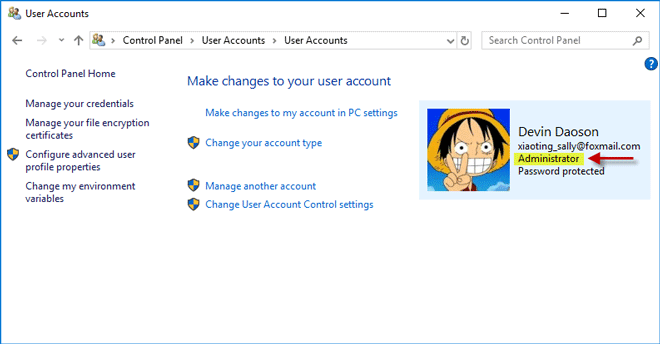
1. Open Control Panel, and then go to User Accounts > User Accounts.
2. Now you will see your current logged-on user account display on the right side. If your account has administrator rights, you can see the word "Administrator" under your account name.

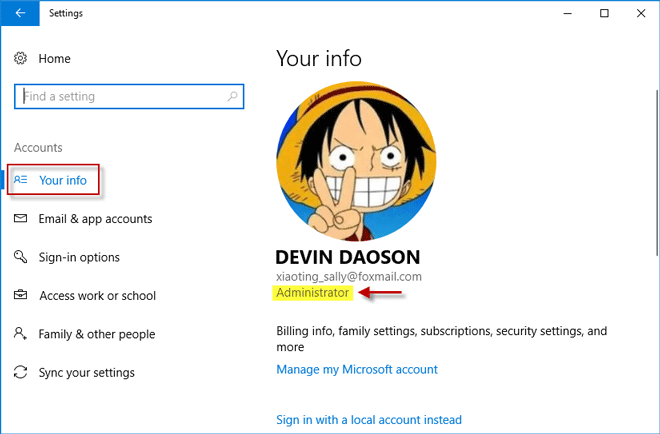
1. Open Settings using Win + I key, and then go to Accounts > Your info.
2. Now you can see your current signed-in user account. If you are using an administrator account, you can see an "Administrator" word under your user name.

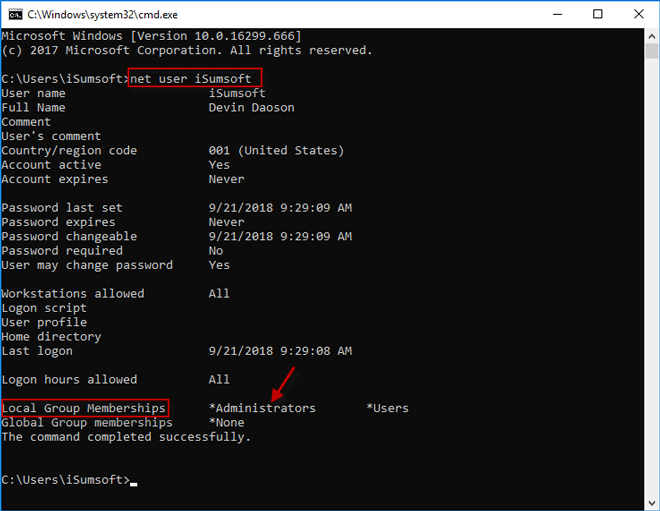
1. Open a Command Prompt window. You can first open the Run dialog using Win + R keys, then type in cmd and click OK.
2. Type in command: net user <username> and hit Enter. Replace <username> with the name of your user. You will get a list of attributes of your account. Look for the "Local Group Memberships" entry. If your account belongs to the Administrator group, it should have administrator rights.

1. Open the Computer Management. You can first right-click on the Windows icon, then select Computer Management from the menu.
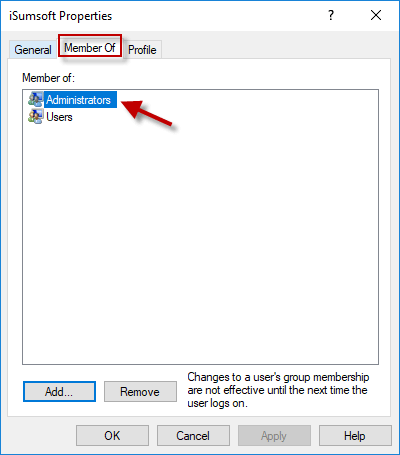
2. Expand Local Users and Groups and select Users folder. You will see a full list of all user accounts on your computer. Double-click on your user account to open the Properties dialog.
3. Now go to the Member Of tab. If you can see the Administrators group appear here, your user should have administrator rights.
