You can use Remote Desktop to connect to and control your PC from a remote device by using the RDC. When you allow remote desktop connections to your PC, you are granting anyone in the Administrator's group, as well as any additional users you select through the Select user button, the ability to remotely access their accounts on the computer. This tutorial describes 5 ways to add Remote Desktop Users in Window10/8/7.
To add users as members of the Remote Desktop Users group to allow connecting remotely to your Windows 10 PC. Here is how:
Step 1: Open the Settings app, and then click System.
Step 2: Click on Remote Desktop tab, click on the Select users that can remotely access this PC link. Make sure Enable Remote Desktop feature is On. Otherwise, you won't see select users link there.
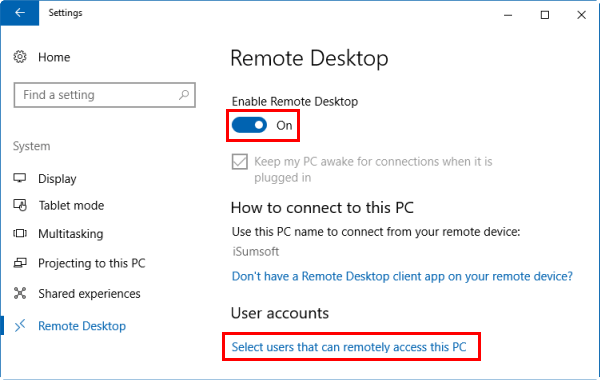
Step 3: In Remote Desktop Users dialog box, click on the Add button.
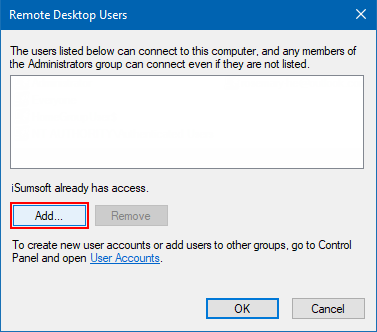
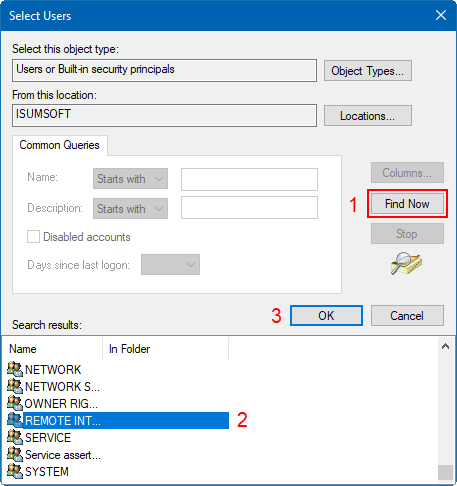
Step 4: The Select Users dialog box will appear. There, you can type the user name to add or click on the Advanced button to select the user from the list.

Step 5: Click on the Find now button in Advanced mode. Select the name of the user account you want to add as a member and click OK.
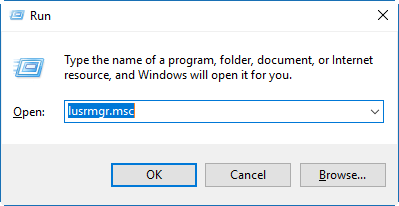
Step 1: Open Local Users and Groups.
Step 2: Click on Groups, and double-click on the Remote Desktop Users group.
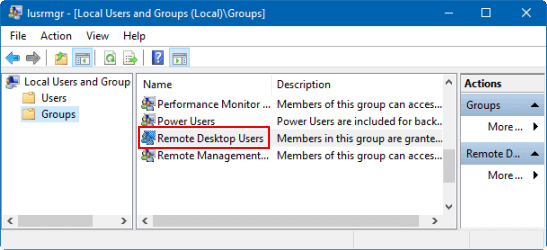
Step 3: Click the Add button to add one or more users. Do step 4 and step 5 as above for what you want to do.
Step 1: Run PowerShell as administrator in Windows 10.
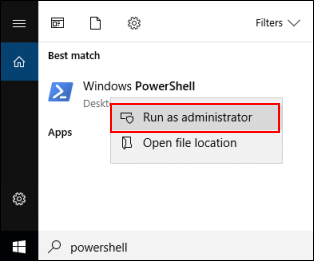
Step 2: Type the command below into the Windows PowerShell, and press Enter.
Add-LocalGroupMember -Group "Remote Desktop Users" -Member "User"

To add Remote Desktop Users in Windows 7/10. Here is how:
In Windows 7:
Step 1: Click the Start menu > Control Panel.
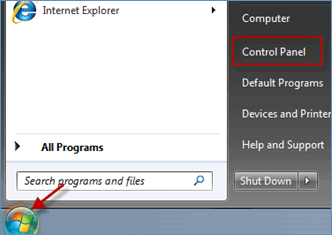
Step 2: Click System and Security link in the Control Panel.
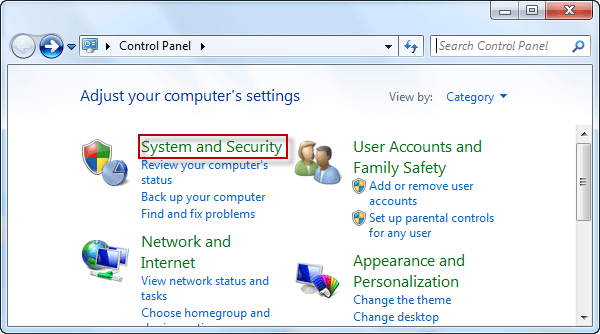
Step 3: Choose Allow remote access link under System.
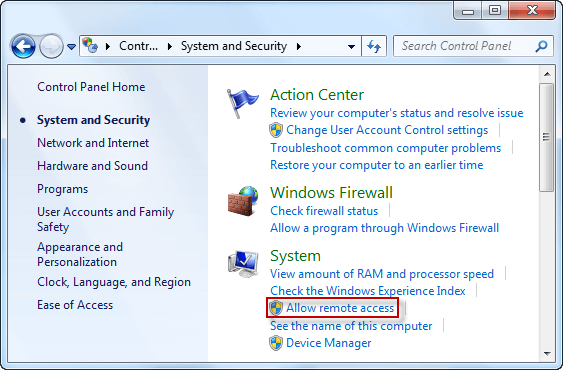
Step 4: Select Allow connections only from computers running Remote Desktop with Network Level Authentication(more secure) under Remote Desktop. Click Apply button.
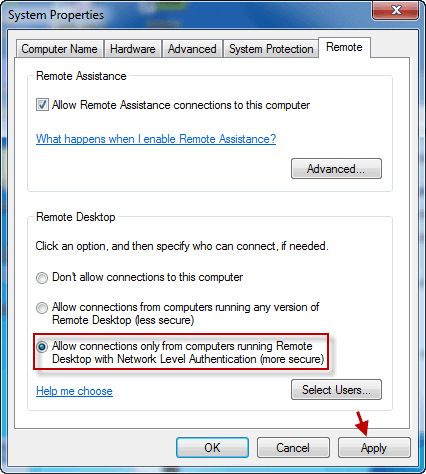
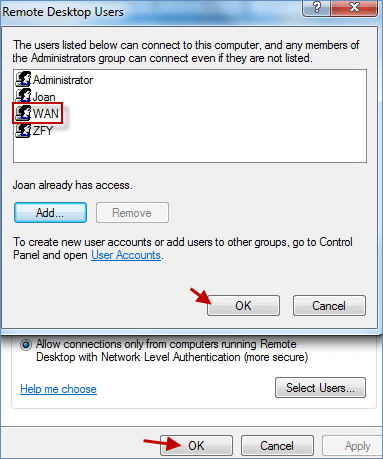
Step 5: Click Select Users button and then click Add button in the Remote Desktop Users window.
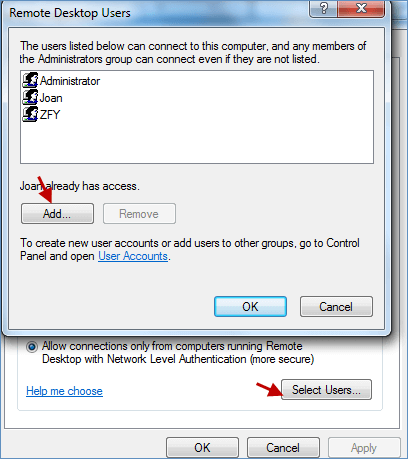
Step 6: Click Advanced button and Find Now button to locate the users that you would like to add, and click OK.
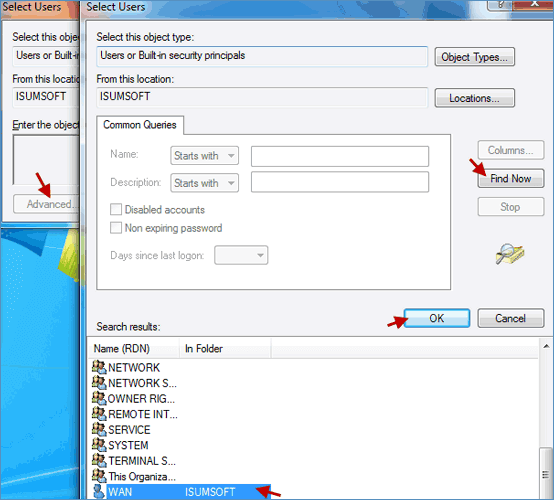
Step 7: You will see iSUMSOFT/WAN displays in the Select Users window. Click OK button.
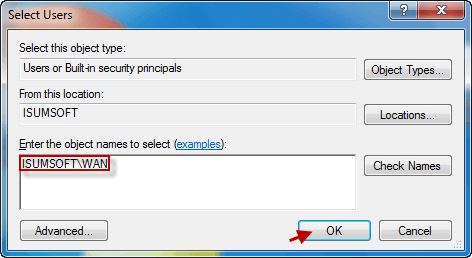
Step 8: And then the WAN user in the Remote Desktop Users window. Click OK twice to exit all dialog boxes manually.
In Windows 10:
Step 1: Launch Control Panel in Windows 10.
Step 2: Follow the above steps from step 2 to step 8 to accomplish what you want to do.
Step 1: Click the Start menu ![]() and right-click Computer to choose Manage option.
and right-click Computer to choose Manage option.
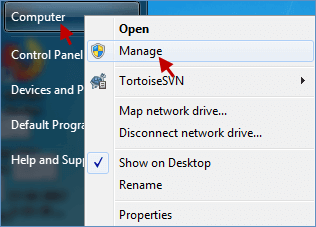
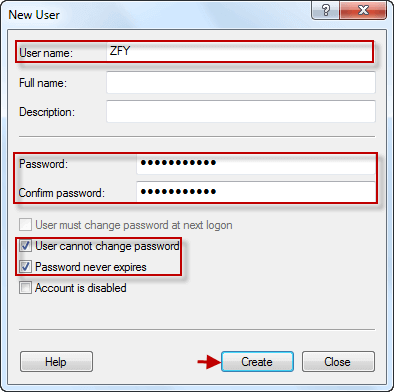
Step 2: Under Local Users and Groups, right-click Users and select New User.
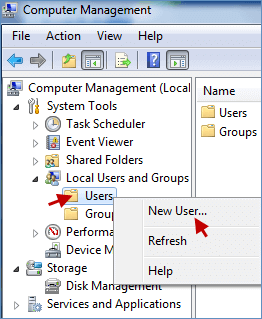
Step 3: In New User window, typing your User name and Password, and then confirm password again. Next, choose Create button, then close the dialog box.
Note: If you do not want the password to be changed, you can check User cannot change password. If you're afraid of being locked out of the server, you can check Password never expires. ( See the following picture )
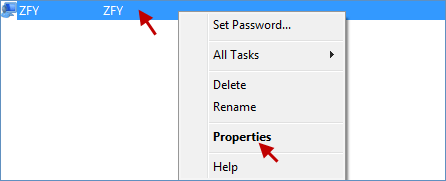
Step 4: When pops up a new User that has been created. You can right-click it to choose Properties.
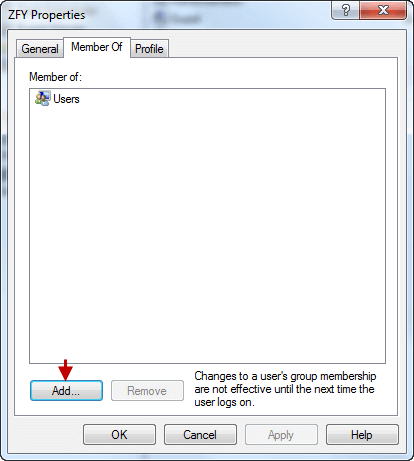
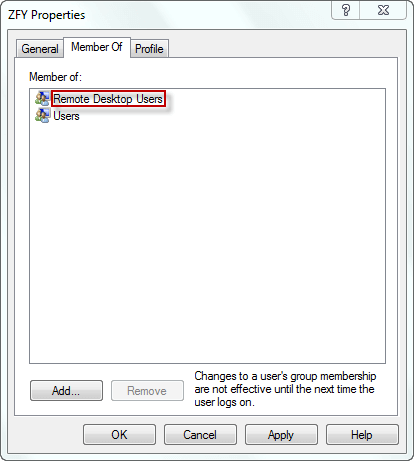
Step 5: Tap Member Of option and hit Add in your Properties window.
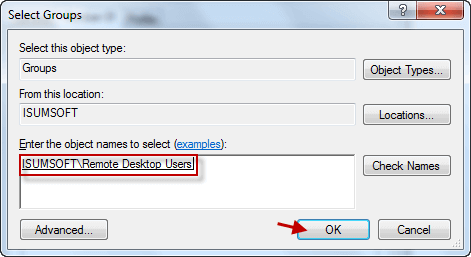
Step 6: In Select Groups window, click Advanced > Find Now > Remote Desktop Users. When you are done, tap OK button.
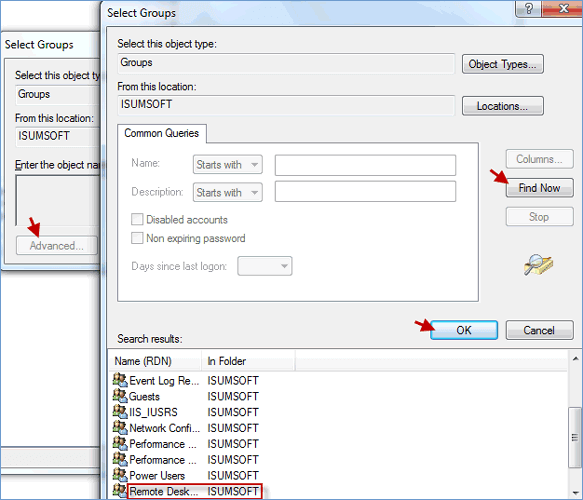
Step 7: You will see ISUMSOFT\Remote Desktop Users displayed in the Select Groups window. And then click OK button.
Step 8: At last, the Remote Desktop Users appears under the Member Of. This proves that you have added successfully Remote Desktop Users in Windows PC.
That's all!