If you haven't known yet or know little about how to add, delete, and modify user accounts on Windows 10, from here learn several classical and new methods to perform this task.
Step 1: Open Control Panel in Windows 10.
Step 2: Click User Accounts.
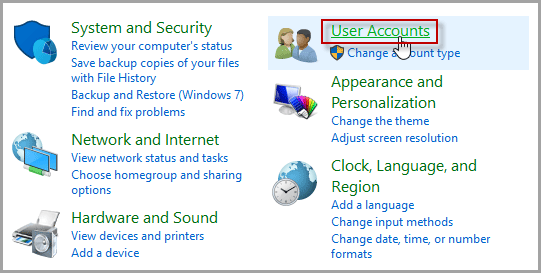
Step 3: Click Remove user accounts link.

Step 4: Then you can add, modify, or delete user accounts on your Windows 10.

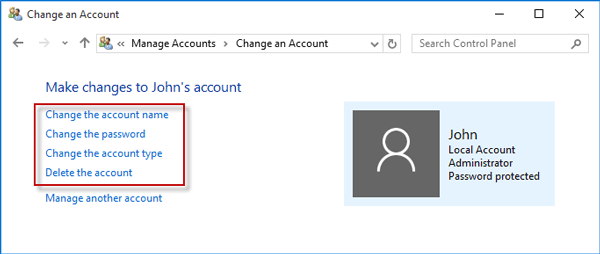
1. Click Add a user in PC settings link showed in the screenshot above so that you can access Windows 10 PC settings to add new user accounts.
2. To modify or delete a user account, in the screenshot above choose the user you would like to change. Then you can change the account name, password, account type, or delete the account.
Step 1: Right-click This PC and select Manage to open Computer Management.
Step 2: Expand System Tools > Local Users and Groups. Then right-click the Users folder and select New User to add a new user for Windows 10.
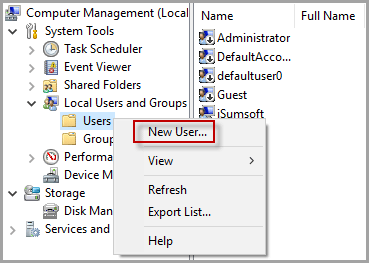
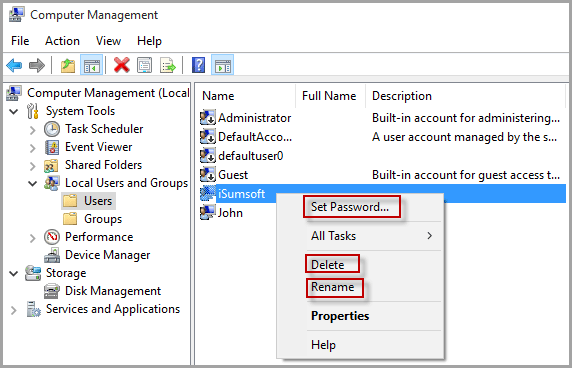
Expand the Users folder, right-click the user and you can set password, delete, or rename the user account.
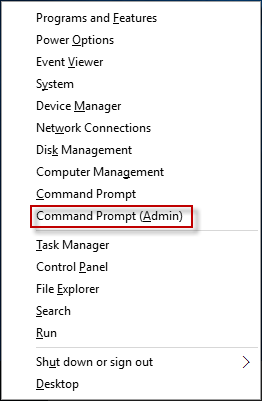
Step 1: Press Win + X to bring Power User Start Menu. Select Command Prompt (Admin) and then confirm the User Account Control dialog if prompted.
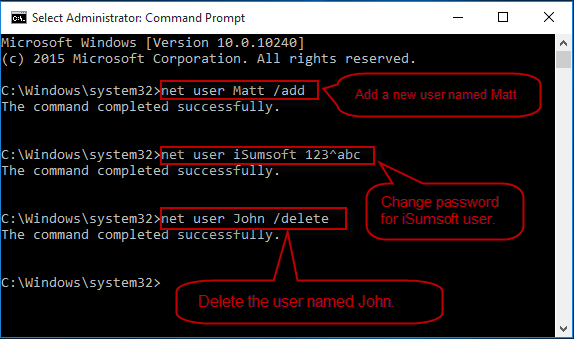
Step 2: Then it can open Command Prompt as administrator. You can type net user username /add and press Enter to add a new user account for Windows 10, type net user username password to change password for the user account, or type net user username /delete to delete the user account from Windows 10.
Tips: If you are not sure the names of the user accounts on your Windows 10, just type net user and press Enter so that it will display all user accounts.
You may be unable to sign in your Windows 10 for some cases, such as forgetting password. In this case, you can add new user accounts and modify password for your user accounts with the help of the third-party program Windows Password Refixer.
1. On anyone accessible computer, download and install Windows Password Refixer.
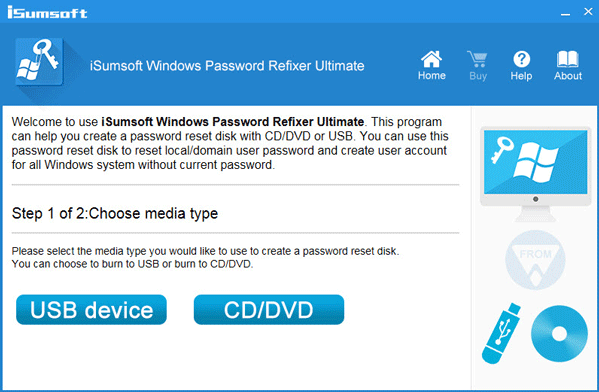
2. Launch this tool and follow its guide to burn it into a USB flash drive or CD/DVD drive to create a bootable USB/CD drive.
1. Connect the Windows Password Refixer boot USB/CD drive into your Windows 10 computer.
2. Start/restart computer and access BIOS (UEFI) on Windows 10 computer to change its boot order and make USB device or CD-ROM the first boot option to boot your computer from USB drive or CD.
Once computer boots up, you can get Windows Password Refixer screen, on which you can add new user accounts or modify password for anyone user account on your Windows 10.
1. Add User: Select Windows 10 running on the computer, and then click Add User. In the dialog, type a user name and a password (optional) and then click OK.
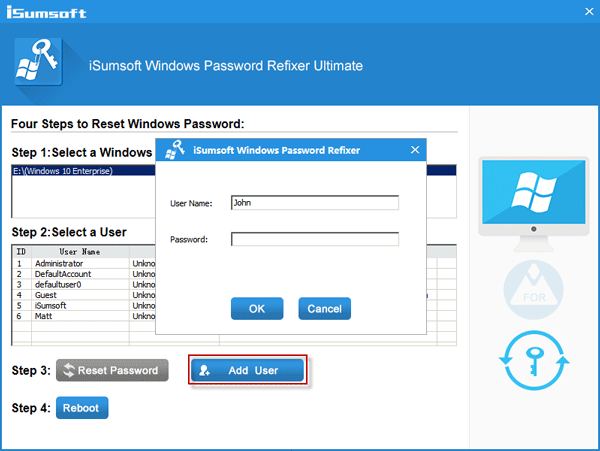
Then you will see the new user is added and it's an administrator account.
2. Modify password for user: Select Windows 10 and the password forgotten user account, then click Reset Password.
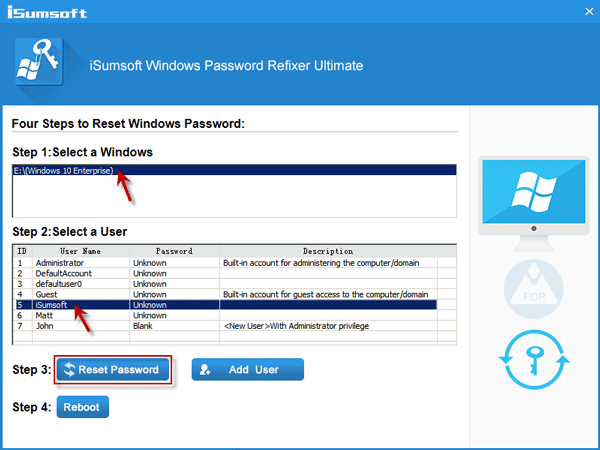
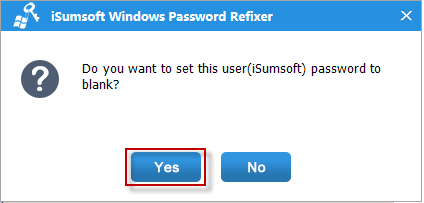
Set the user password to blank when asked. Then password will be set to blank.
3. When new user is added or password is modified, click Reboot button and disconnect the boot USB/CD.
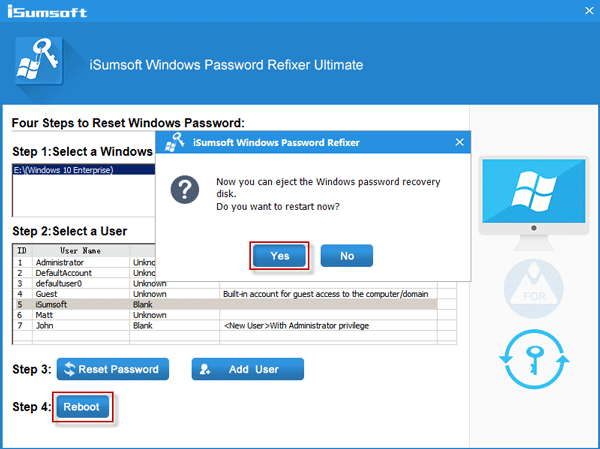
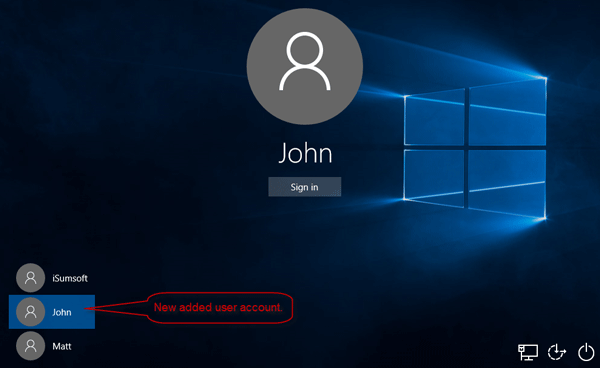
Then the computer will restart normally, and the new added user account will display on Windows 10 sign-in screen. And you can sign in the user whose password you modified without password.
