After you open Command Prompt in Windows 10, the window immediately exits when you press any key. You open CMD again wanting to see the cause and find "The command prompt has been disabled by your administrator" showing on the screen.
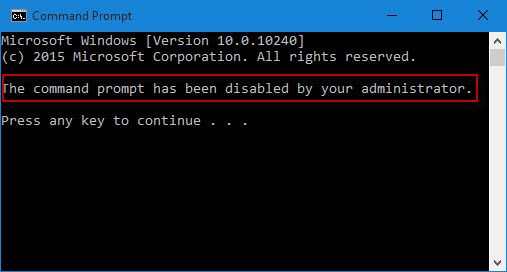
Then what should be done to fix the problem so that you can open and use CMD normally? Now, this post will show you three options to re-enable Command Prompt disabled by the administrator in Windows 10. The methods also work on other Windows versions.
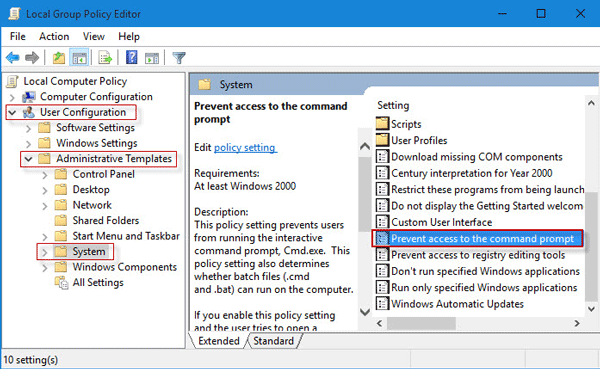
Step 1: In the Windows 10 Start menu, type gpedit.msc. Then click gpedit in the program list to open Local Group Policy Editor.
Step 2: Navigate to User Configuration > Administrative Templates > System. Click on the System entry, then on the right-side pane, double-click on Prevent access to the command prompt.
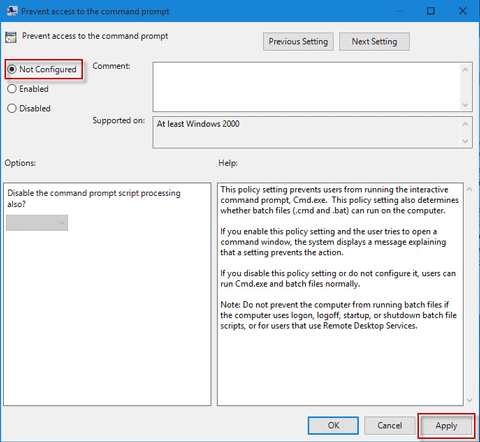
Step 3: Check Not Configured or Disabled, and then click Apply and OK. Then you can open and use Command Prompt normally.
Tips: You will need to edit Registry. It's a good idea to firstly backup your Windows 10 registry if you fear to make a mistake.
Step 1: Press Win + R keys to bring out the Run dialog. Type regedit and click OK to open Registry Editor.
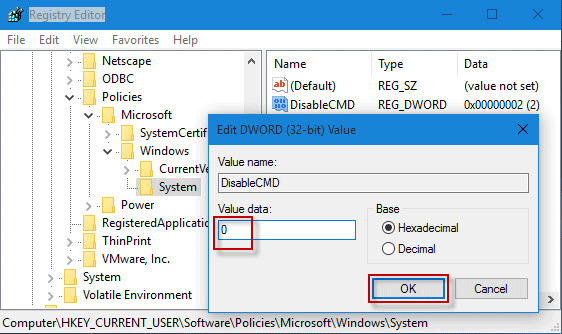
Step 2: Navigate to HKEY_CURRENT_USER\Software\Policies\Microsoft\Windows\System. Click on the System entry, and then on the right-side pane, double-click on the DisableCMD key.
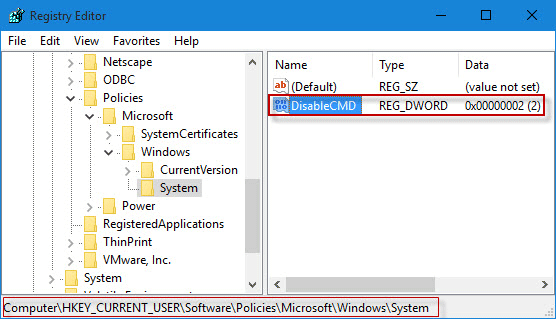
Tips: If you can't find the System key under Windows, you need to create a new key and name it System. If you can't find the DisableCMD key, create a new DWORD value and name it DisableCMD.
Step 3: Set the value data to 0 and click OK. Then you can open and use Command Prompt normally.
Tips: This way only works when you've signed into Windows 10 as the built-in administrator.
Step 1: Press Win + R to bring out the Run dialog. Then type REG add HKCU\Software\Policies\Microsoft\Windows\System /v DisableCMD /t REG_DWORD /d 0 /f in the box and then click OK.
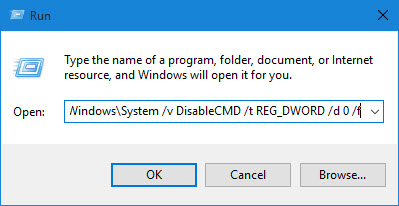
Step 2: When you see a command prompt window flash by, the disabled Command Prompt is re-enabled successfully and you can use it to work normally.