Nowadays, taking photos as a way to keep memory, has become a part of our life. However, with more and more photos hogging our phone storage, where to keep our photos may be a problem troubling us a lot. To avoid photos lost as well as free up phone space, we have to migrate our phone photos to computer. Sometimes, in terms of the running speed of computer, you may prefer save your iPhone photos to USB device instead of your PC. So, how to transfer photos from iPhone to USB drive? Here comes 5 ways for you.
As a versatile software to back up and restore, iSumsoft BackupTo can help you back up your files such as photos, music, videos with following advantages.
In addition, with a simple and intuitive interface, iSumsoft BackupTo can help you transfer your photos from iPhone to USB drive directly and rapidly. So, how to transfer Photos from iPhone to USB drive with iSumsoft BackupTo? Here comes the steps.
Step 1. Download and install iSumsoft BackupTo on your PC first. When you launch iSumsoft BackupTo, you will be guided to connect your iPhone to PC. To transfer your iPhone photo to USB drive, you need to connect your iPhone as well as your USB drive to your PC first.
DownloadStep 2. Click on "Back Up" > Choose "Classified backup" > select "Picture". In this way, you are able to transfer your photos independently.
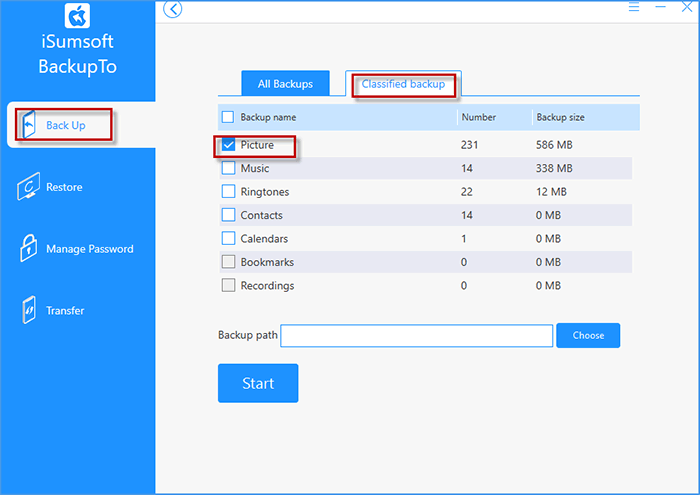
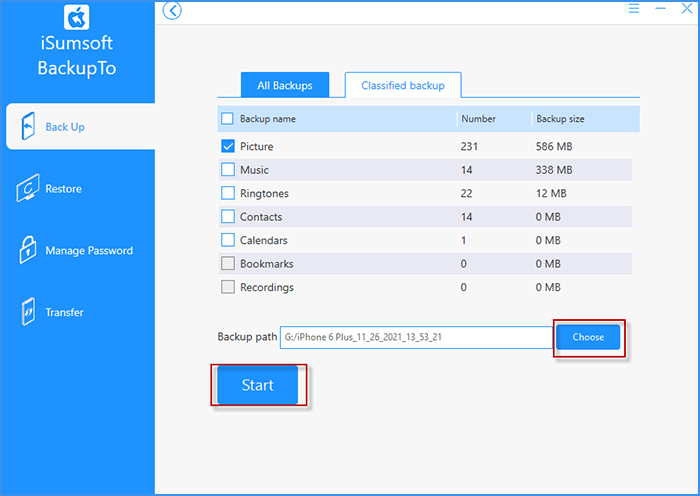
Step 3. Click on "Choose", you are able to preview and set your USB drive as backup path. After confirm the backup location, click on "Start" to begin your backup. When "Finished" appears on the interface, you will successfully transfer your photos from iPhone to USB drive.
Windows Files Explorer on PC supports to transfer your photos from phone to USB drive. When you connect your device and USB drive to PC, your iPhone icon and USB drive icon will both appear on the Windows Files Explorer. In this way, you can easily copy your Camera Roll photos from your phone to USB drive.
Step 1. To begin with, you need to unlock your device. Then connect your device and USB drive to PC and tap "Trust" on your device to gain access to computer. Sometimes you may find iPhone icon is missing because your iPhone is not recognized by your PC. Try to fix iPhone not showing on your windows files explorer here.
Step 2. Go to This PC/ This computer > Double-click the iPhone icon > Click on Internal Storage > Enter DCIM folder
![]()
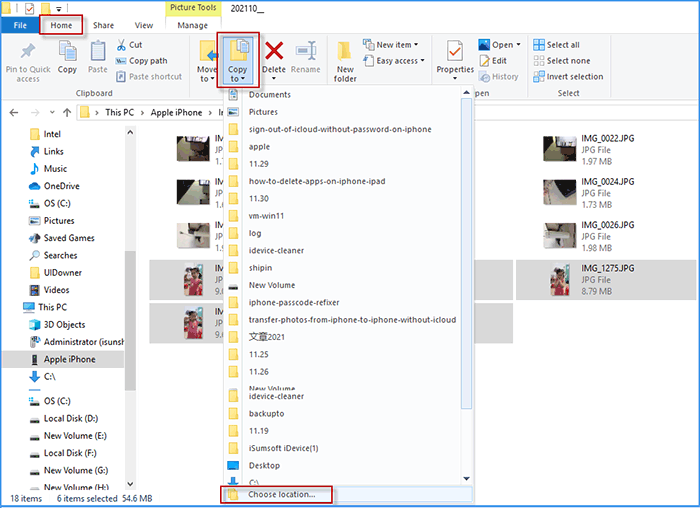
Step 3. Select photos first (press Ctrl+A button on the keyboard to choose all photos & press Ctrl button and right-click the photos in the same time to choose one by one). After selection, click "Home" on the left top and you can find "Copy to". Expand "Copy to" and you can click the final one"Choose location" and set USB drive as your location.
If you are a Mac user, you can also use Image Capture app on Mac to transfer your Camera Roll photos to USB drive. Before transferring your photos, please ensure the latest version of iTunes has been installed on your Mac, which enables Mac to recognize your device. Then connect your device to Mac and let your Mac trust the device.
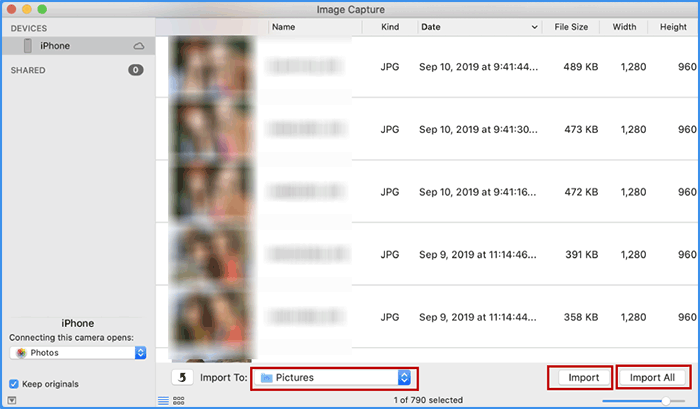
Step 1. Enter Image Capture app on Mac, you should select your device in the Devices or Shared list and you will view the photos in your phone. You can select the photos you want to transfer and click on "import". If you would like to transfer all photos, just click on "Import all".
Step 2. At the bottom, click on Import To pop-up menu to choose a location for imported photos such as "Pictures" and you can start to import photos. After imported, you can enter Finder(> Pictures >Photos Library)to find the imported photos. Then plug your USB drive into Mac and drag your photos to your USB drive from Pictures.
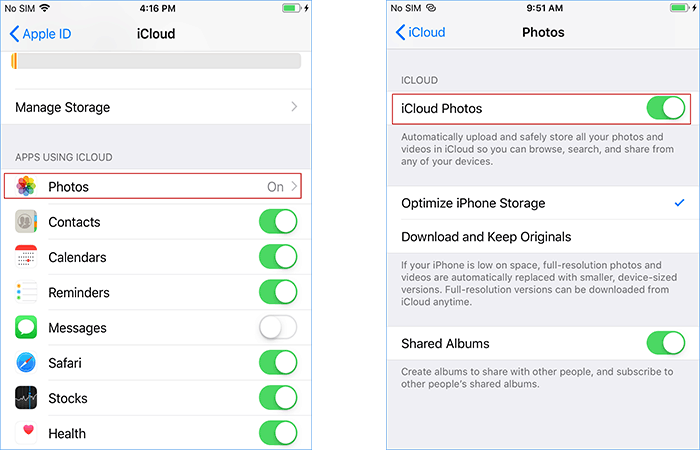
If you have sufficient iCloud space to save your photos and Wi-Fi in good condition to transfer photos, you can firstly sync your photos to your iCloud, and enter iCloud.com to download the photos to your USB drive. To begin with, please ensure your device is connected to Wi-Fi and turn on iCloud Backup on your device. Then you can move on following steps.
Step 1. Go to "settings" > Tap on your ID > Hit iCloud > Enter Photo option > Switch on iCloud Photo. Then your photos will be uploaded to iCloud automatically once you have your iPhone connected to Wi-Fi.
Step 2. Open a web browser on your PC and navigate to iCloud.com. To view your iCloud photos, you need to sign in to iCloud account with your Apple ID and password and click "Photos" icon. Inside iCloud Photos, You can press Ctrl to select the photos and click the "iCloud Download" button. Next, you are able to choose the download location on PC and click on "Save". After downloaded, you can launch USB drive and copy the photos to USB drive.

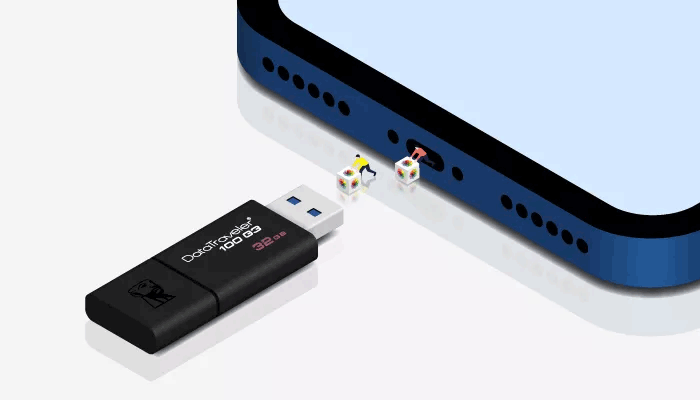
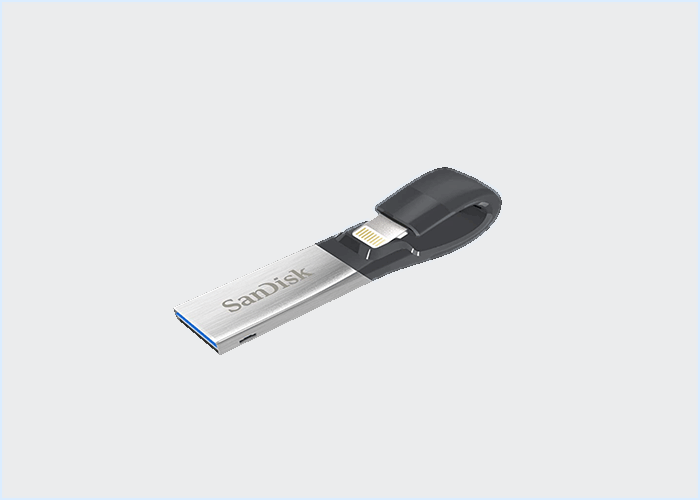
If you want to connect the flash drive to your iPhone, a flash drive with a lightning connector sold by Amazon may meet your needs. With such a portable external hard drive like SanDisk, you can simply connect it to your phone directly and move all of the photos, movies, and documents in your iPhone to the flash drive.
That's all 5 ways on how to transfer photos from iPhone to USB drive. Hope you can find a suitable one to transfer your photos from phone to USB drive successfully. In addition, any questions and suggestions will be appreciated. Thank you.