To create a bootable USB drive for installing Windows 10, the preferred method is of course using the Windows 10 Media Creation Tool. But what if the Media Creation Tool doesn't work for you, or you don't like using it? Don't worry, you can also create a Windows 10 bootable USB drive from an ISO image file without using the Media Creation Tool.
This article will show you how to create a Windows 10 bootable USB drive from ISO for installing Windows 10. Make sure you have downloaded a Windows 10 ISO file onto your computer, then follow the methods and steps below.

Rufus is an open-source application for easily creating bootable USB flash drives or Windows To Go live USB drives. Here is how to easily create a Windows 10 bootable USB flash drive from an ISO image using Rufus.
1. Plug a USB flash drive into your computer and back up the data on the USB drive (if any) to another place.
2. Download the Rufus program onto your computer, and then run it directly without installation.
3. On Rufus, set the following options to create a Windows 10 bootable USB flash drive.
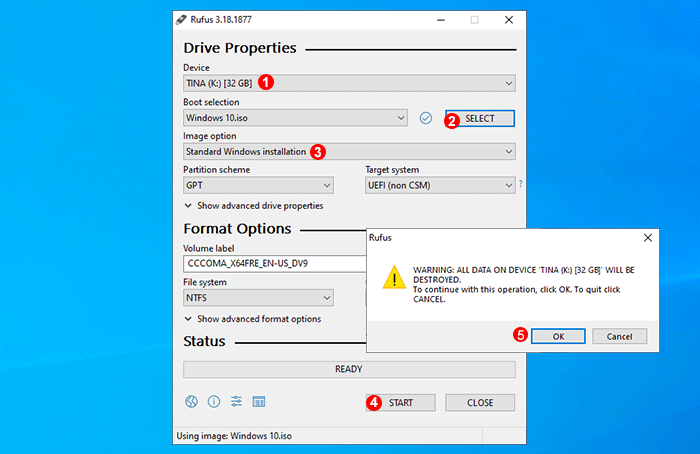
4. Just wait for the creation to complete. This usually takes 15 to 30 minutes.
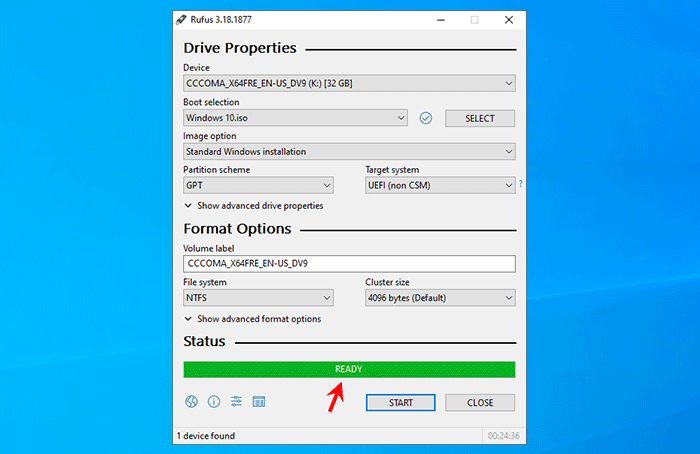
5. When the progress bar goes to 100% and displays Ready, it indicates that Rufus has successfully created a Windows 10 bootable USB drive from the iSO.
iSumsoft ShapeISO is another powerful and yet easy-to-use tool that can help you easily create a Windows 10 bootable USB drive from an ISO image file.
Step 1: Download and install iSumsoft ShapeISO on your PC. After installation, launch this tool.
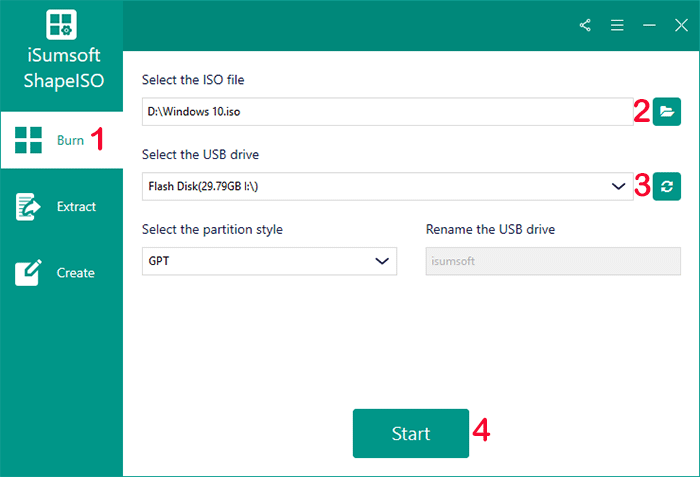
Step 2: Select the Burn option, click the file icon to import the Windows 10 ISO file, click the Refresh icon to show your connected USB drive, and then click the Start button. The tool will immediately start burning the Windows 10 ISO file to the USB drive to create a bootable Windows 10 USB drive.
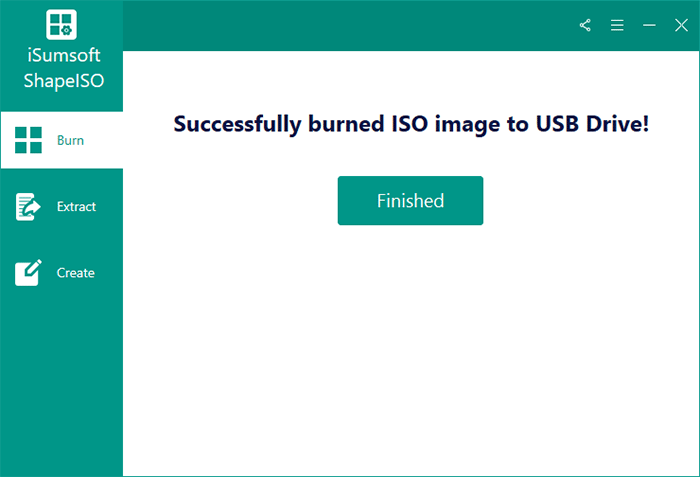
Step 3: Wait until the process is complete. When the software page shows that the ISO image has been successfully burned to the USB drive, the Windows 10 bootable USB is created.
If you want to create a Windows 10 bootable USB drive without using any software, the Windows Command Prompt can do it for you. Here is how to create a Windows 10 bootable USB flash drive from an ISO image using Command Prompt.
1. Connect the USB flash drive into your computer and back up the data on the USB drive (if any) to another place.
2. Type cmd in your Windows search box. When the Command Prompt app shortcut appears in the search results, click Run as administrator.
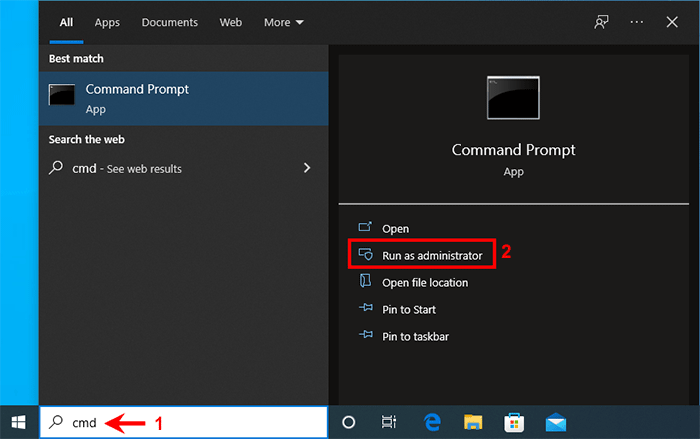
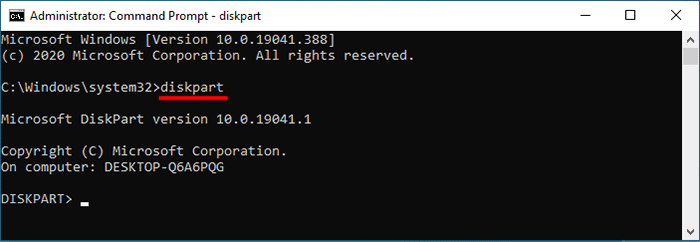
3. In the Command Prompt window, type diskpart and press Enter to access the diskpart tool.
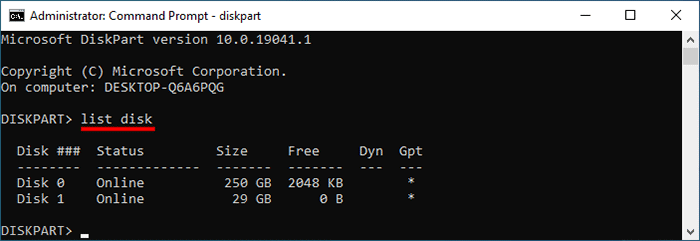
4. Type list disk and press Enter to list all disks connected to your computer. Then judge which is your USB flash drive according to the disk size.
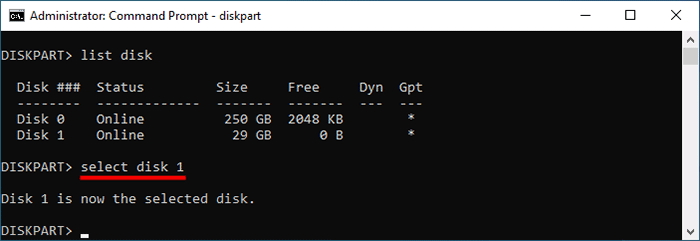
5. Type select disk # and press Enter to select your USB flash drive. "#" is the disk number of your USB flash drive.
6. Type clean and press Enter to erase all partitions as well as data on your USB flash drive.
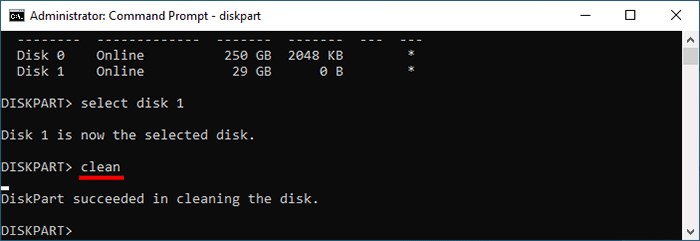
7. Type convert mbr and press Enter to convert the USB flash drive to MBR format.
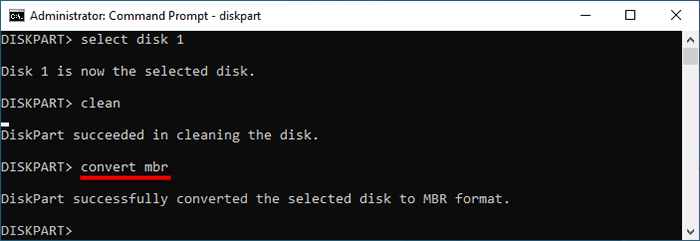
8. Type create partition primary and press Enter to create a primary partition on the USB flash drive.
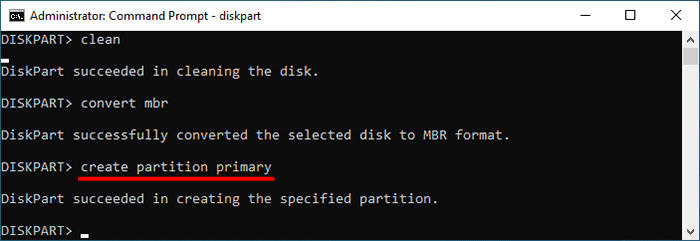
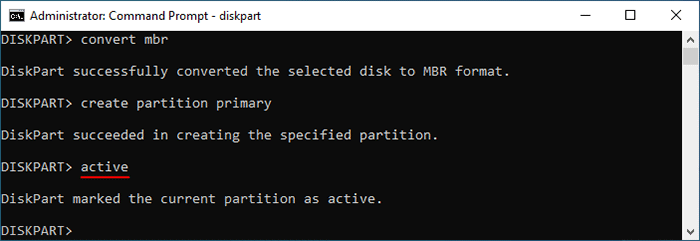
9. Type active and press Enter to active the primary partition on the USB flash drive.
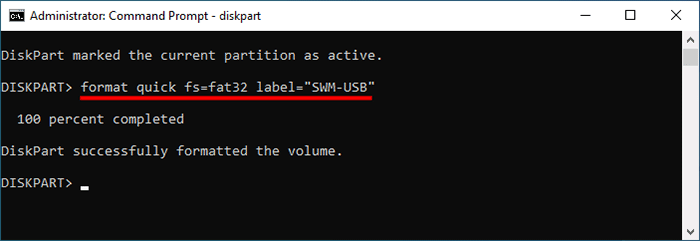
10. Type format quick fs=fat32 label="SWM-USB" and press Enter to quickly format the primary partition as FAT32 and set its volume label as SWM-USB.
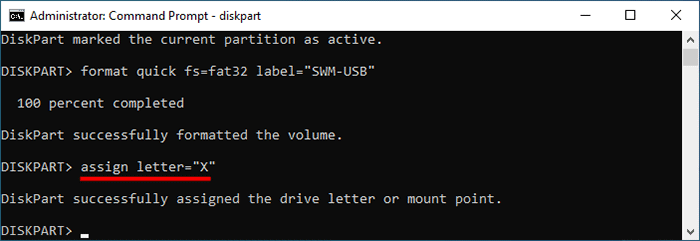
11. Type assign letter="X" and press Enter to set the drive letter of the partition to X.
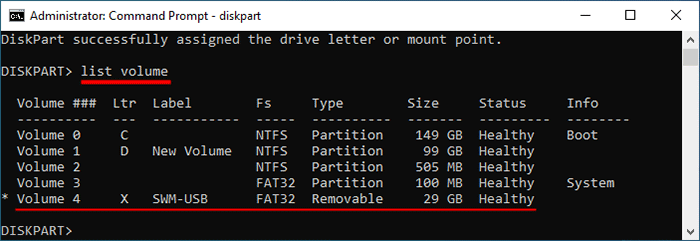
12. Type list volume and press Enter to list all volumes on your PC so that you can view the volume details of your USB drive.
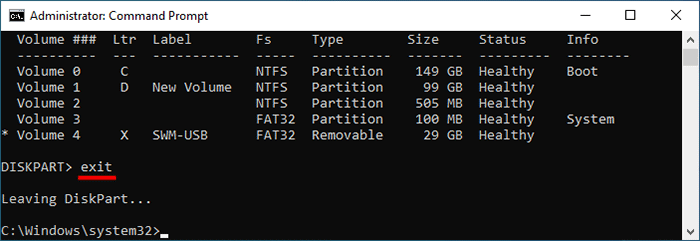
13. Type exit and press Enter to exit the diskpart tool, leave the Command Prompt window there or close it.
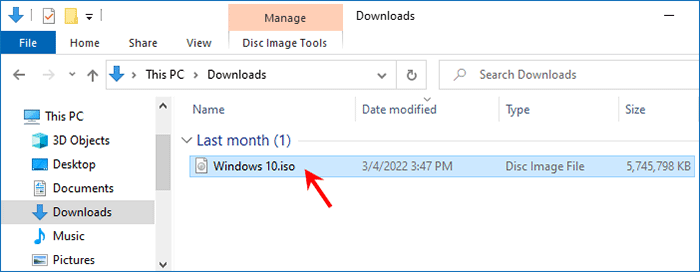
1. Locate the downloaded Windows 10 ISO file and double-click it to mount it to your computer.
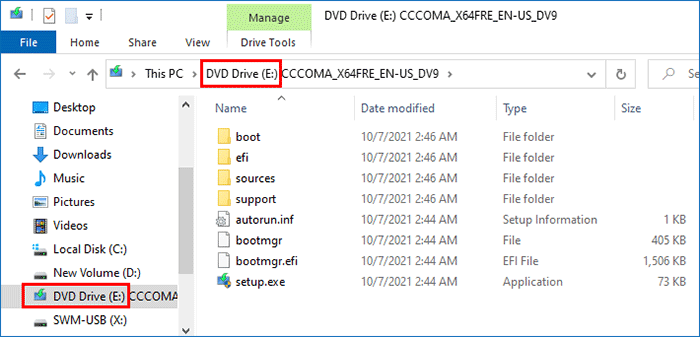
2. Windows will automatically assign a DVD drive letter for the mounted ISO image. Write down the DVD drive letter (E: in my case).
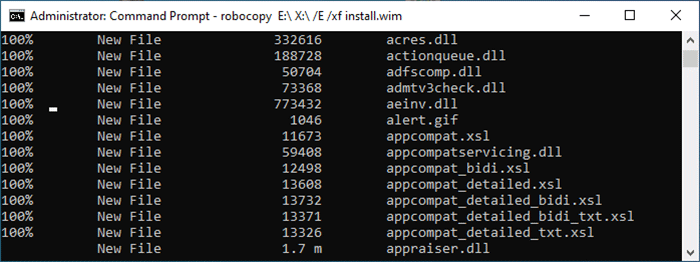
3. Go back to the previously Command Prompt window or open a new Command Prompt window as administrator. Then, type robocopy E:\ X:\ /E /xf install.wim and press Enter to copy all files except the install.wim file in the mounted Windows 10 ISO image to the root directory of the USB flash drive. Then, wait for the file copy to complete. This takes about three minutes.
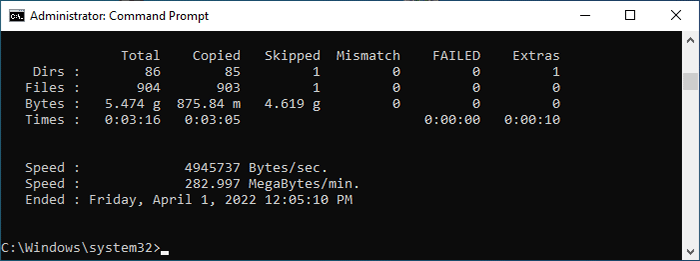
4. All files except the install.wim file in the ISO image have been successfully copied to the root directly of the USB flash drive.
5. In this step, you will copy the install.wim file from the ISO image to the USB flash drive. Since the install.wim file is larger than 4GB and the FAT32 formatted USB drive cannot store a single file over 4GB, you need to divide the install.wim file into two install.swm files and save them on the USB flash drive. To do that, type the following dism command and press Enter.
Dism /Split-Image /ImageFile:E:\sources\install.wim /SWMFile:X:\sources\install.swm /FileSize:2500
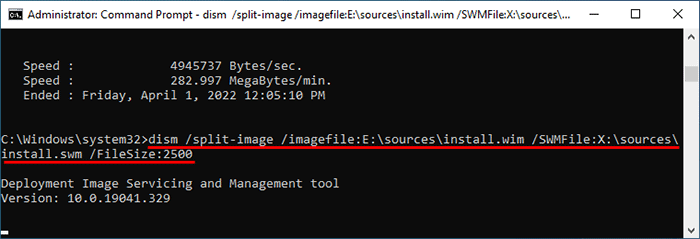
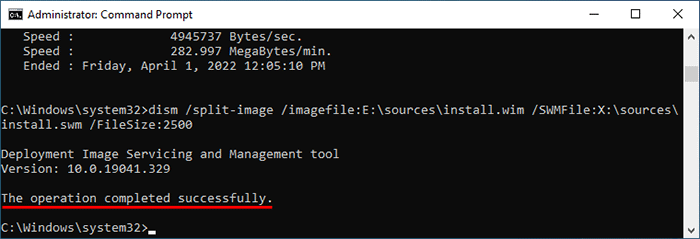
6. A few minutes later, the install.swm files are successfully split from the install.wim file and stored in the sources folder in the USB flash drive.
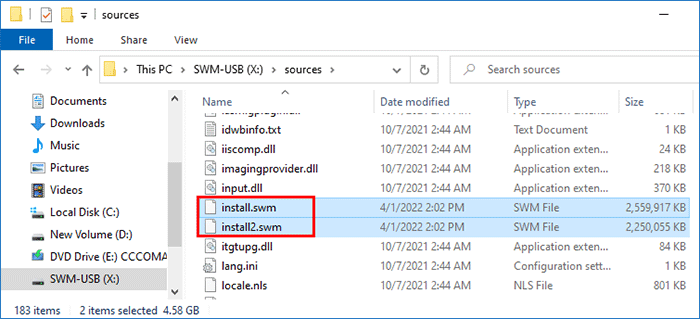
7. Now go to the USB flash drive, open the sources folder, and you will see two install.swm image files.
That's all the steps required to create a Windows 10 bootable USB flash drive from an ISO image using Command Prompt. Then, boot the computer from the USB flash drive and you can install Windows 10 on the computer.
The above how to create a Windows 10 bootable USB drive from an ISO image file for installing Windows 10. Both Rufus and iSumsoft ShapeISO are good options, they are safe, effective and easy to use. The Command Prompt allows you to successfully create a Windows 10 bootable USB drive from an ISO image without using any software, but the process is cumbersome. You need to make sure you run the correct commands to make the USB drive bootable. If you are not good at using Windows commands, Rufus or iSumsoft ShapeISO is still your best choice.
You may also be interested in How to Make External Hard Drive Bootable for Windows 10.