Recently, some iPhone users have reported that they had encountered an error prompt "Cannot Verify Server Identity" continuously after updating to iOS 18/17. It may be a challenging task to fix this error for the first time. Fortunately, this article will explore the methods to fix "Cannot Verify Server Identity".
Note:

Let's start with the reasons behind this pop-up message. When your iPhone displays the message "Cannot Verify Server Identity," it typically means that the Mail app or another network-related app is having trouble verifying the security certificate of the server it's trying to connect to. The following are some common reasons for it:
Expired or Invalid Certificate: The server's SSL certificate may have expired or is not configured correctly.
Untrusted Certificate Authority: The certificate might be issued by an authority that your iPhone doesn't recognize as trusted.
Server Configuration Issues: There might be misconfigurations on the server side.
Network Issues: Sometimes, network-related issues can cause this error, such as problems with your internet connection or interference from a firewall.
Incorrect Date & Time: If your iPhone's date and time settings are incorrect, it can cause issues with verifying certificates.
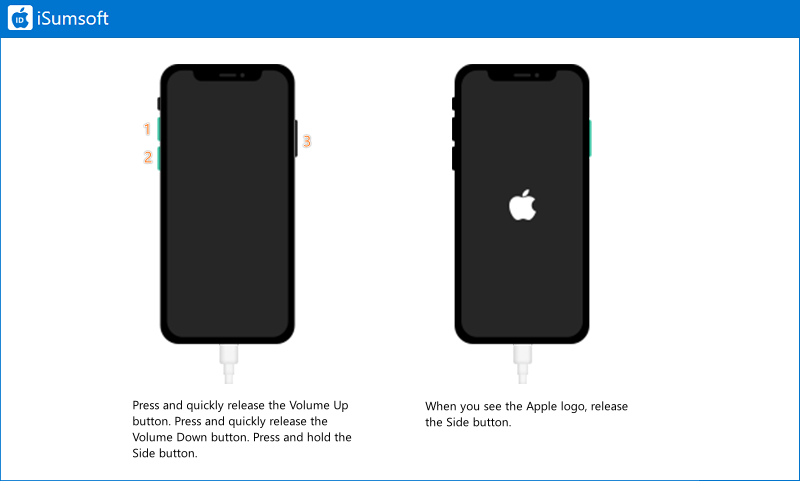
Before carrying out further measures, force restarting your iPhone or iPad may be an effective and straightforward method to resolve this issue. This process can help to clear any temporary glitches or software anomalies that might cause the problem so that you can refresh the system and potentially fix the error without delving into more complex troubleshooting steps.
Here is how to force restart iPhone:
For iPhone 8 and later:
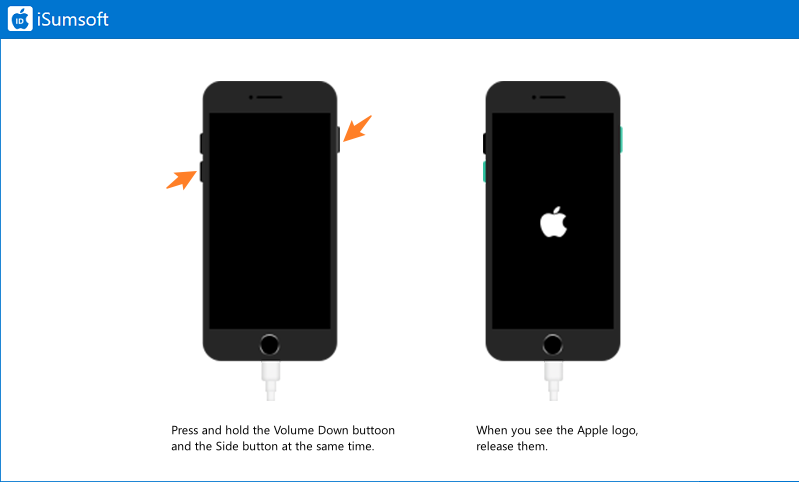
For iPhone 7 and iPhone 7 Plus:
Keep pressing the Volume Down button and the Side buttons simultaneously until the Apple logo appears.
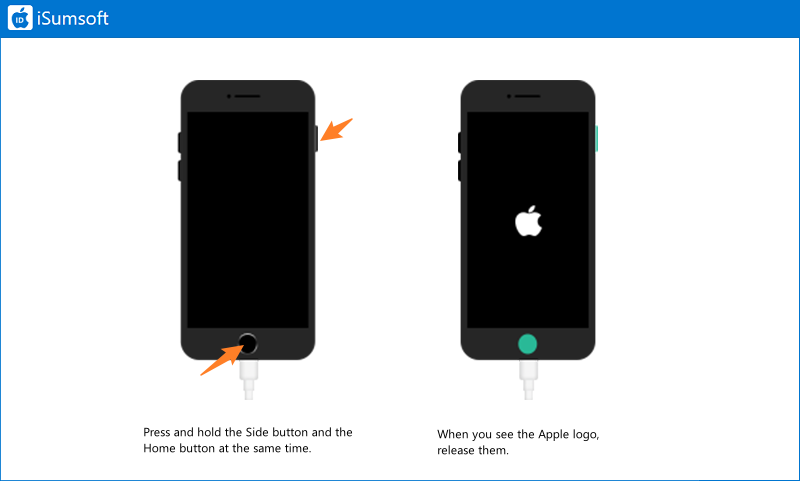
For iPhone 6 and earlier:
Hold the Home button and the Top buttons until you see the Apple logo.
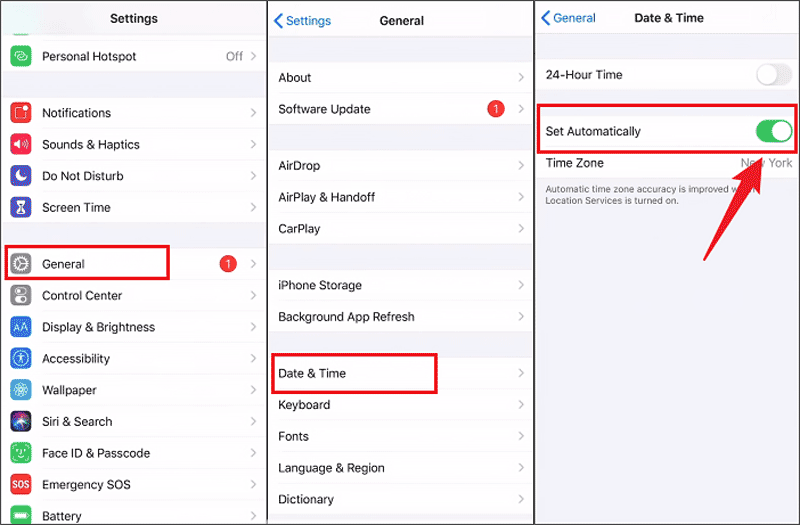
If your iPhone date and time are set to be incorrect, the error cannot verify server identity may happen.
Steps: Settings > General > Date & Time > Set the Set Automatically toggle to on.
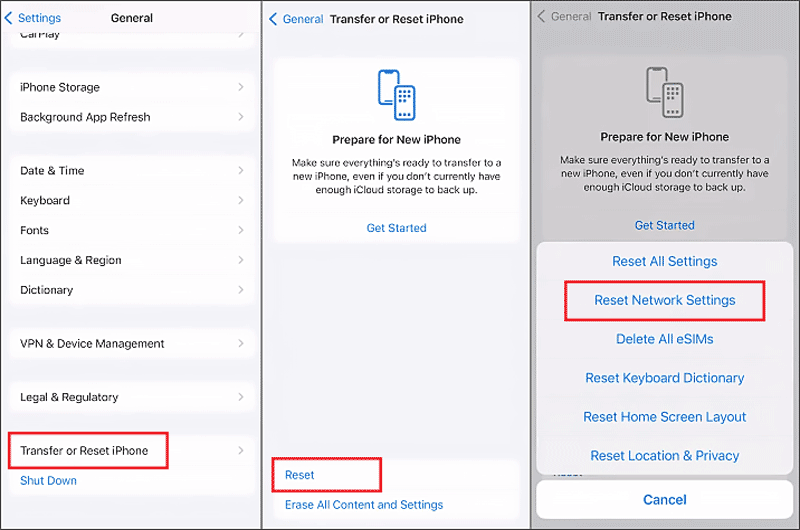
Network problems might be one of the causes to affect verifying iPhone server identity, you can try to reset the network settings.
Steps: Settings > General > Transfer or Reset iPhone > Reset > Reset Network Settings.
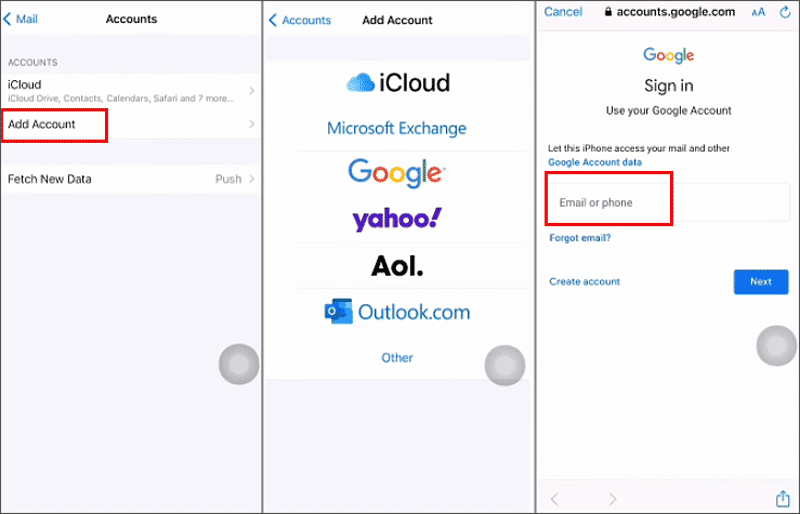
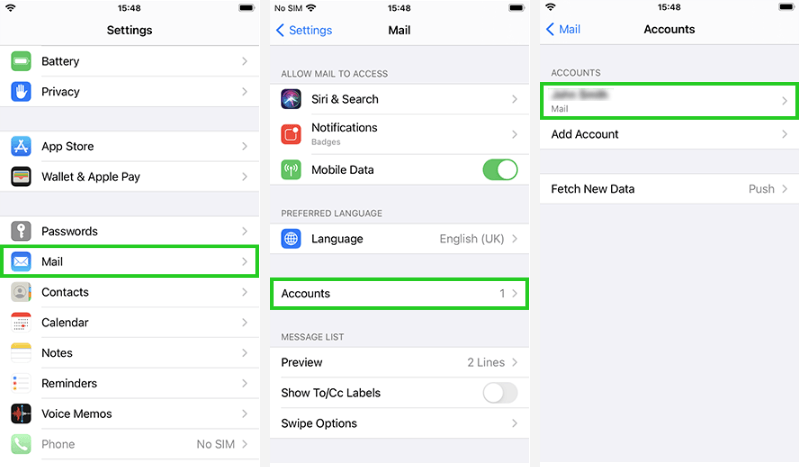
Step 1: Settings > Mail > Accounts > Gmail (or others) > Delete Account > Delete from My iPhone.

Step 2: Back to the Accounts page, and click "Add Account" to add your account deleted before. If you don’t remember the account and passcode, you’d better back up your iPhone.
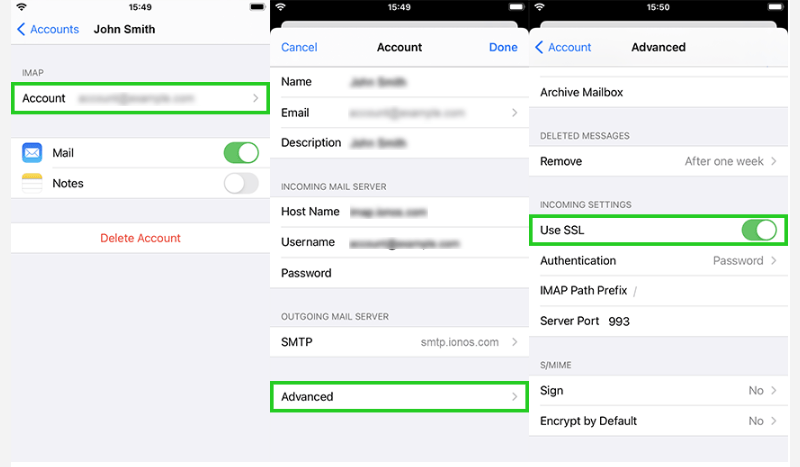
Disabling SSL can temporarily fix the "Cannot Verify Server Identity" issue by bypassing certificate verification but it is generally not recommended because it compromises the security of your email communications. It should only be used as a last resort and for a short duration while permanent solutions, such as updating the server's SSL certificate or resolving misconfigurations, are implemented.
Step 1: Tap Settings > Mail > Accounts and select the email account you're having trouble with.
Step 2: Tap Account > Advanced. Here, toggle off Use SSL.
iSumsoft iOS Refixer is a safe tool designed to repair various iOS problems. If the above methods are not working, you may try to perform a system repair using iSumsoft iOS Refixer.

Step 1: Free download and run the iSumsoft iOS Refixer. Then connect your iPhone and computer with a USB cable.
Step 2: Select System Repair.

Step 3: Click Standard Mode.
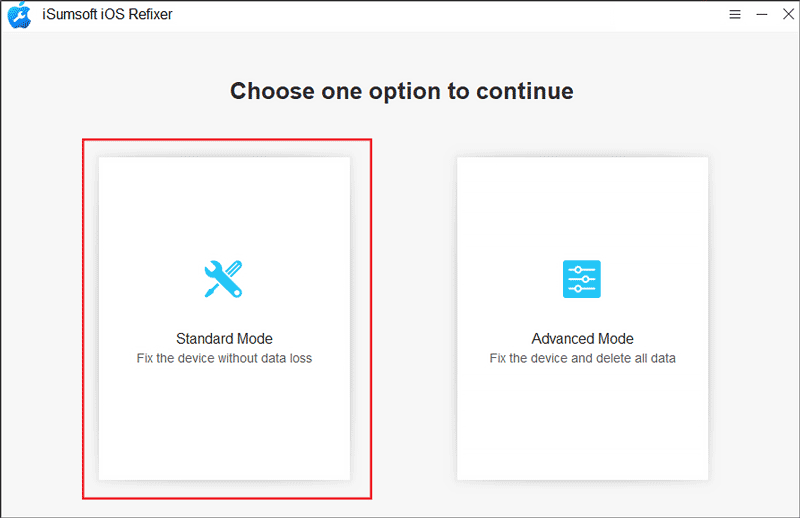
Step 4: Click Start.
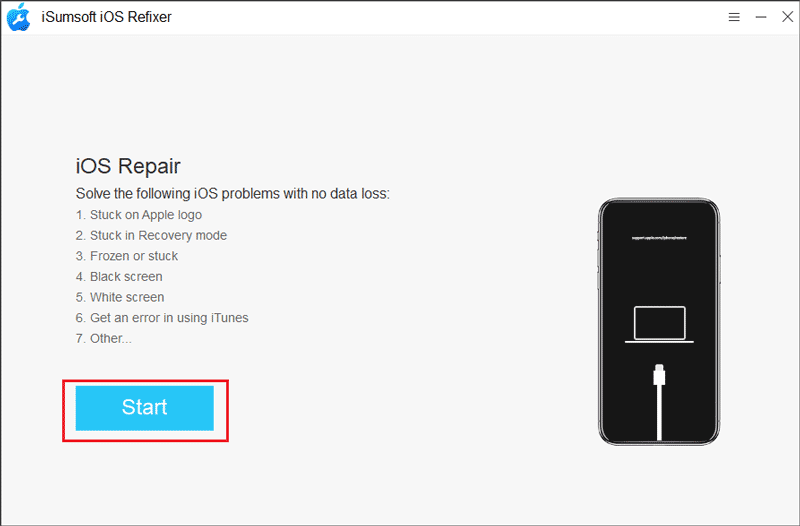
Step 5: Download the firmware package.
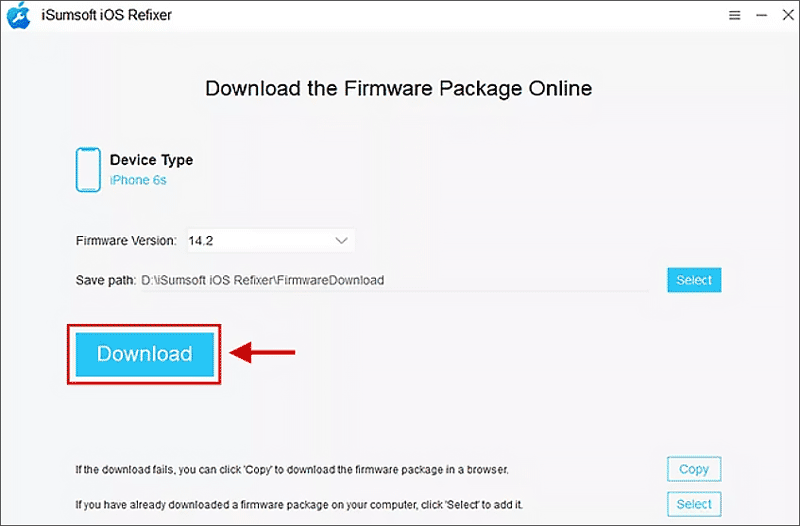
Step 6: Start "Repair" after the firmware package is downloaded.
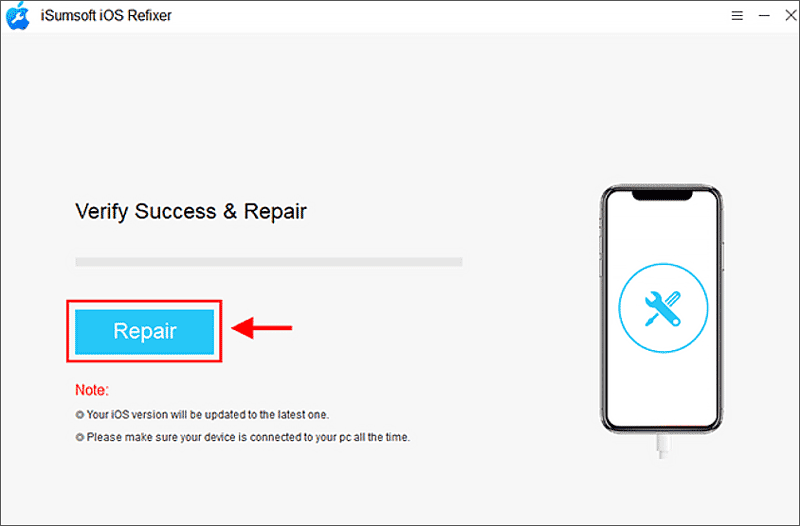
Step 7:When the Repair Successfully dialogue pops up, restart your iPhone to check if the error “Cannot Verify Server Identity” has been troubleshooted.

When encountering common iOS issues, you can first try to force restart your device as this simple step will solve the problem. However, for more complex issues that cannot be solved by force rebooting, such as persistent software bugs, system crashes, or problems that occur after an iOS update, you may need to seek additional help. In this case, iSumsoft iOS Refixer is a very useful tool.