If you have a Windows ISO file, you usually need to burn it to a USB drive to make it bootable. Some people think that burning is simply copying an ISO file to a USB drive. However, it's not that simple and you can't do it without a special ISO burning tool. This page shows you two simple and completely free ways to burn an ISO file a USB drive in Windows 10/11.

The Media Creation Tool is a utility provided by Microsoft that allows users to download the latest version of Windows and create installation media, such as a bootable USB drive or DVD, to install or reinstall the operating system. It's commonly used for performing clean installations of Windows 10 or 11, upgrading an existing system, or troubleshooting serious software issues.
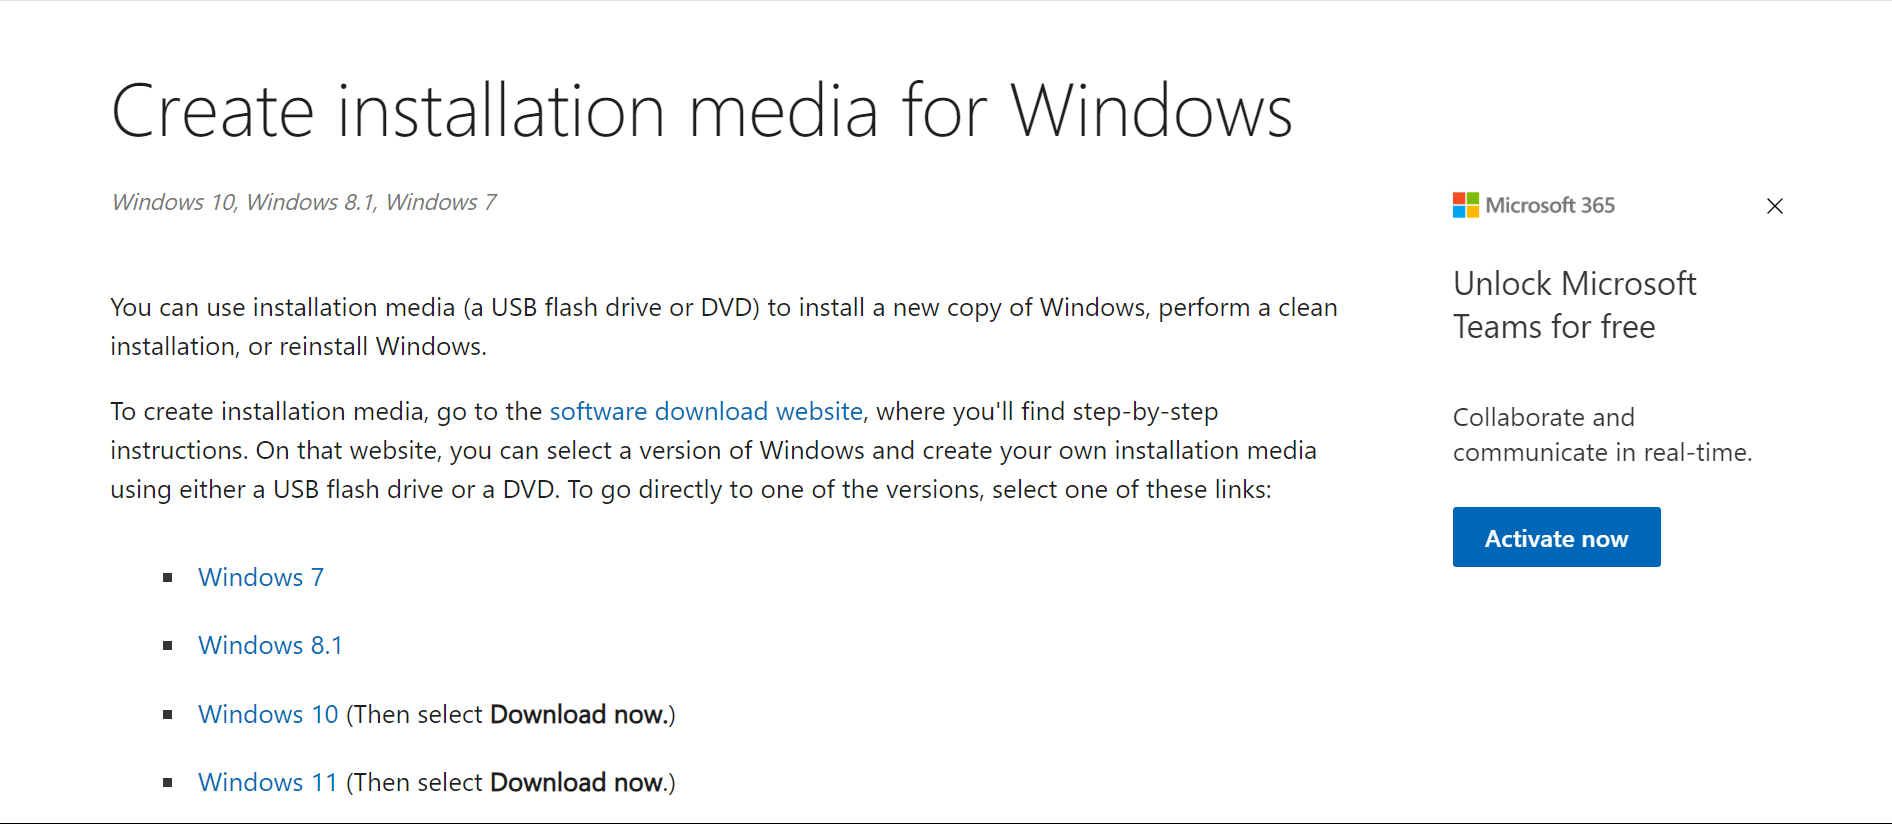
You can click here to visit the Media Creation Tool offical site. This tool simplifies the process by guiding users through downloading the OS, choosing the correct version, and setting up the bootable media without needing third-party software.
iSumsoft ShapeISO is a free and yet powerful ISO image processing tool that helps you easily burn an ISO file to a USB drive on Windows 11/10/8/7. Download and install iSumsoft ShapeISO on your Windows 10/11, and then follow these steps.
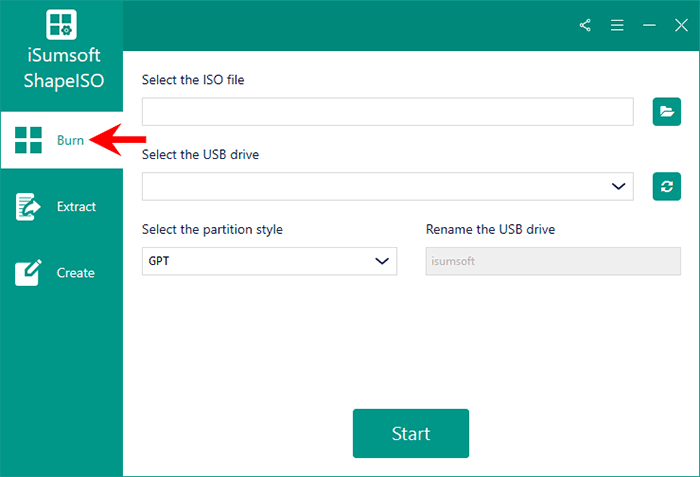
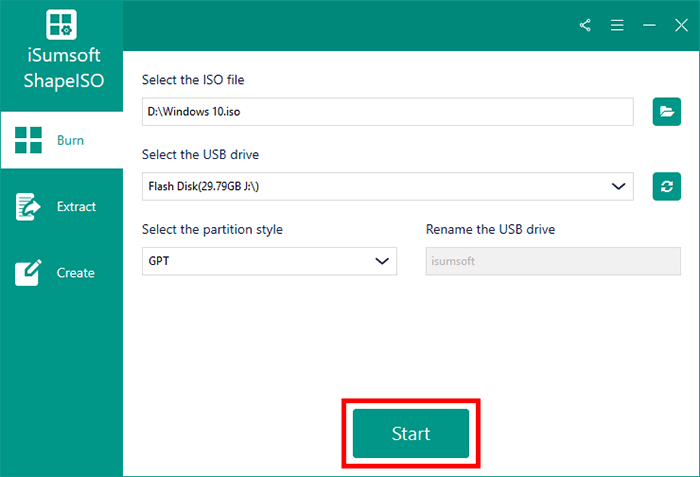
1. Open iSumsoft ShapeISO and select the Burn option on the left.
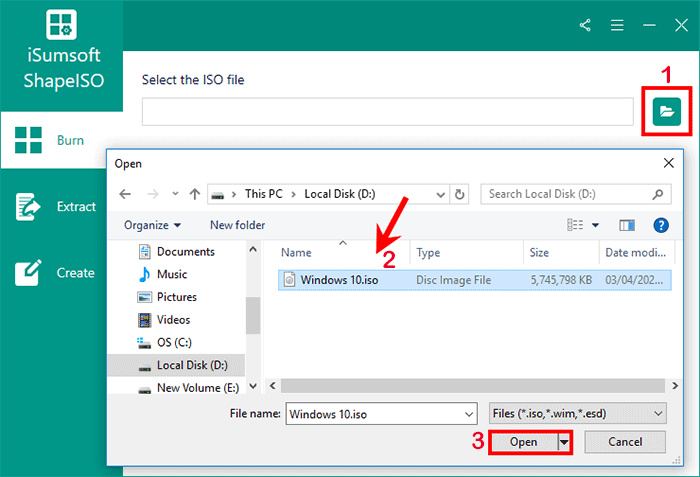
2. Click the file icon on the right, locate and select the ISO file, and then click Open. The ISO file is added to the software.
3. Make sure the USB drive you want to burn the ISO file to is inserted into the computer, then click the Refresh button to let the software detect the USB drive.
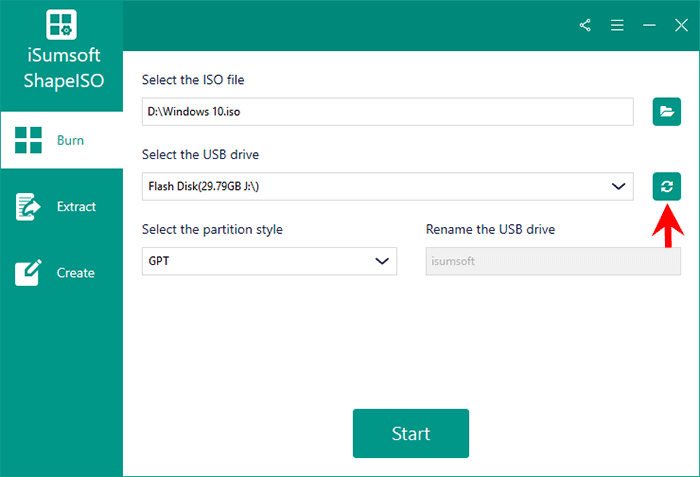
4. Select GPT as the partition style and then click the Start button. iSumsoft ShapeISO will immediately start burning the ISO file to the USB drive.
Note: When installing Windows on an MBR partition, the partition type must be set to MBR; when installing Windows on a GPT partition, the partition type must be set to GPT. Otherwise, you will not be able to select the partition during installation.
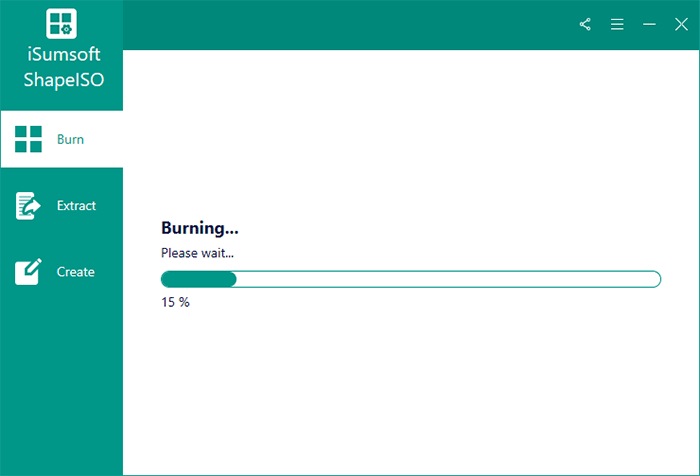
5. All that's left is to keep the USB drive connected and wait for the burning to complete.
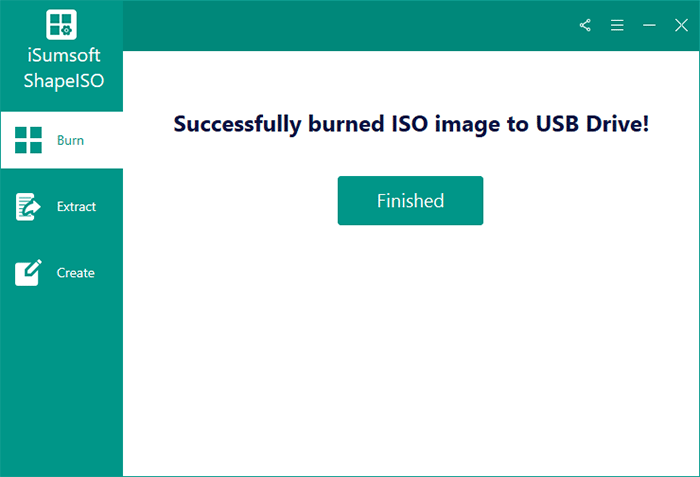
6. When you see "Successfully burned ISO image to USB Drive" on the software page, you are done.
Rufus is a another free and open-source tool that helps you easily burn an ISO file to a USB drive on Windows 10/11.
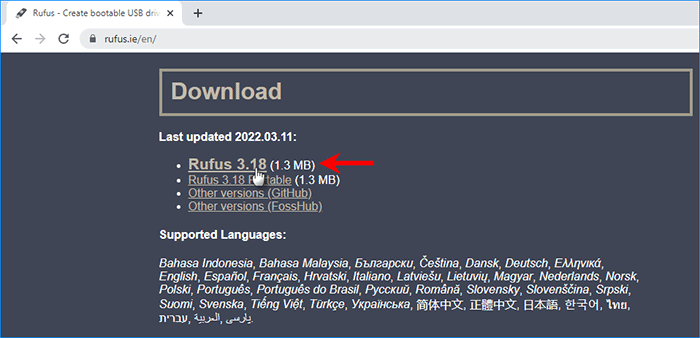
1. Download the Rufus tool from https://rufus.ie/en/, and then double-click the downloaded rufus.exe file to run this tool.
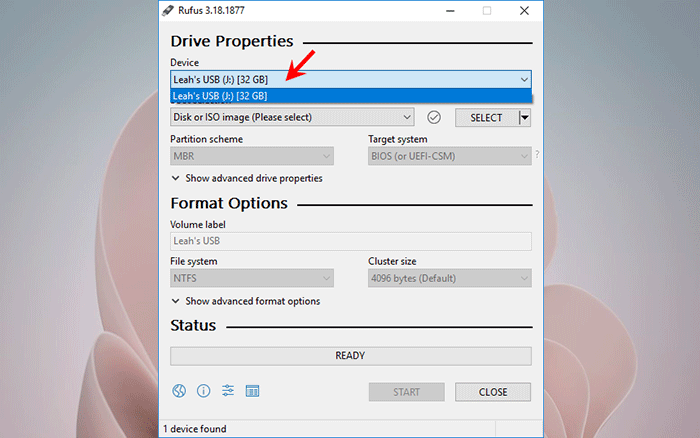
2. Rufus will automatically detect the USB drive inserted into the computer. Select the USB drive you want to burn the ISO file to from the Device drop-down menu.
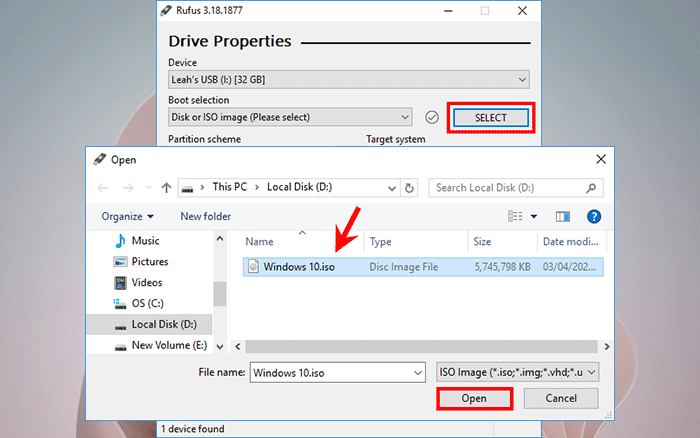
3. Click the SELECT button. In the Open dialog that pops up, locate and select the ISO file you want to burn to the USB drive, and then click Open. The ISO file will be added to Rufus and displayed under "Boot selection".
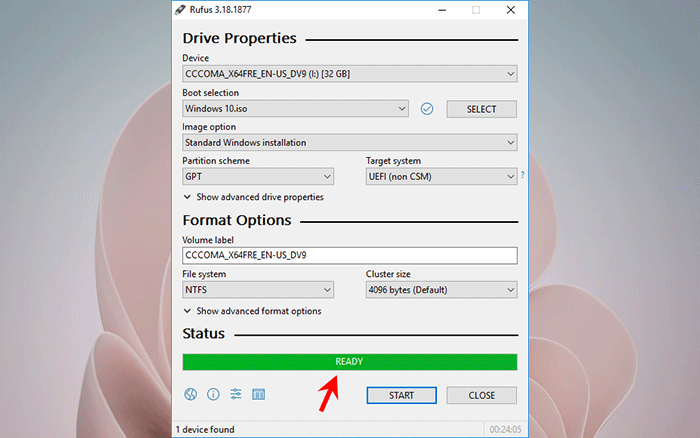
4. Leave the remaining options at their default values, and then click the START button at the bottom. Click OK in the Warning dialog that pops up and Rufus will start burning the ISO file to the USB drive.

5. Keep the USB drive plugged in and wait patiently until the burning is complete. This usually takes around 10 minutes, depending on the size of the ISO file.
6. When the Status bar shows Ready, it means the ISO file has been successfully burned to the USB drive. You can then close Rufus and unplug the USB drive.
Windows doesn't come with the ability to burn an ISO file to a USB drive, so you need to use a third-party tool like iSumsoft ShapeISO or Rufus. If the ISO file contains an operating system or bootable program, after burning it to the USB drive, you will be able to boot your computer from the USB drive.