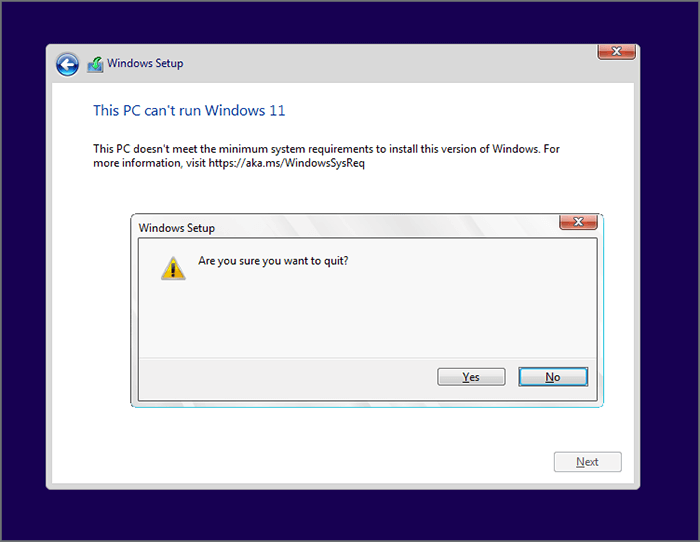
Installing Windows 11 on VMware Workstation enables users to enjoy the latest Windows features regardless of the hardware requirement for host PC. However, it is so depressing when you find "this PC can't run Windows 11" on VMware Workstation after booting from the ISO. Why does this happen and how to fix it? Here in this passage you will know the reason and get some easy ways to fix it.
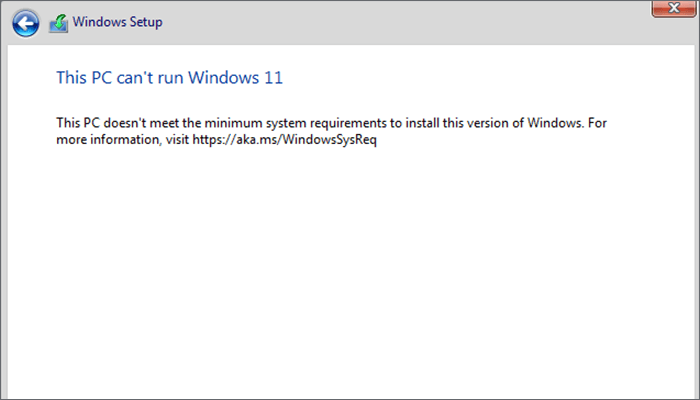
Actually, creating a Windows 11 VM also needs to meet some configuration requirements. During installation, your virtual machine will be automatically checked if it has 2 or more virtual processors, 4 GB or greater memory with enabled Secure Boot and virtual TPM. If it can't meet the requirement, your installation will be interrupted by the error "this PC can't run Windows 11" on VMware Workstation.
Option 1: Create Bypass Check files in Registry Editor
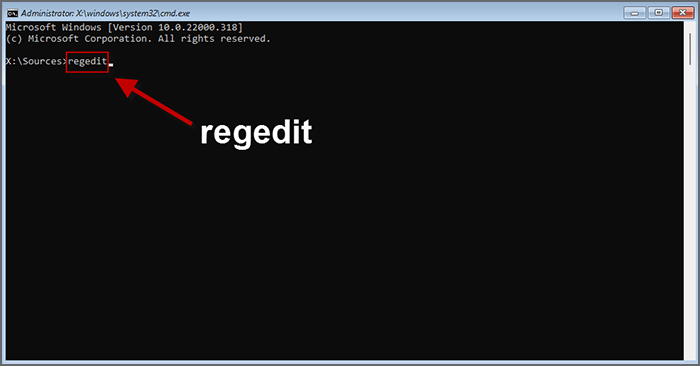
Step 1: Press Shift + F10 and type regedit after X:\Sources. Then hit Enter button on the keyboard.
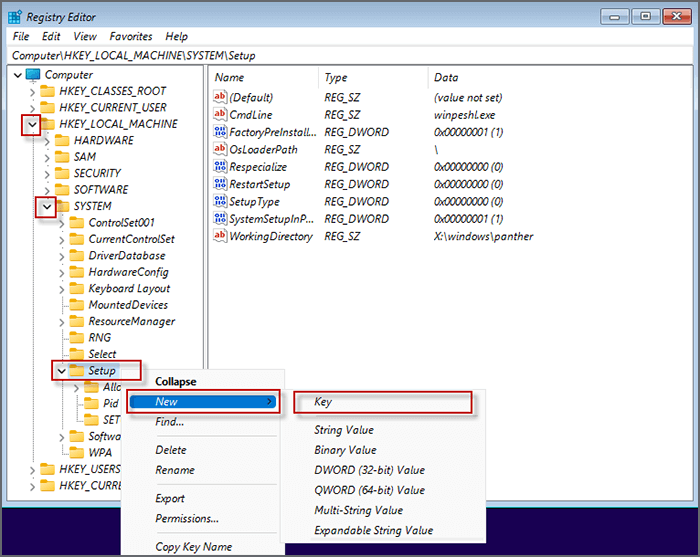
Step 2: Extend HKEY_LOCAL_MACHINE folder and SYSTEM folder. Right-click on Setup folder, and select New to create a new Key.
Step 3: Name the new key as LabConfig. Enter Labconfig folder and right-click on the blank to create a new DWORD(32-bit) Value.
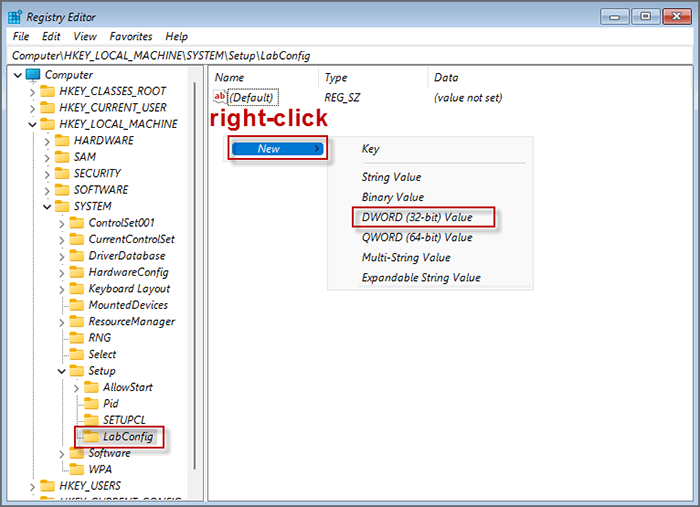
Step 4: Name the DWORD(32-bit) Value as BypassCPUCheck.
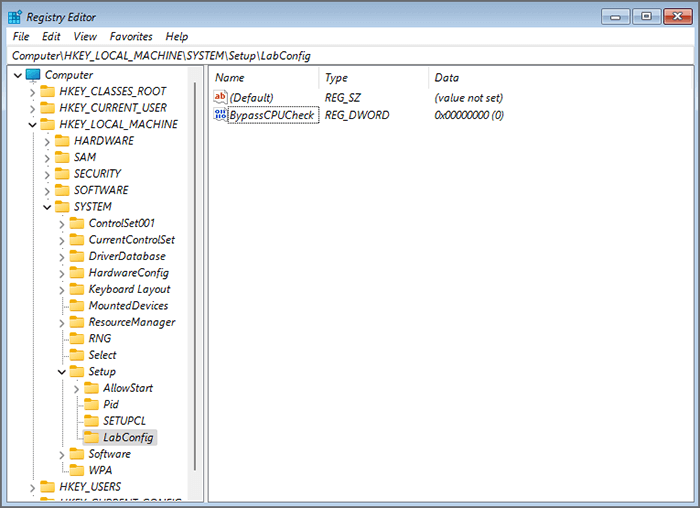
Step 5: Right-click on BypassCPUCheck and choose Modify.
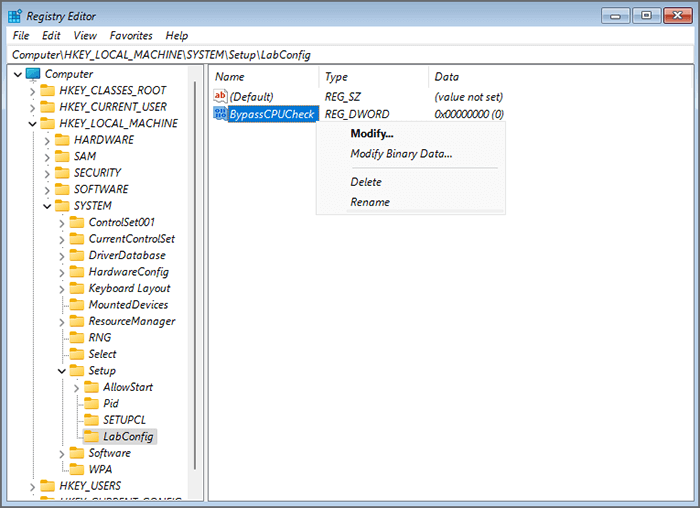
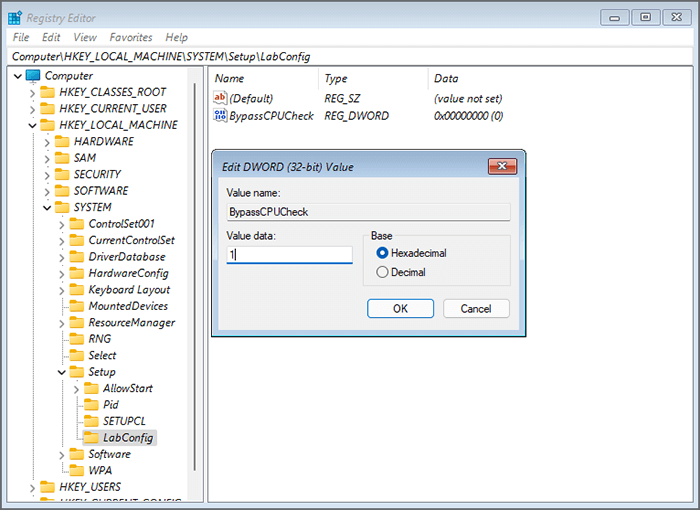
Step 6: Adjust the Value data of BypassCPUCheck to 1 and click on OK.
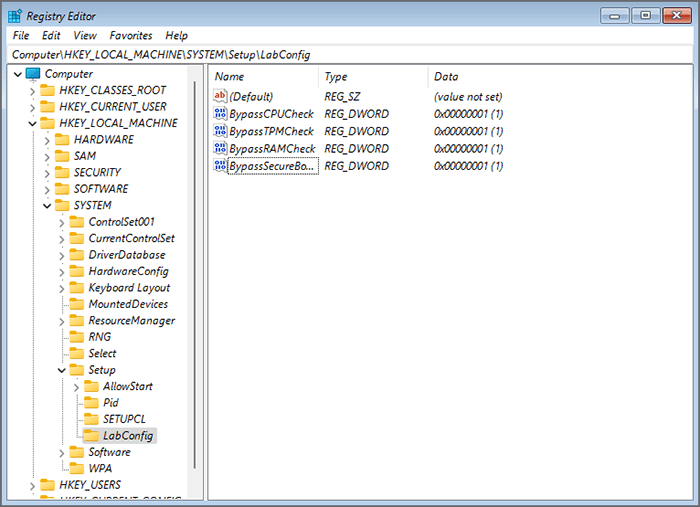
Step 7: Right-click on the blank and create another 3 new DWORD(32-bit) Value files one by one. Name them as BypassTPMCheck, BypassRAMCheck, BypassSecureBootCheck and adjust their Value data into 1 respectively. Then quit this Windows.
Step 8: Close the Windows Command Prompt to go on Windows Setup.
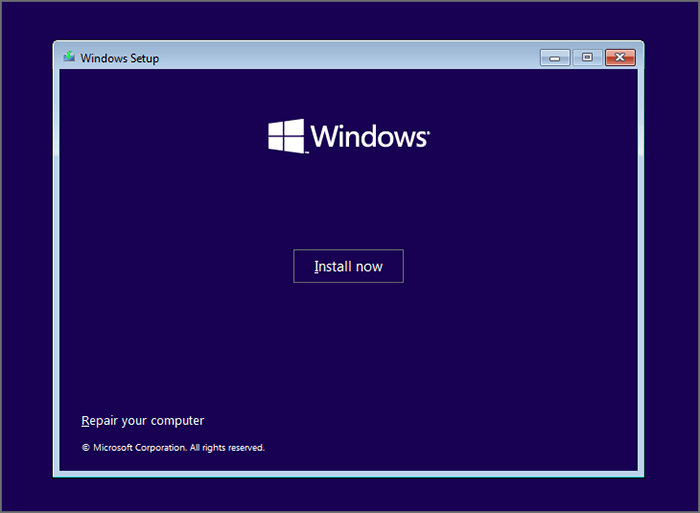
Step 9: Click Install now and you will successfully continue installing Windows 11 VMware without the error "this PC Can't Run Windows 11" on VMware.
Option 2: Enter Bypass Check Command in Command Prompt.
Ensure your virtual machine has 2 or more virtual processors and then fix "this PC can't run Windows 11" error on VMware Workstation as follow:
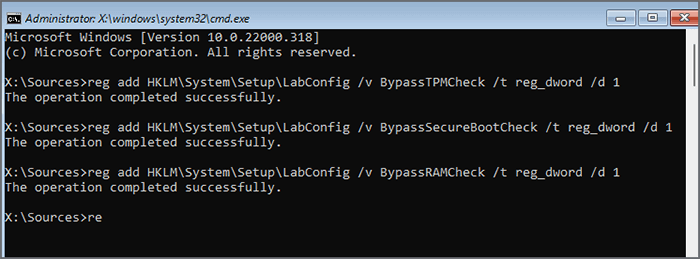
Press Shift + F10 and then enter the commands in the command Prompt as below.
Type reg add HKLM\System\Setup\LabConfig /v BypassTPMCheck /t reg_dword /d 1
Press Enter button.
Type reg add HKLM\System\Setup\LabConfig /v BypassSecureBootCheck /t reg_dword /d 1
Press Enter button.
Type reg add HKLM\System\Setup\LabConfig /v BypassRAMCheck /t reg_dword /d 1
Press Enter button.
Then you can close all the command Prompt and go ahead to install Windows 11 on VMware Workstation without error.
Trusted Platform Module (TPM) technology is designed to provide hardware-based, security-related functions. Some users have tried to add TPM on VM and successfully fix "this PC can't run Windows 11" error on VMware. You can try on this easy way by following the steps.
Step 1: Encrypt Virtual Machine
1. Click on Edit virtual machine settings.
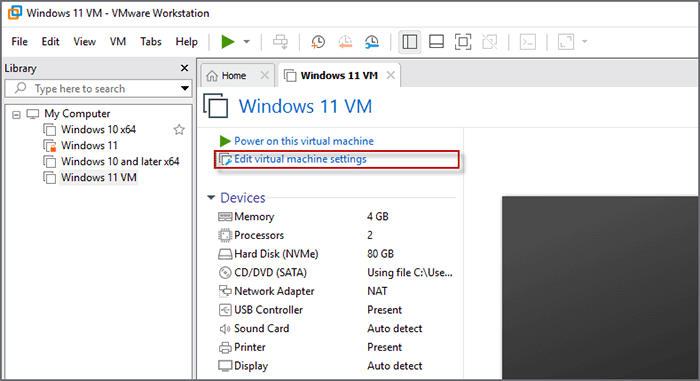
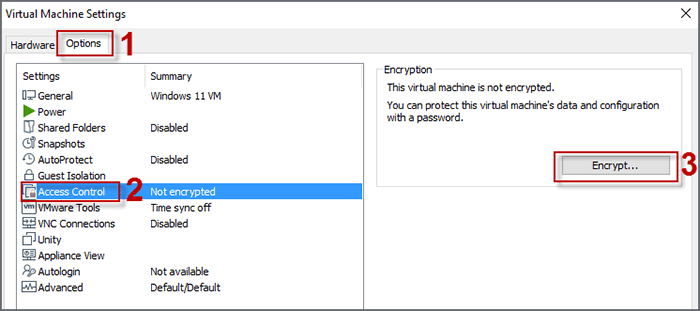
2. Choose Options on the top section, select Access Control and click on Encrypt.
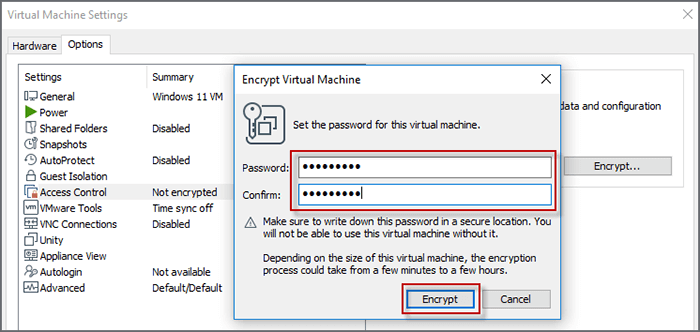
3. Enter and confirm your password and click Encrypt to finish VM Encryption.
Step 2 : Add Trusted Platform Module
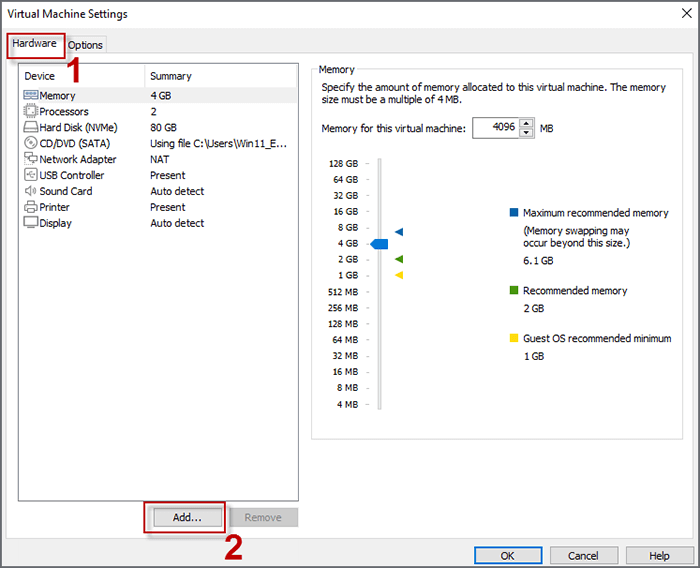
1. Choose Hardware on the upper left and click on Add at the bottom.
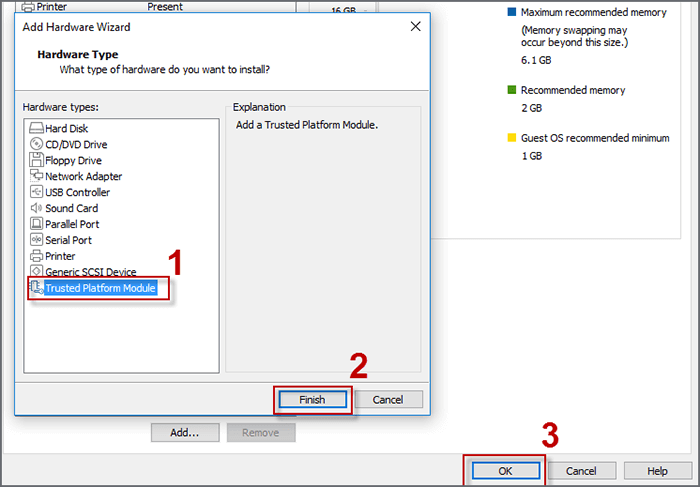
2. Select Trusted Platform Module and click on Finish. Then you can find created TPM in VM Hardware. Finally click OK to save the alteration. Then you can continue Windows Setup.
That's all about how to fix "this PC can't run Windows 11" on VMware Workstation. Hope the steps above can help you to fix the issue successfully. If you still can't install Windows 11 on a virtual machine, you can choose to install Windows 11 on USB instead of virtual machine. With a Windows 11 bootable USB, you are able to run a portable and clean windows 11 on PC whenever you need.