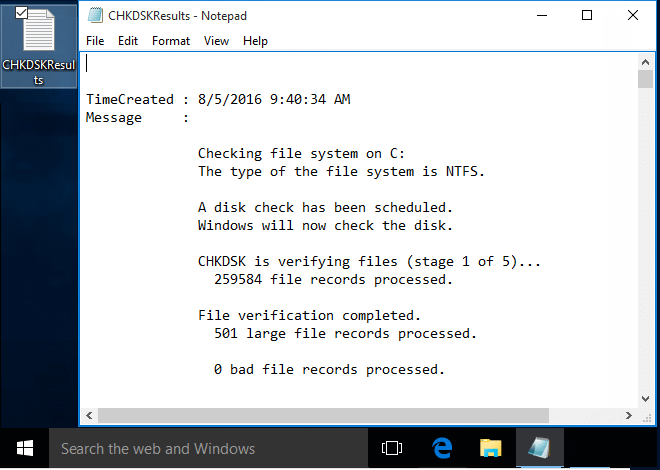
This post will show how to read the Event Viewer logs for Check Disk scan results in Windows 10.
Event Viewer is a Microsoft Management Console snap-in that allows you to browse and manage event logs. When you check a drive for errors, the detail results are stored as logs in Event Viewer, the steps below will show you how to read those logs.
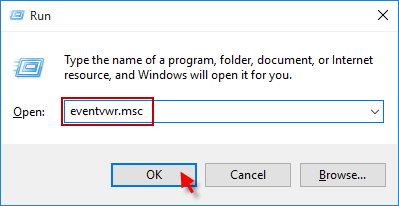
Step 1: Open Event Viewer.
Press Win + R keys, type eventvwr.msc and then click OK to open Event Viewer.
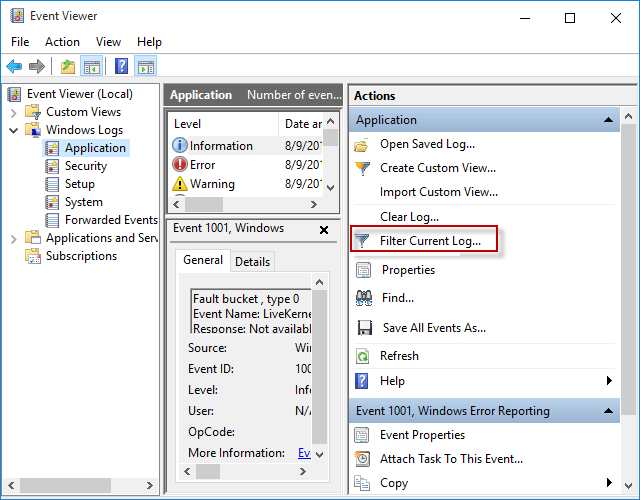
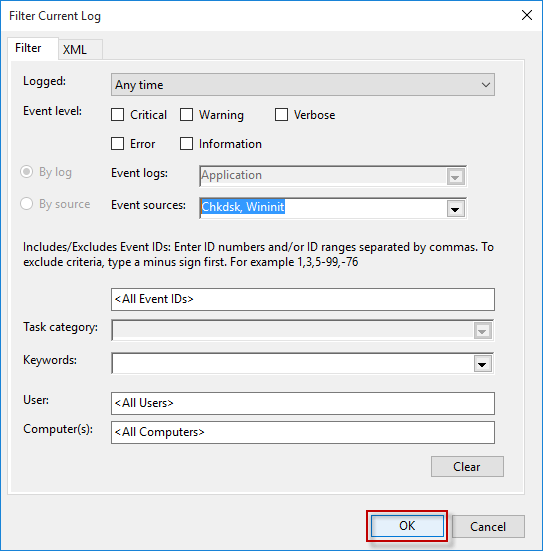
Step 2: Expand open Windows Logs > Application. Then move to the right pane, click on Filter Current Log.
Step 3: Check in Chkdsk and Wininit items in the Event sources from the drop-down menu.
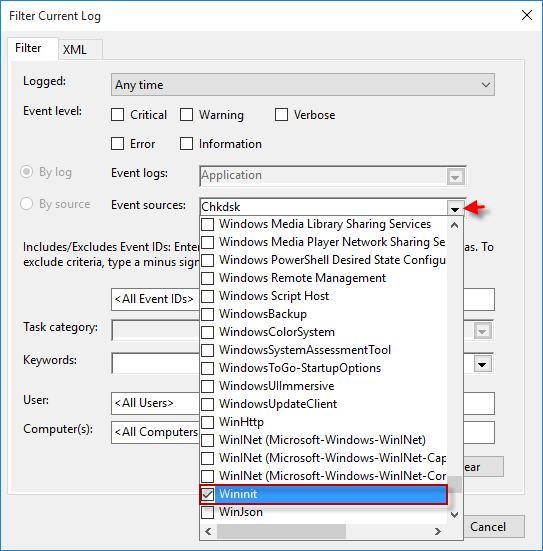
Step 4: Close the drop down sources by clicking on the blank area of Filter Current Log window, then click OK.
Step 5: You will now see all available event logs for Chkdsk listed in the middle pane of Event Viewer.
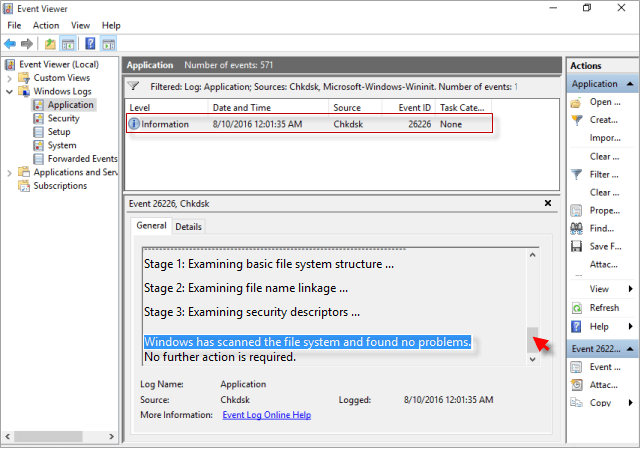
You can use the scroll bar on the right when reading information.
You can read the Event Viewer log for Chkdsk (Check Disk) scan results via PowerShell command.
Step 1: Open the Windows PowerShell.
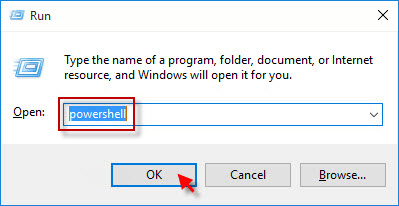
Press Win + R keys to bring up the Run dialog, then type powershell and then click OK.
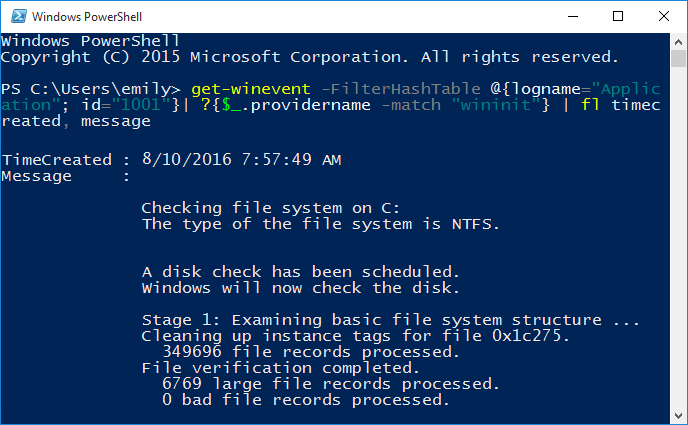
Step 2: Copy and paste the command below you want to use into PowerShell, and then press Enter key.
Command to read Chkdsk log in PowerShell:
get-winevent -FilterHashTable @{logname="Application"; id="1001"}| ?{$_.providername –match "wininit"} | fl timecreated, message
The following command is used to create CHKDSKResults.txt file on your desktop containing log:
get-winevent -FilterHashTable @{logname="Application"; id="1001"}| ?{$_.providername –match "wininit"} | fl timecreated, message | out-file Desktop\CHKDSKResults.txt

Step 3: You can now read the latest Event Viewer log for Chkdsk.
