My husband kindly set up my new laptop for me when I was busy but thoughtlessly used his Microsoft account, not mine. Now I find I can't find any way to remove it and replace it with mine. Any help would be much appreciated.
That is a question on Microsoft Community and thousands of people have the same question. If you are in a similar situation, how will you remove a Microsoft account from your Windows 10 laptop/PC? Don't worry. This page will help you solve this problem.
Step 1: Sign in Windows 10 with the Microsoft account.
Step 2: Open Settings using Win + I keys, then go to "Accounts (Your accounts, email, sync, work, family)".
Step 3: Click "Your info" on the left side, then click "Sign in with a local account instead" on the right side.
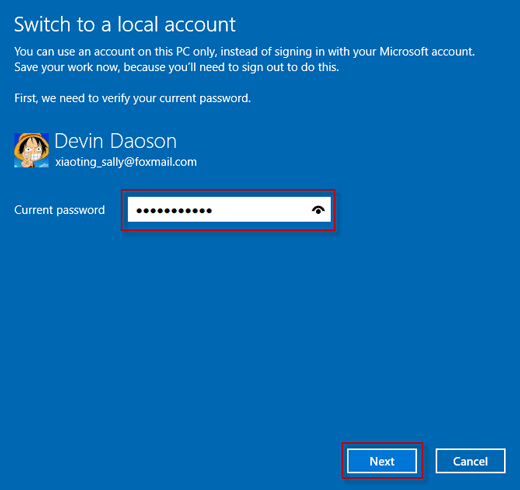
Step 4: When it asks for your current password, type in the current password of your Microsoft account and then click Next.
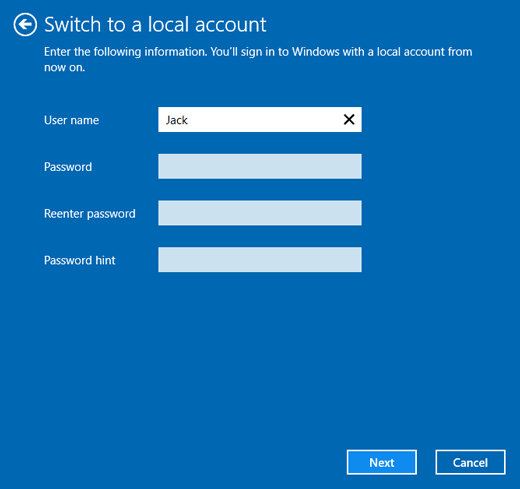
Step 5: Type in a user name, password and password hint you want for your local account, and then click Next. The user name is required, the password and password hint are optional.
Step 6: Click Sign out and Finish. Windows 10 will then sign out from the Microsoft account.
Step 7: When you are at the login screen, sign in with the local account you just created.
Step 8: Open Settings, and go to Accounts > Your info, and then click "Sign in with a Microsoft account instead".
Step 9: Then you can sign in using a Microsoft account with the email address you want.
That's it. This way, you can remove that initial Microsoft account and replace it with a different one. However, this method may not work in some cases, for example, if you don't know the password for that initial Microsoft account. If so, another method is available for you.
If there is any available local administrator account in this Windows 10 computer, you can sign in with the administrator account and then remove that unwanted Microsoft account using any of the following three methods.
Notes: If there is no administrator account, you first have to create one. See How to Create an Admin Account When You Can't Sign in Windows 10.
1. Sign in Windows 10 using a local admin account.
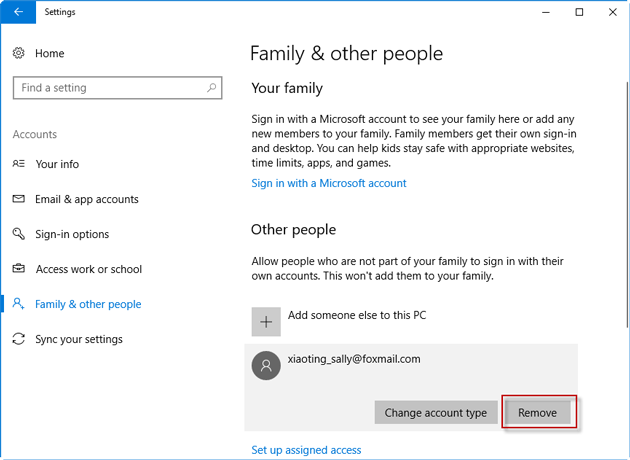
2. Open Settings, and go to Accounts > Family & other people. Select the Microsoft account under "Other people" section, and then click Remove.
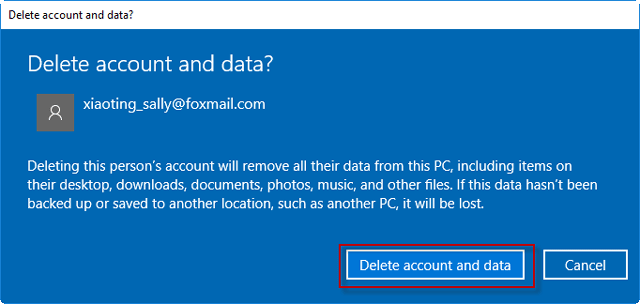
3. Click "Delete account and data". This will remove the Microsoft account from the Windows 10 computer.
1. Open Control Panel, then click User Accounts > Remove user accounts.
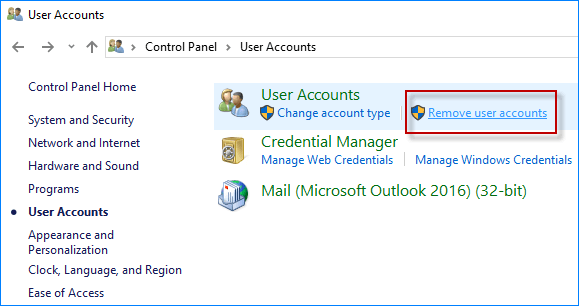
2. Select that Microsoft account you would like to remove from this Windows 10 computer.
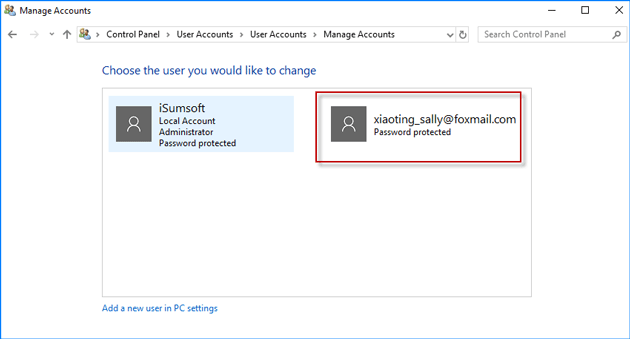
3. Click on "Delete the account" link on the left side.
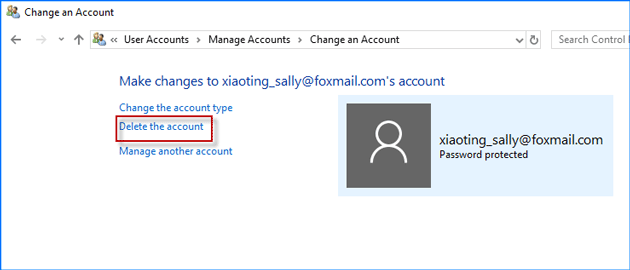
4. Click on "Delete Files" button.
5. Windows 10 will ask if you are sure you want to delete this Microsoft account, click the "Delete Account" button to confirm the deletion.
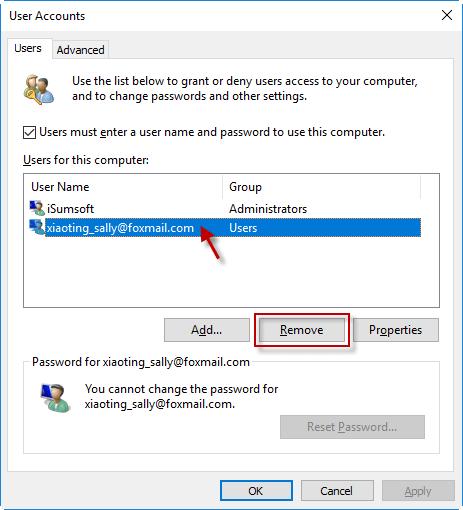
1. Open Run dialog using Win + R keys, then type in netplwiz and click OK.
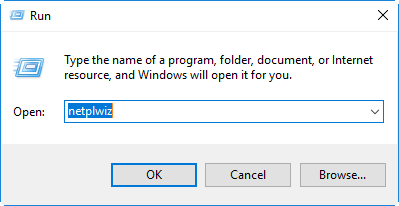
2. After the "User Accounts" window opens, keep the "Users" tab selected, and select the Microsoft account you want to remove, and then click "Remove" button.
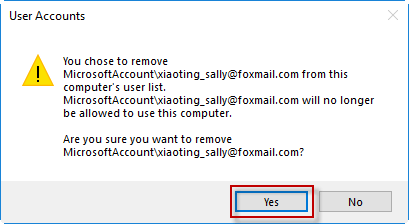
3. It asks if you are sure you want to remove this Microsoft account from this Windows 10 computer, click Yes to confirm.
The above are all the methods you can use to remove a Microsoft account from a Windows 10 laptop/PC.