If you just bought a new drive, you need to partition it before using it. Whether you are using a new drive or just want to partition an existing drive, the process is the same. Fortunately, learning how to partition a hard drive in Windows 10 is quick and easy. We'll show you the easiest way to help you initialize a new hard drive and partition an existing drive in Windows 10 using Windows disk management.
A partition is a part of a disk with a specific size, which was set when it was created. Disk partitioning means that the user divides the hard disk into several logical parts using the partition editor. After that, they can store different directories and files in different partitions. The more partitions, the more different the storage location. Therefore, users can store files in different partitions. Partitioning a hard drive in Windows is not difficult and usually takes only a few minutes.
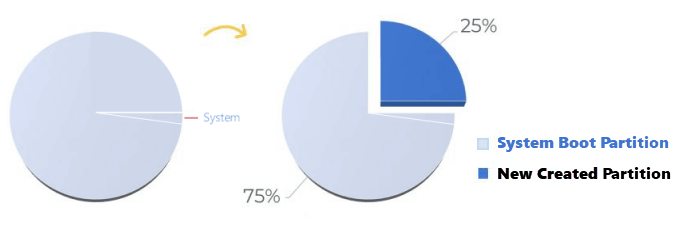
Typically, a newly purchased laptop contains one single partition on its hard drive. it shows up as one drive (C drive) in the computer windows. Saving data on applications and operating systems can be risky in the same partition. In addition, saving a large amount of information on a system partition can slow down your computer. Under such circumstances, you can shrink C drive and create a new partition with that redundant space by using Disk Management.
You may need to initialize a new SSD or HDD when you get a brand new hard drive or when get an error such as "Disk is not uninitialized" or "You must initialize the disk before the Logical Disk Manager can access the disk". Here is how to initialize the hard drive disk or SSD in Windows 10.
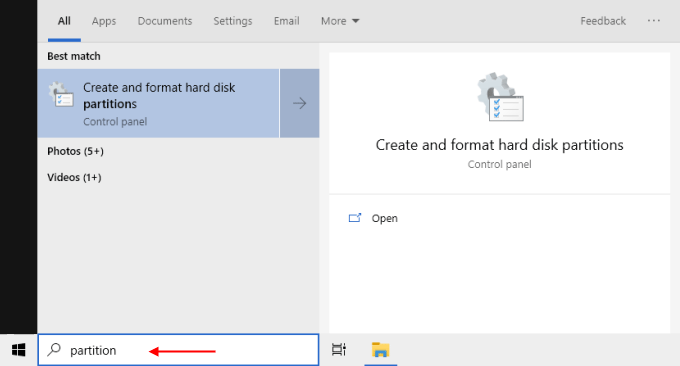
Step 1: Type the partition in the Search box and press Enter. This will open the Disk Management window.
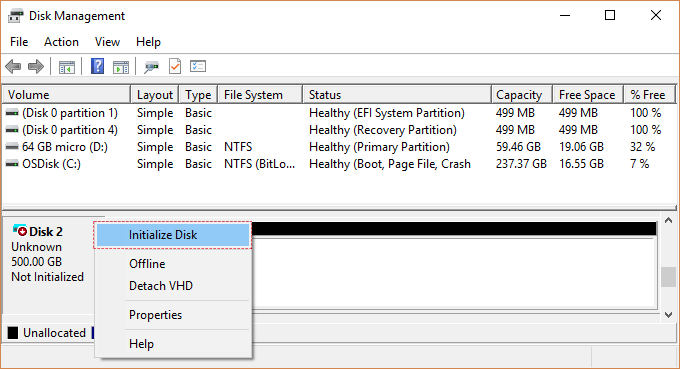
Step 2: Locate and right-click the hard drive or SSD you want to initialize, then click Initialize Disk.If the disk is listed as "Offline", right-click the disk and select "Online".
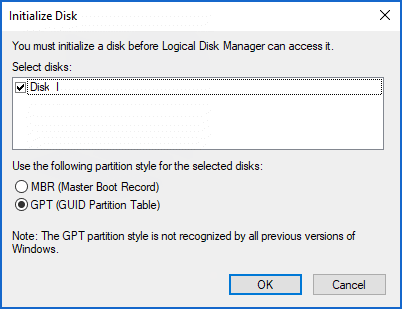
Step 3: In the Initialize Disk dialog box, select the correct disk to initialize. Then click OK to accept the default partition style, or you can change the partition style (GPT or MBR) as needed.
The easiest way to partition a new or existing hard drive is to use Windows' built-in disk management tool. You must be logged in as an administrator and there must be unallocated disk space or free space in the extended partition on your hard disk. If there is no unallocated disk space, you can create some disk space by shrinking the existing partition.
Step 1: Open the Disk Management using the Windows power user menu (Win key + X, K).
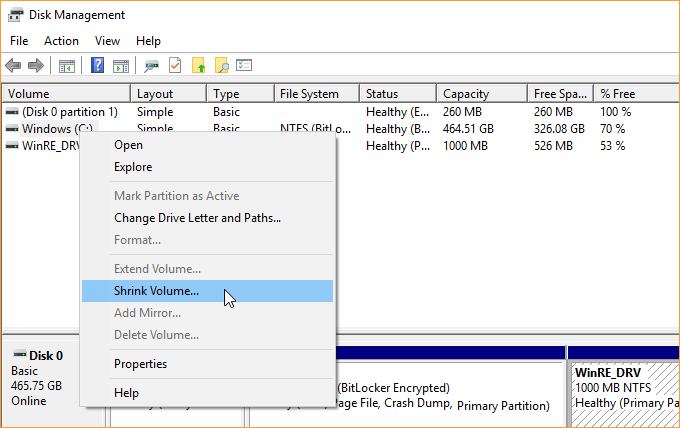
Step 2: Select the hard drive you want to partition from the list of available drives. If it is a new drive, skip to Step 4. If it is an existing drive with files and even your operating system installed on it, you'll need to create some unallocated space before you can partition it. Right-click on it and select Shrink Volume.
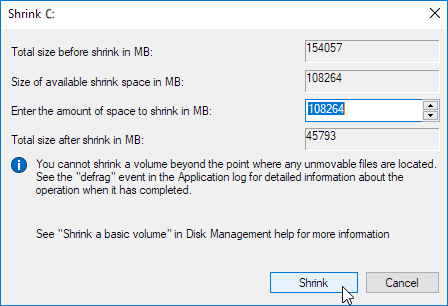
Step 3: Your PC will then calculate how much free space you can allocate to the new partition. Once completed, it will ask you how much of it you want to use. If you want to use all the free space on the hard drive, simply click the Shrink button. When complete, you'll have a new unallocated space shown next to the corresponding physical drive in the Disk Management screen.
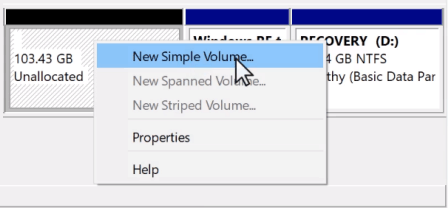
Step 4: Right-click the Unallocated space and select New Simple Volume from the resulting menu.
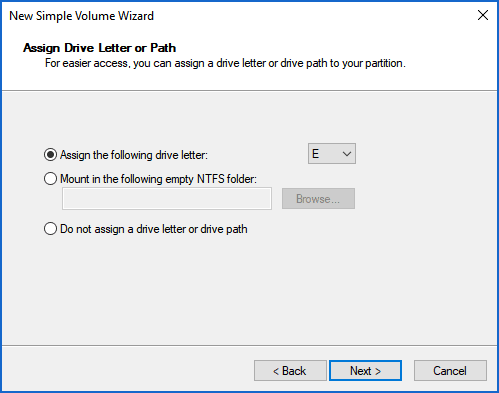
Step 5: In the New Simple Volume Wizard, choose Next. Follow the on-screen instructions and select the size of the volume (the default will use all unallocated space) and the drive letter.
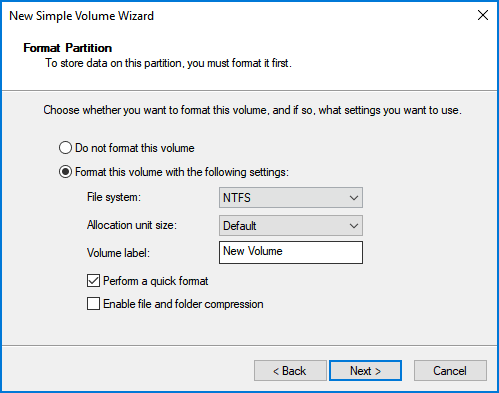
Step 6: It's wise to format new and old drives when creating a new partition. When given the option, select to do so. For file system select NTFS. You can also add a volume label name if you want. You can leave the allocation unit size at default. Select quick format if you are short on time.
Step 7: Continue to click through Next buttons and finally, hit Finish to create the volume.