By default, the hard disk drives on your computer use the same name 'Local Disk'. You use drive letters such as C, D, E, F, etc. to distinguish different hard disk drives. Occasionally, you may want to change the name of the hard disk drive for easier identification. Here in this post, we will show you how to rename hard drive in Windows 10. There are three available ways.
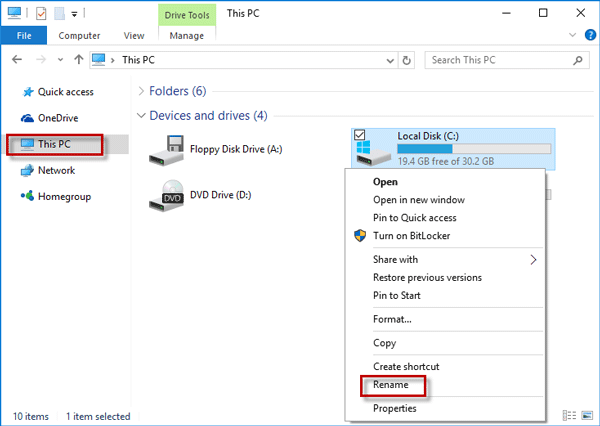
Step 1: Launch File Explorer in Windows 10, and then select This PC.
Step 2: Under the "Devices and drives" section, right-click on the drive you want to rename, and select Rename from the context menu.

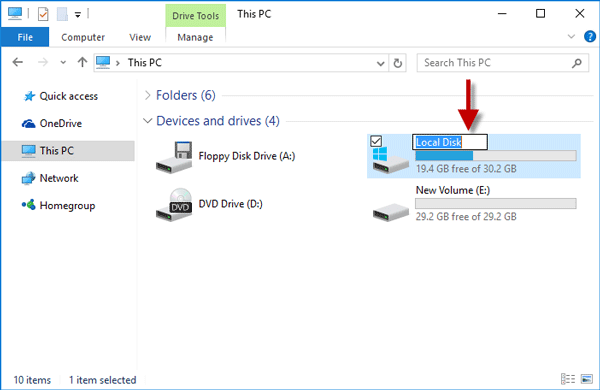
Step 3: Then the name of the disk is changed to an editable field. Type your desired name in the field and hit Enter to apply the name.

Note that if you rename the drive where the operating system is installed, you will need to provide administrator permission.

Step 1: Open the Disk Management in Windows 10 by right-clicking on the Windows icon in the lower left corner of the desktop and then select the Disk Management from the menu.
Step 2: Right-click on the disk drive you want to rename under the Volume list, and then select Properties from the context menu.

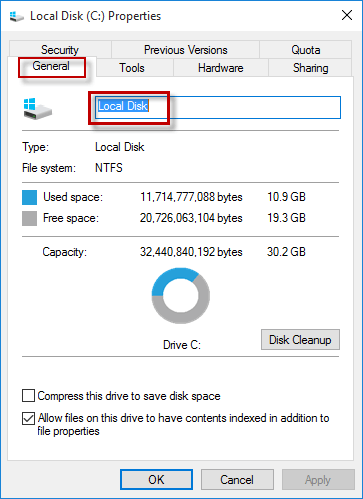
Step 3: After the Properties dialog opens, select the General tab, type your desired name in the field following the disk icon, and click OK to apply the name.

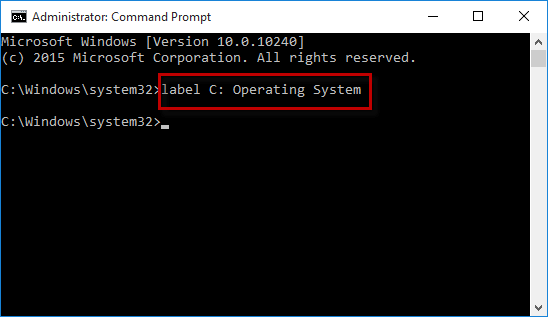
Step 1: Press Win + X, and then select Command Prompt (Admin) from the menu to open Command Prompt as administrator in Windows 10.
Step 2: Type the command: label <drive letter>: <drive name>, and press Enter key. For example, type label C: Operating System and press Enter to change the name of the local disk C to ''Operating System''.
