Memory problems can cause your computer to lose information or stop working. If your computer is unstable, there may be a problem with its RAM. This article describes how to use the Windows Memory Diagnostic Tool to check for computer's memory problems in Windows 10.
Windows Memory Diagnostic is a very useful tool that can help you discover problems with your computer's RAM. Here is how to run the Diagnostics tool to check your system for memory problems.
Step 1: Run Windows Memory Diagnostic tool.
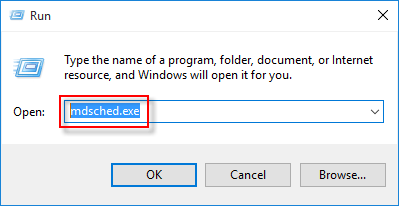
Press Win+R keys to open Run dialog, then type mdsched.exe into the Run dialog and press Enter.

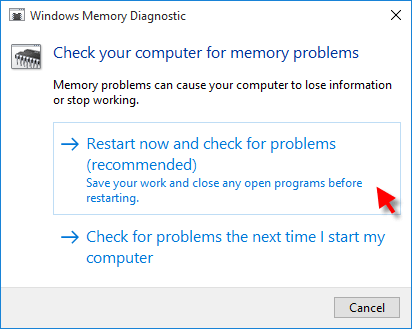
Step 2: To agree run this tool, click Restart now and check for problems (recommended).

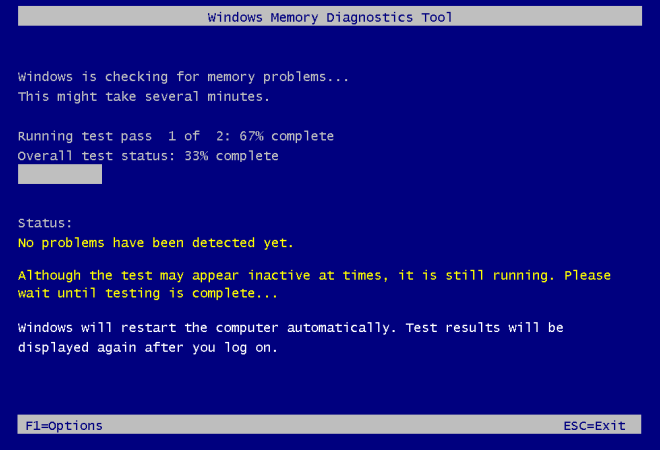
Step 3: Windows Memory Diagnostics runs automatically after the computer restarts and performs a standard memory test automatically.

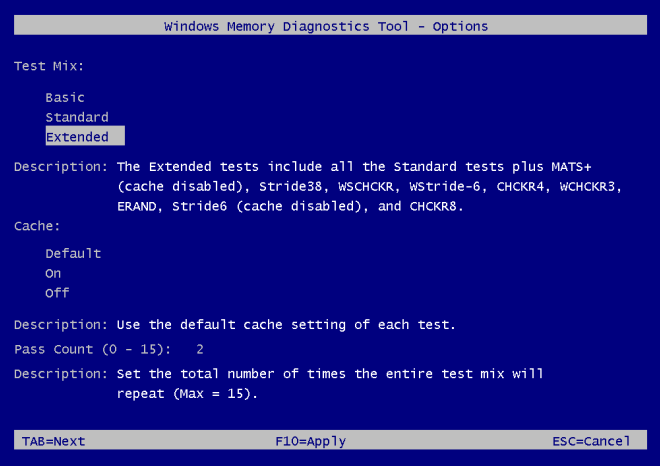
Tips: If you want to perform fewer or more tests, press F1, use the Up and Down arrow keys to set the Test Mix as Basic, Standard, or Extended, and then press F10 to apply the desired settings and resume testing.

Step 4: Wait until Windows check your disk for errors. After the checking action is done, you can find detailed results of ram testing in Event Viewer. Learn more see how to find the Event Viewer Logs for Memory Diagnostic.