Windows Defender Antivirus uses real-time protection to scan your downloads and the programs you run on your device. This guide will show you how to turn on or off Windows Defender Real-time protection on Windows 10 PC.
To turn on or off Windows Defender Antivirus in Windows Defender Security Center app. Here is how:
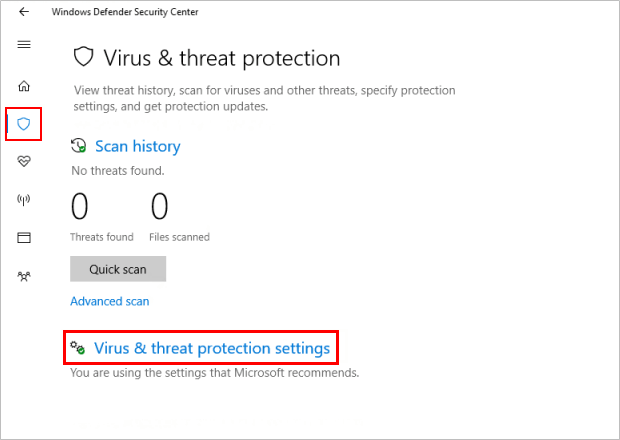
Step 1: Open Windows Defender Security Center app.
You can quickly open it by clicking the shield icon in the taskbar.

Step 2: Click on Virus threat protection tile on the left menu bar. Click Virus & threat protection settings.
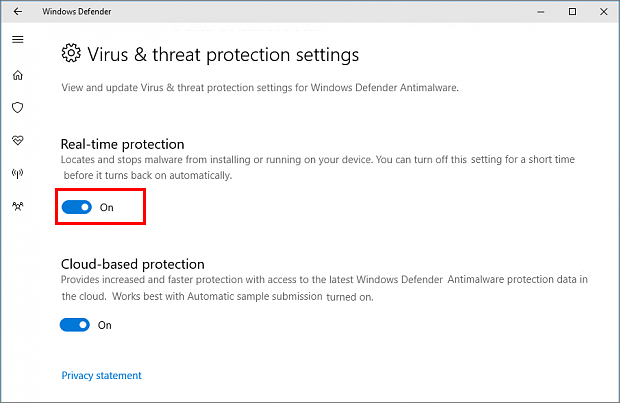
Step 3: Toggle the Real-time protection switch to On or Off for what you want to set.
You can also turn on Windows Defender Antivirus in Settings app.
To do: Go to Settings app, click Update & security, select the Security tab, and then choose the antivirus program you want to use. Windows Defender Antivirus will then automatically turn on.
If you're running Windows 10 for Enterprise, turn on Windows Defender Antivirus by uninstalling all of your existing antivirus programs.
Local Group Policy Editor is only available in the Windows 10 Pro, Enterprise, and Education editions.
Step 1: Open the Local Group Policy Editor.
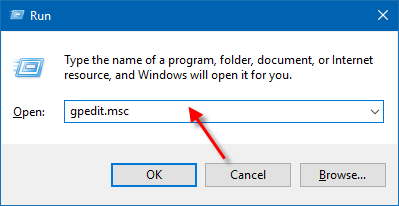
Press Win+R to open Run dialog, then type in gpedit.msc, then press Enter.
Step 2: In the left pane of Local Group Policy Editor, navigate to the location below.
Computer Configuration/Administrative Templates/Windows Components/Windows Defender/Real-time Protection
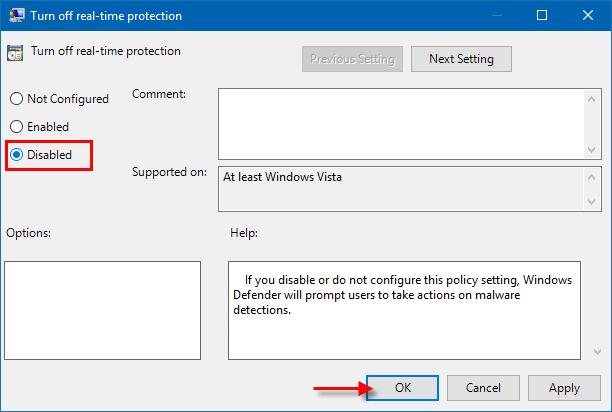
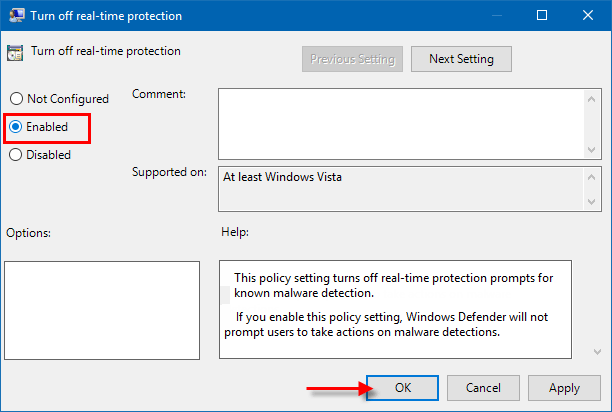
In the right pane of Real-time Protection, double-click on the Turn off real-time protection policy to edit it.
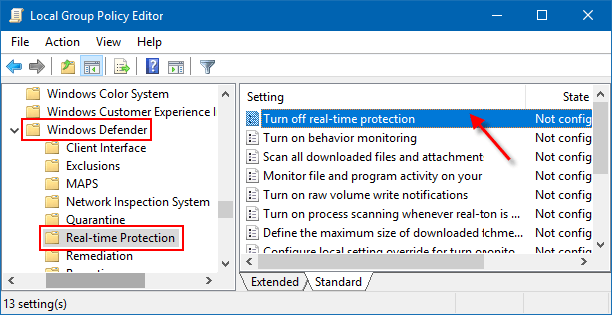
Windows Defender alerts you when malware or potentially unwanted software attempts to install itself or to run on your computer. To enable Real-time protection: Select Not Configured or Disabled, click on OK. Windows Defender will prompt users to take actions on malware detections.
If you select enabled option, Windows Defender will be turned off and will not prompt users to take actions on malware detections.
When finished, close Local Group Policy Editor.