This tutorial explains how to manage your startup programs to make Windows boot faster. It covers how to remove a startup program and start the program automatically when the computer is turned on, you will learn the easiest way to change the application that will run automatically or not run when Windows 10 starts.
Step 1: Select the Start button, then select Settings > Apps > Startup.
Step 2: Under the Startup Apps, make sure any app you want to run at startup is turned On or turn Off any app you don't want to startup.
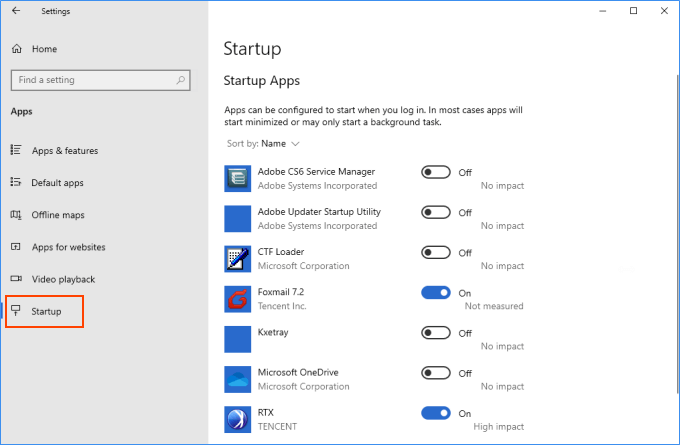
Tip: If your program isn't listed, you can change it by adding a shortcut to the Windows Startup folder.
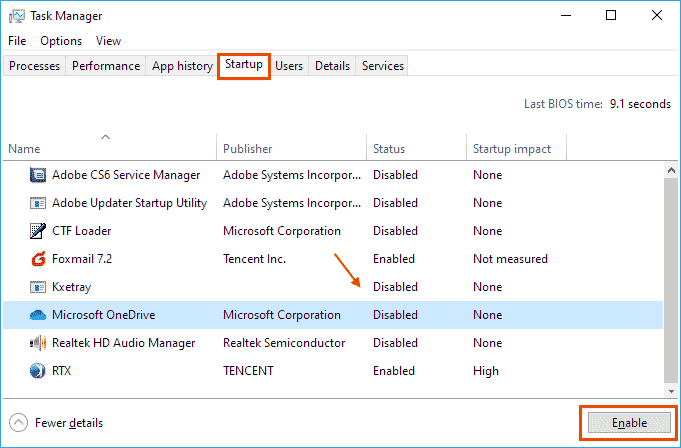
Step 1: Right-click the Start button, select Task Manager, then select the Startup tab.
Step 2: Select the app you want to change, then select Enable to run it at startup or Disable so it doesn't run.
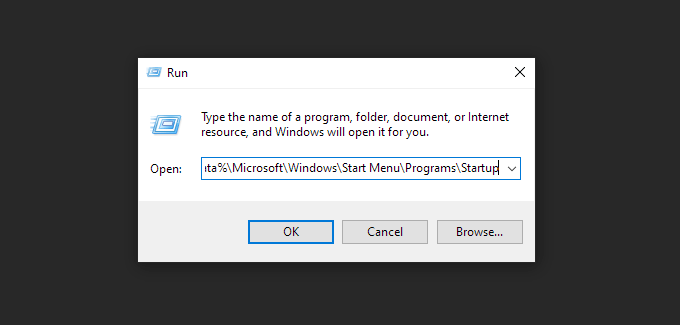
Step 1: Press Windows Key + R to open the Windows Run dialog.
Step 2: Copy the following path to the Run dialog, and then press Enter.
%AppData%\Microsoft\Windows\Start Menu\Programs\Startup
Step 3: Open the Start Screen, right-click the program you want to automatically start, and click Open file location. This might be under the More submenu.
Step 4: Copy the program shortcut and then paste (CTRL +V) it to the Startup folder you opened in Step 2.
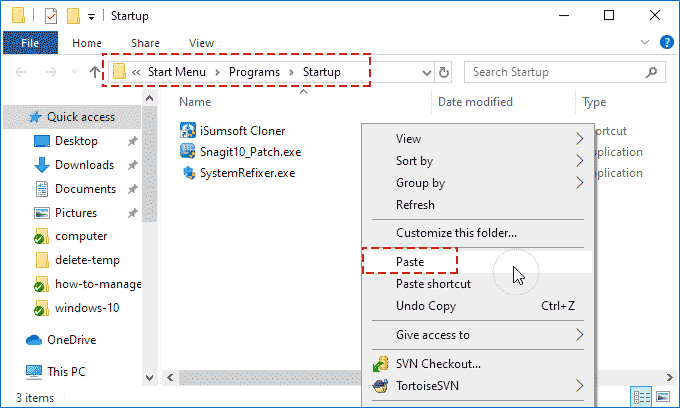
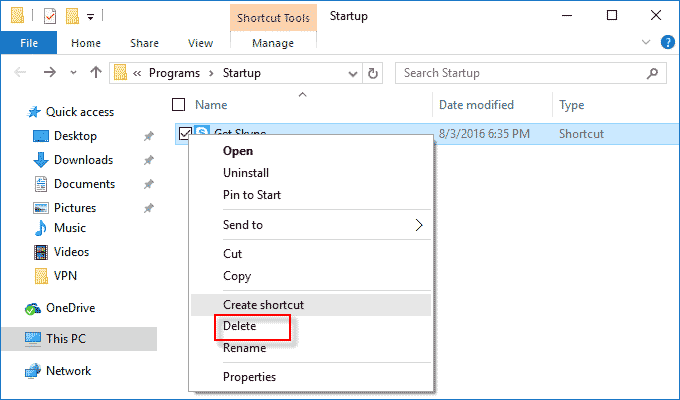
Step 5: Your program will automatically start the next time you start your computer. If you ever want to remove a program from autostart, delete the shortcut from the Startup folder.
The free system cleaner utility iSumsoft System Refixer also has a function that lets you manage startup programs on your computer. In System Refixer, click the Startup button on the menu and then you can see a list of startup programs. The Condition column indicates whether each program is set to start from Windows or not. To disable an enabled program, select the program in the list and click Disable start.
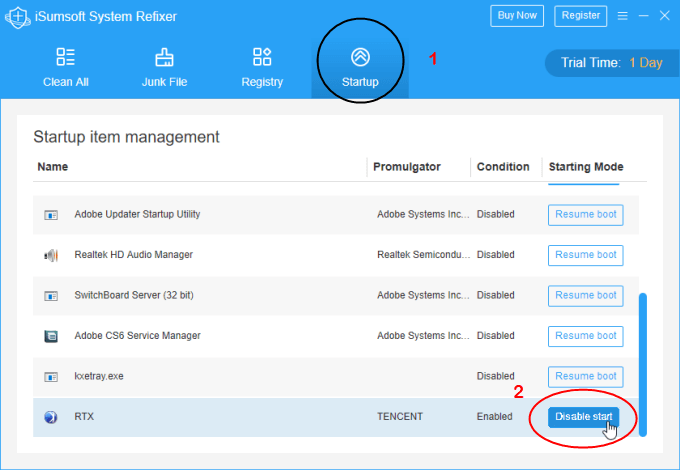
You can also enable disabled programs by clicking Resume boot.
This change will take effect the next time you start your computer.