You have upgraded to Windows 11, but found that your computer does not work properly on Windows 11, or you still prefer Windows 10. Then you must wonder if you can roll back to Windows 10 from Windows 11 without losing data. The answer is of course yes. This article will show you how to downgrade from Windows 11 to Windows 10 within or after 10 days of the upgrade without losing data.

Microsoft allows you to roll back to Windows 10 within 10 days of upgrading to Windows 11 without losing data. Of course, the premise is that you do not delete the Windows.old file under your operating system drive.
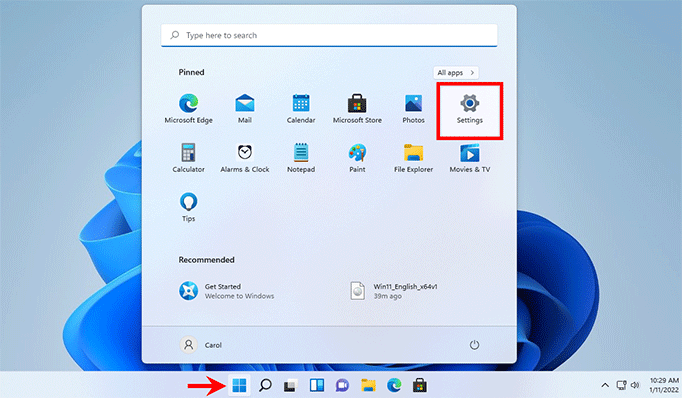
Step 1: Click the Windows (Start) button on your Windows 11 taskbar, then select Settings.
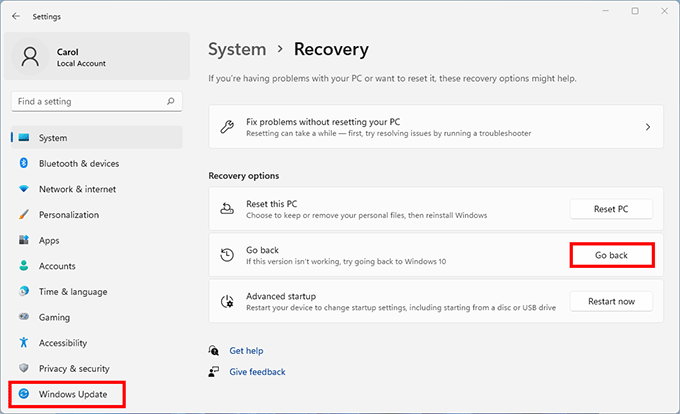
Step 2: In the Settings, select Windows Update on the left, then click Advanced options > Recovery > Go back on the right.
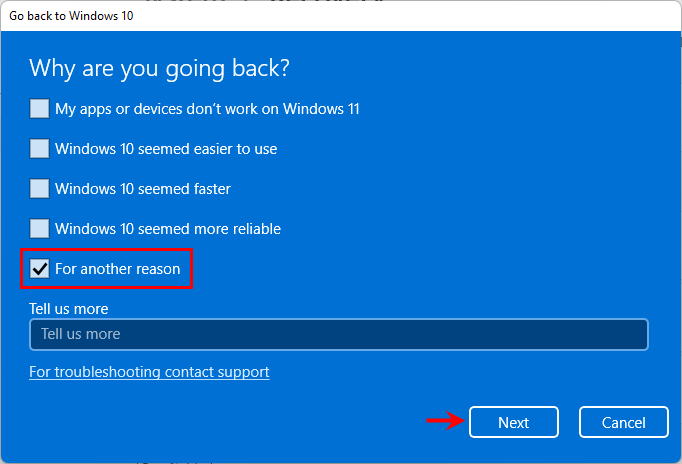
Step 3: The "Go back to Windows 10" window opens. Choose why you want to go back to Windows 10, and then click Next.
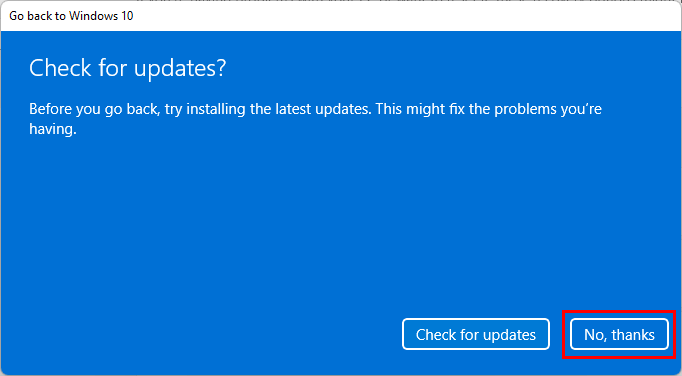
Step 4: You will be asked if you want to install the latest updates to fix the problems you're having, click "No, thanks".
Step 5: Take one minute to read the instructions on the screen, then click Next, and then click Next again.
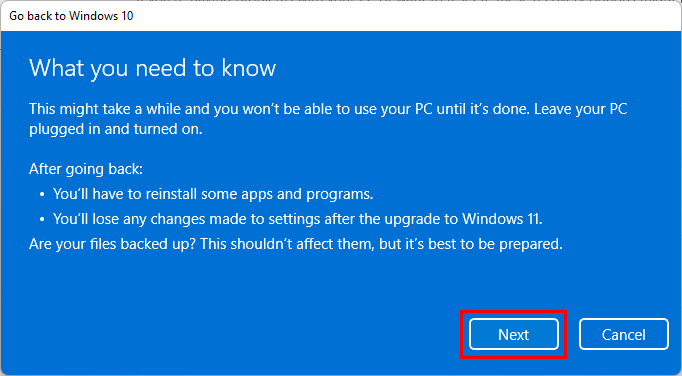
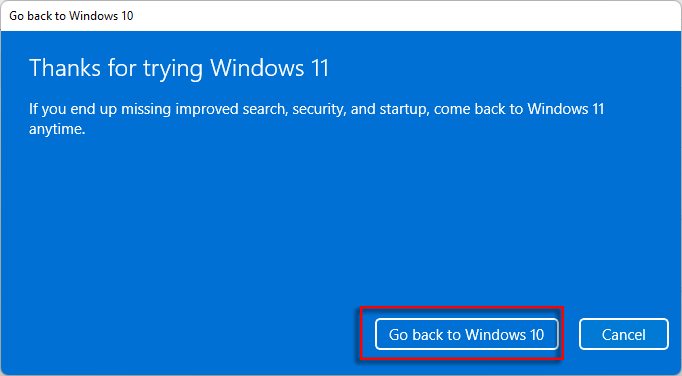
Step 6: Finally, on the "Thanks for trying Windows 11" page, click Go back to Windows 10. Your computer will restart and start rolling back to Windows 10.
Step 7: Wait patiently until the rollback is complete. This usually takes several minutes. When finished, you will go directly back to your Windows 10, and the downgrade is complete without data loss.

You should know that Microsoft does not offer the option to downgrade from Windows 11 to Windows 10 after 10 days of the upgrade. Therefore, if you want to go back to Windows 10 from Windows 11 after 10 days of your upgrade without losing data, you need to back up your Windows 10 before upgrading. Then, you can restore your Windows 10 backup to your PC for the downgrade. To do all this, you just need the iSumsoft Cloner software and a USB flash drive.
DownloadDownload and install iSumsoft Cloner on your Windows 10 computer. Then, open this software tool and follow these steps.
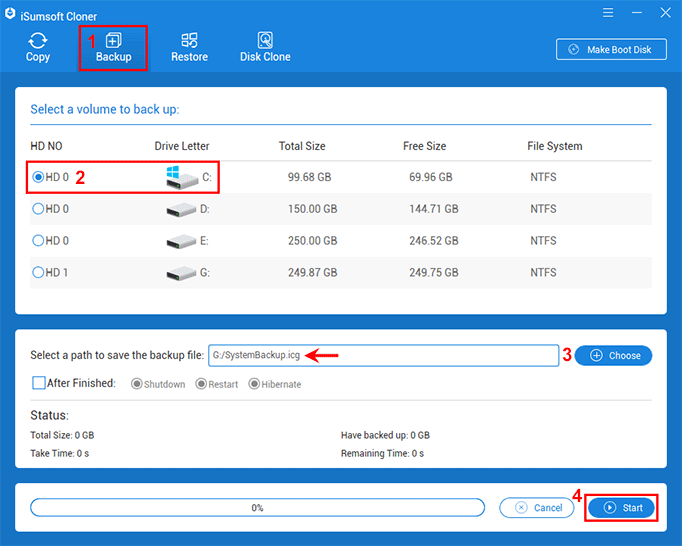
Step 1: Install iSumsoft Cloner on your Windows 10 computer. Open the software and select the Backup option at the top.
Step 2: Under "Select a volume to back up", select your operating system drive (typically C:) where your Windows 10 is installed.
Step 3: Click the Choose button to choose a path to save the backup. Remember the path, and rename the backup if you want.
Step 4: Click the Start button in the lower right corner to start backing up your Windows 10.
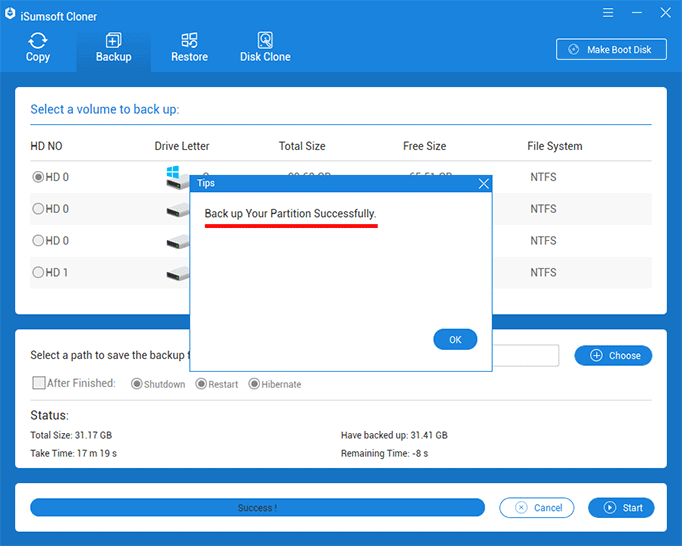
Step 5: Wait a while until the backup is complete successfully. Then, you can go to the backup save path to view the backup.
Before upgrading to Windows 11, you should also create a WinPE bootable disk on your current Windows 10, which you will need to use to roll back to Windows 10 after upgrading.
Step 1: Insert a USB flash drive into your computer, and then go to This PC to view the USB drive letter.
Step 2: Open iSumsoft Cloner on your computer, click the Make Boot Disk button in the upper right corner, and then choose "Create PE in current system environment (No PE files)" in the pop-up dialog.
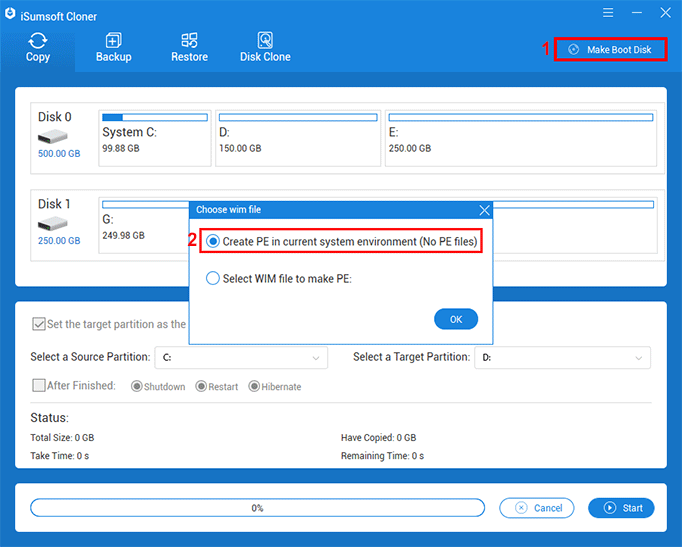
Step 3: Select your USB flash drive and click Make to start making the WinPE disk. Then, wait a few minutes until the WinPE disk is created successfully.

Step 4: Once you have a backup of your current Windows 10 and a WinPE bootable disk, you can start upgrading to Windows 11.
If you have upgraded to Windows 11 and now want to downgrade or roll back to Windows 10, just restore your backed-up Windows 10 to your computer. You need to do this in Windows PE.
1. Connect the WinPE USB drive you've created to your current Windows 11 computer.
2. Start/restart the computer and immediately press and hold the F12 key to enter the Boot menu. Then select the USB flash drive as the boot device and your computer will boot from it. See How to boot a computer from USB drive.
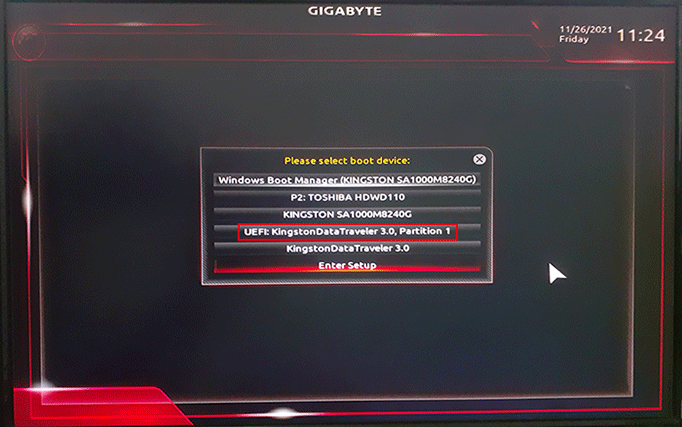
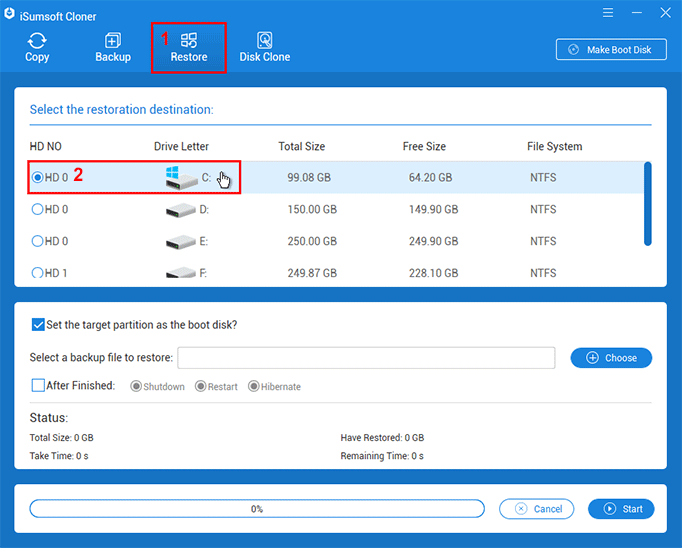
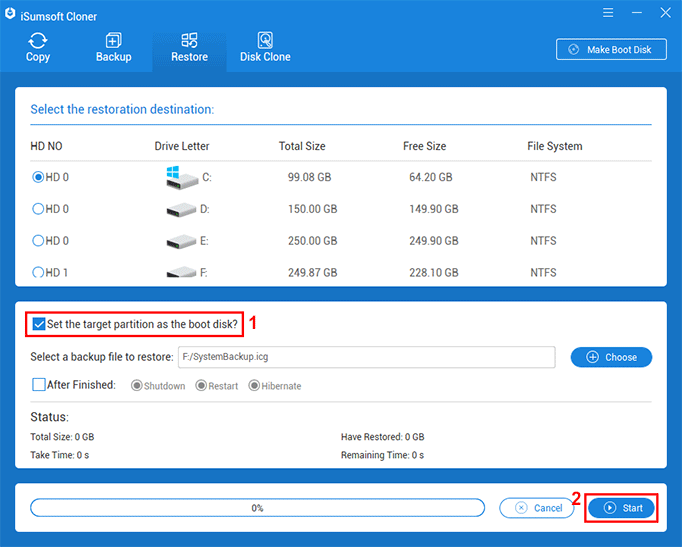
1. Once your PC boots to Windows PE, you will see iSumsoft Cloner on your monitor. Choose the Restore option on the top.
2. Under "Select the restoration destination", select your operating system drive where your Windows 11 is running.
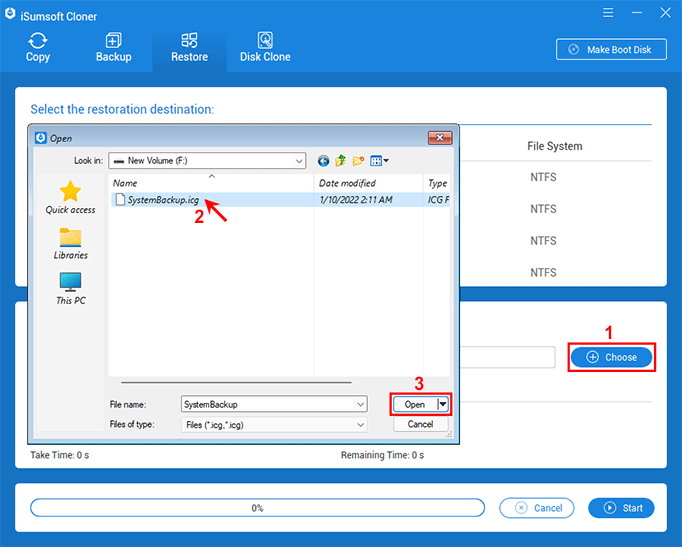
3. Click the Choose button and choose the Windows 10 backup file you created before your upgrade, and then click Open.
4. Make sure that you tick the "Set the target partition as the boot disk" box, and then click Start in the lower right corner to start restoring Windows 10.
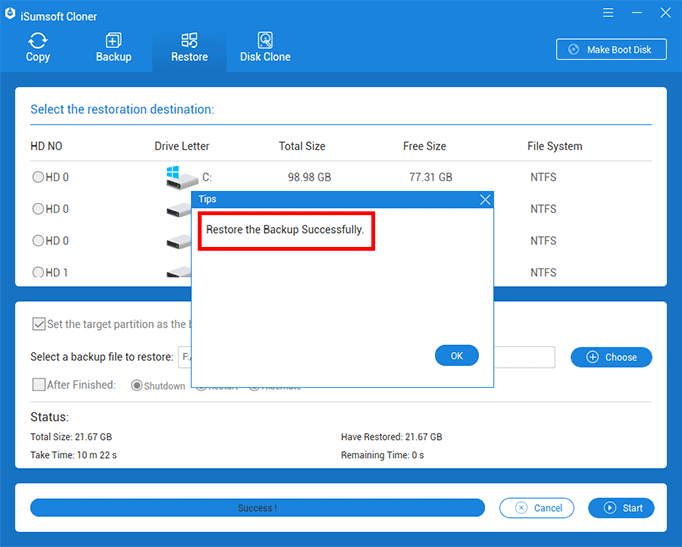
5. When the restoration is complete successfully, remove the WinPE disk and restart the computer. This time, your computer will boot to Windows 10 and the downgrade is complete.
If you have been upgraded to Windows 11 for more than 10 days and you have not backed up your Windows 10 before your upgrade, doing a clean install of Windows 10 is the last downgrade method.
All you need to do is create a Windows 10 installation media, boot your computer from the Windows 10 media, and then follow the on-screen steps to install Windows 10 on your computer.