When you download or receive the same photo multiple times, or you back up the same photo in different drive and folder, it may create multiple duplicate photos, wasting your Computer space and decreasing your system performance. Here in this article, you will know about how to find and delete duplicate files on Windows 11 so as to free up your Computer.

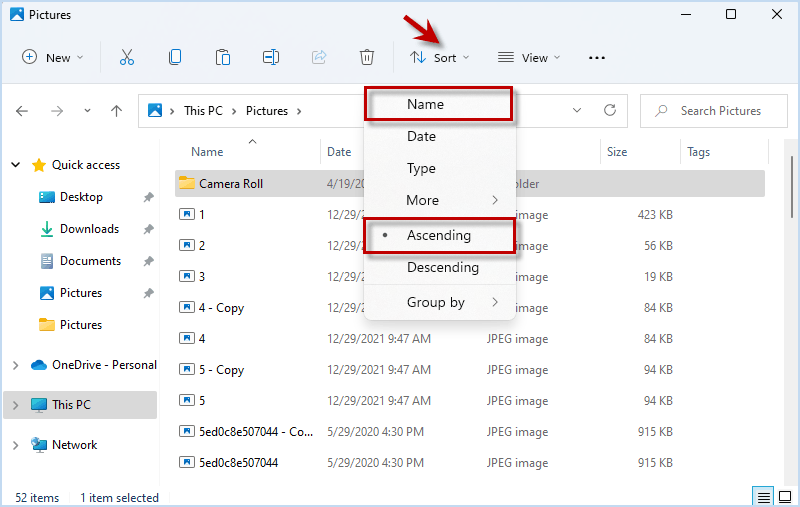
Step 1: Open the folder you want to scan. Then click Sort option and choose Name and Ascending in the drop-down menu.
Step 2: Switch to View menu and choose Details.
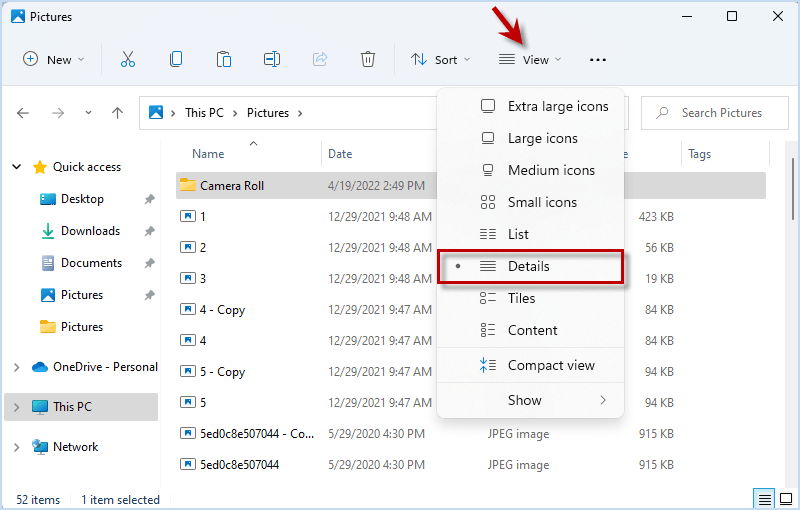
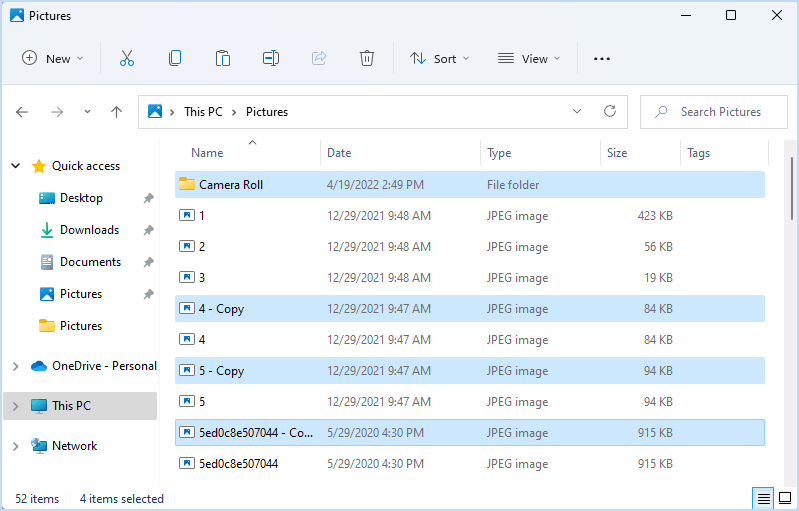
Step 3: After setting the preview mode, you can clearly identify the duplicate photos and manually delete them on Windows 11.
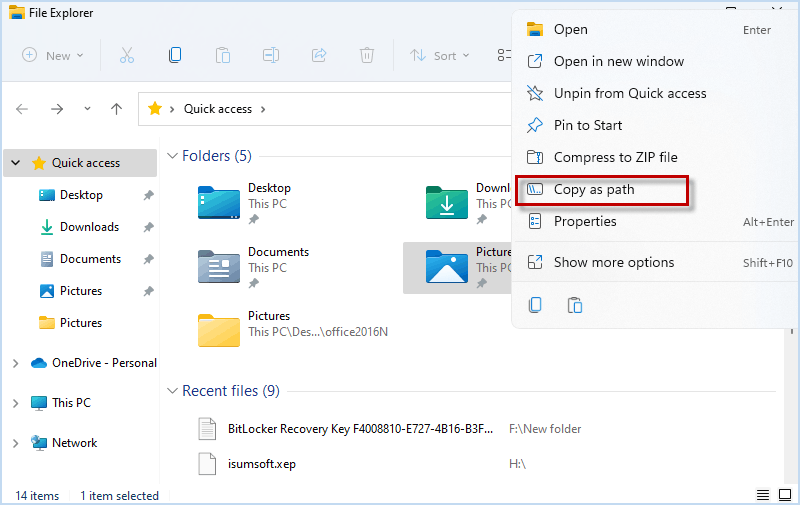
Step 1: Right-click the folder you want to search for duplicate files and select Copy as path.
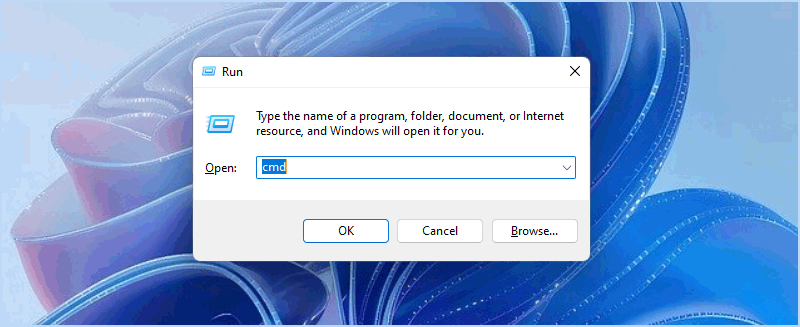
Step 2: Press Win + R to open Run window. Then enter cmd and press Ctrl + Shift + Enter to run Command Prompt as administrator.
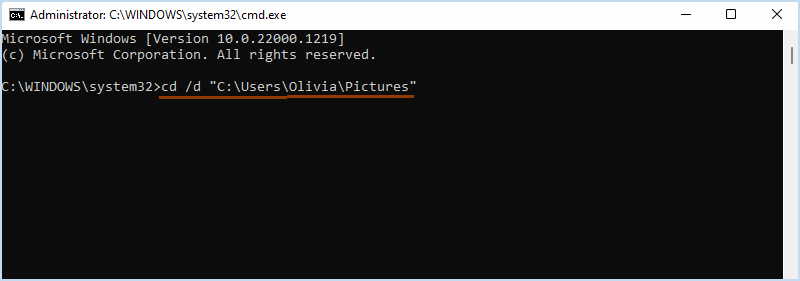
Step 3: When Command window opens, replace folder path in following command with the folder path you had copied. Then paste the whole command to Command window and press Enter.
cd / d folder path
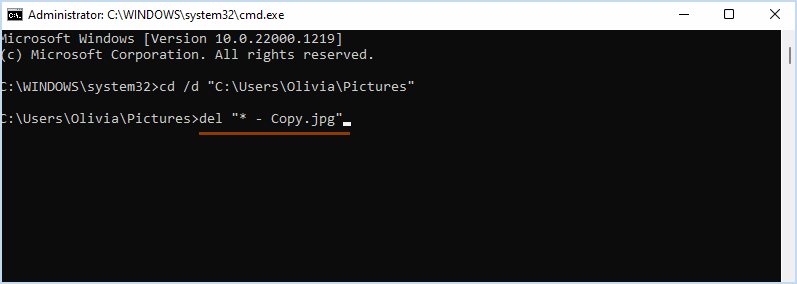
Step 4: Enter next command and hit Enter. Here you need to replace -Copy.jpg with the corresponding suffix and extension of file you scan for. For example, if you want to delete .png files with the suffix 1, you need to enter del "* - 1.png"
del "* - Copy.jpg"
Note: The deleted files will be permanently erased from the hard drive.
The best way to find and delete duplicate photos is using iSumsoft DupFile Refixer to perform a fast scan on Computer to automatically find out the duplicate files and safely make a mass deletion. This powerful tool is designed for cleaning up Windows duplicates with following advantages.
Now. let's download and install iSumsoft DupFile Refixer on Windows 11.
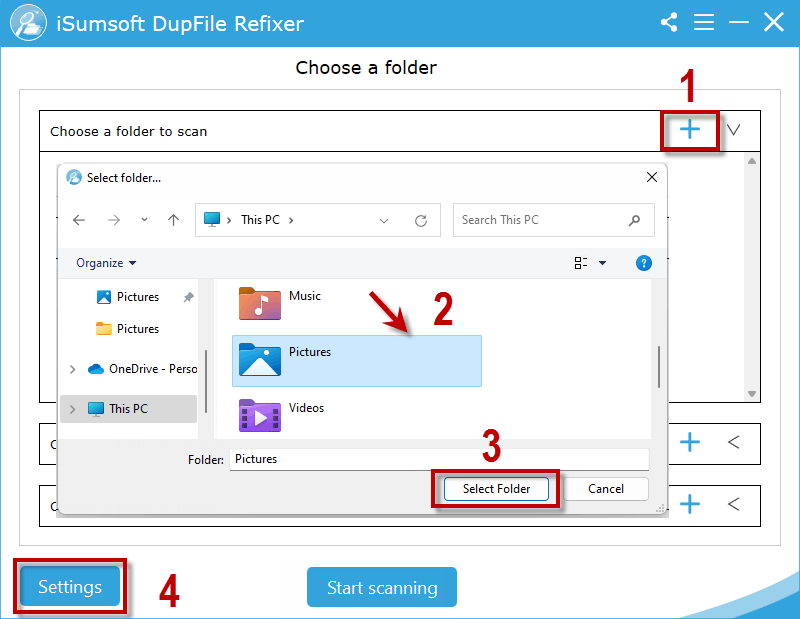
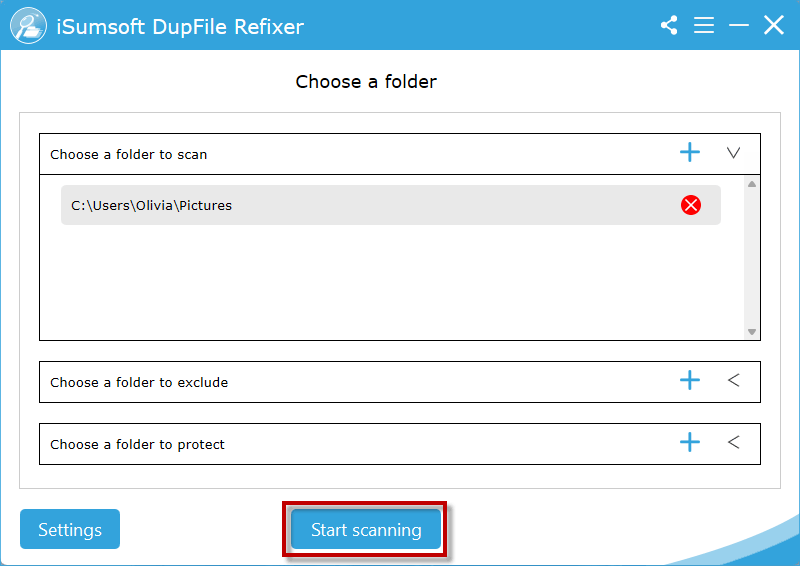
Step 1: On the main interface, click "+" to choose the folder you want to scan for duplicate files and click Select Folder. Then click Settings to configure scan target.
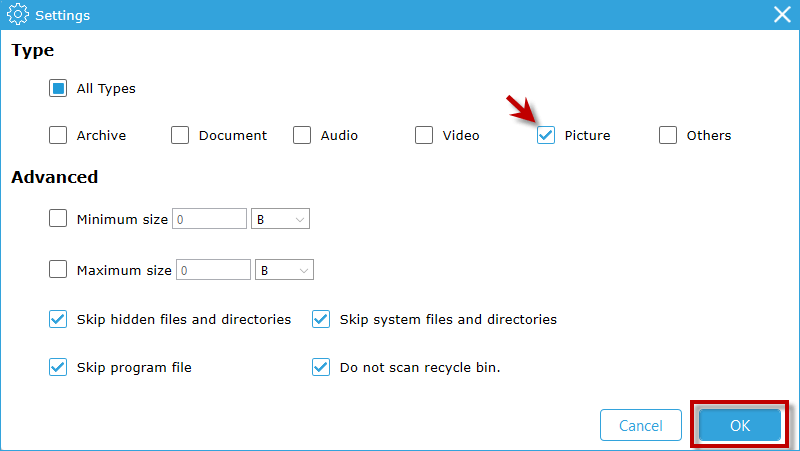
Step 2: In scan settings, check the box for Picture to only scan for duplicate photos and click OK.
Step 3: When the scan settings is done, click Start scanning to search for the duplicate photos in the selected folder.
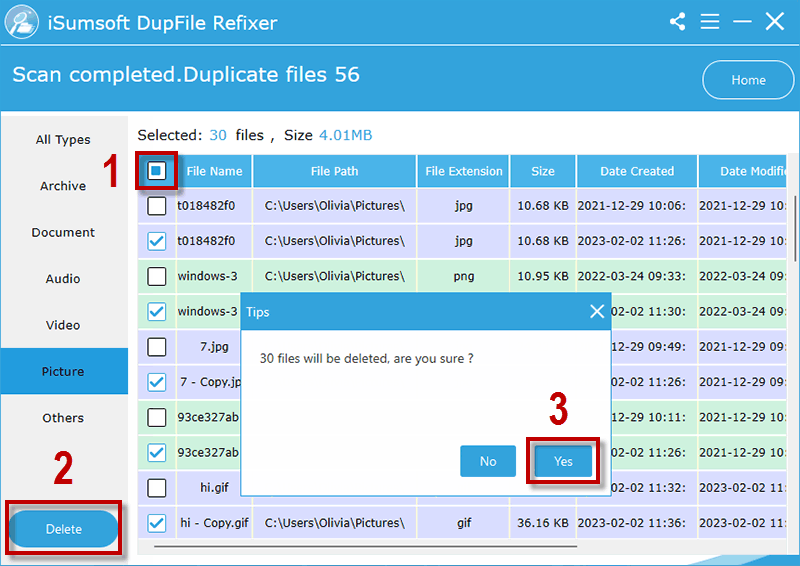
Step 4: Wait until the scan is complete, all duplicate photos in the folder will be listed on the screen. Then you can check the box for File Name to select all duplicate photos and delete them.
Note: The deleted duplicate photos will go to Windows recycle bin instead of being permanently delete.
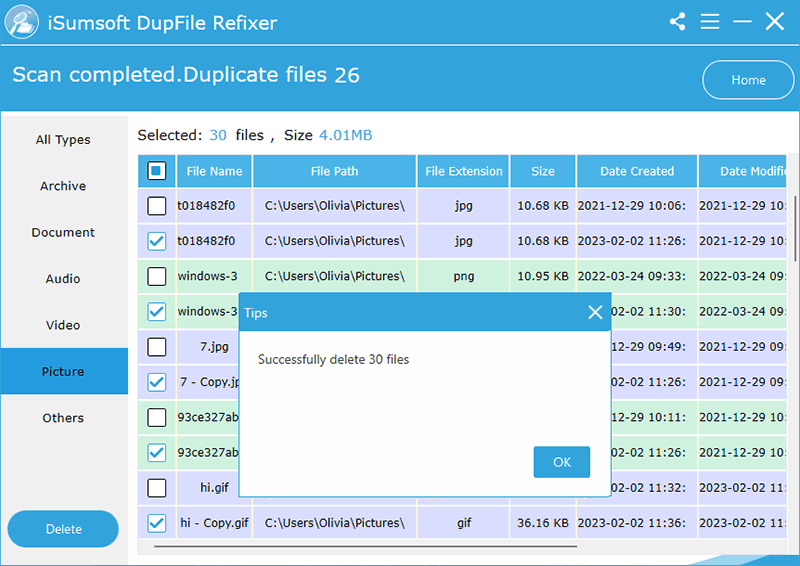
In no time, iSumsoft DupFile Refixer will remove all the selected duplicate photos and free up space.
To identify identical files, you need to compare the file with detail information such as file name, path, format, size, date created/modified. On Windows 11/10, you can sort out and preview files to manually delete them, or use Windows Command to catch and permanently erase duplicates from Computer hard drive. Or you can use a third-party duplicate files finder like iSumsoft DupFile Refixer to automatically find out and remove duplicate files in a few simple clicks.
Usually, duplicate files will be created in following ways:
It depends on what kind of duplicate files you delete. Generally, most of the duplicate files such as photos, documents, text on your computer are unnecessary and wasting space, so it is safe to delete. While if you delete system/apps related duplicate files, it may corrupt your running system or program. Always keep away from them, especially in C drive.
iSumsoft DupFile Refixer can be the best duplicate file finder for Windows 11 for its easy-to-use interface, fast scanning speed, and various scan options. It is not limited in finding duplicate photos, but also allows you to pick out duplicate videos, music, documents, texts, etc. on Windows, good at handling large numbers of duplicate files.