With automatic updates, you don't have to search for updates online or device drivers for your Windows PC. Windows Update automatically installs important updates as they become available. If automatic updates are disabled, Windows will stop downloading and installing updates for your system, instead, you need to check for updates and install updates manually. This article describes how to enable or disable automatic updates for all users who use Windows 7/8/10.
Following steps are taking Windows 10 as an example to enable or disable automatic updates via Local Group Policy Editor. Here's how:
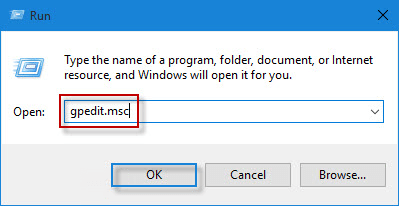
Step 1: Open the Local Group Policy Editor.
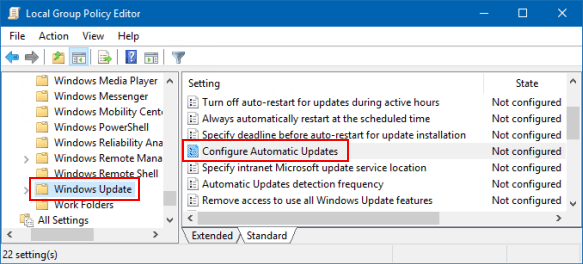
Step 2: In the left pane of Local Group Policy Editor, navigate to the following path:
Computer Configuration\Administrative Templates\Windows Components\Windows Update
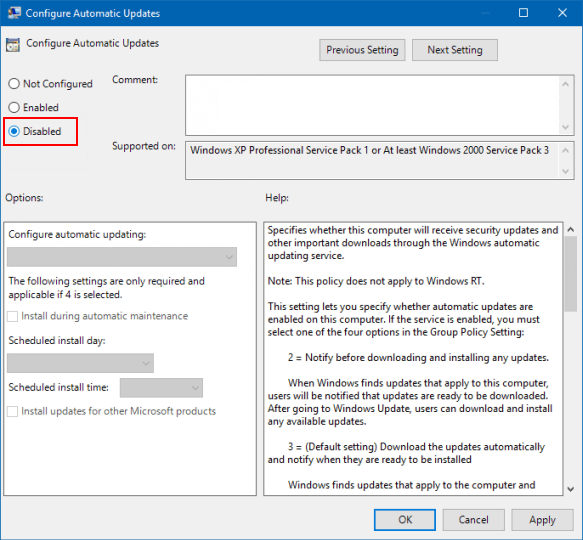
In the right pane of Windows Update, double-click on the Configure Windows Updates policy to edit it.
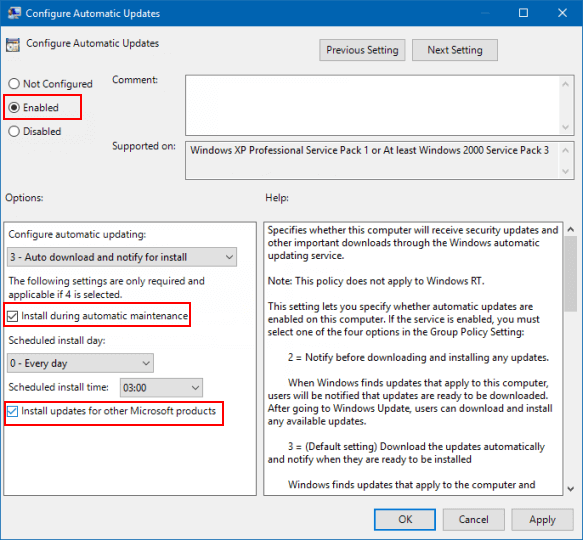
Step 3: Then select what you need:
If you choose to enable automatic update, select one of the four options:
1. Notify for download and auto install. Users will be notified when updates are ready to be download.
2. Auto download and notify for install. Windows will download updates in the background. When the download is complete, users will be notified that they are ready to install.
3. Auto download and schedule the install. You can set a time to automatically download updates when it is available. you need to enter a time in the Scheduled install time drop-down.
4. Allow local admin to choose settings. With this option, local administrator will be allowed to use the settings app to select a configuration option of their choice. Local administrators will not be allowed to disable the configuration for Automatic Updates.
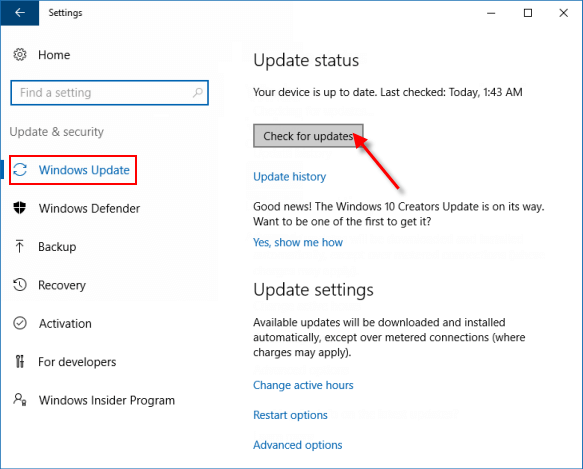
If you select the Disable option, any update that is available on Windows Update must be downloaded and installed manually. To do this: go to Settings > Update & Security > Windows Update.
Click on the Check for updates button in Windows Update.
