Here is a guide on how to enable or disable auto-correction and check spelling in iPhone/iPad.
Auto-Correction tool matches with a built-in iPhone dictionary, your contacts and replacement words that you have created. It can be very helpful for common misspellings. iPhone will also note spelling errors as you type. Any misspelled words will be underlined in red.
Here is how to enable these two features:
Step 1: Open the Settings app.
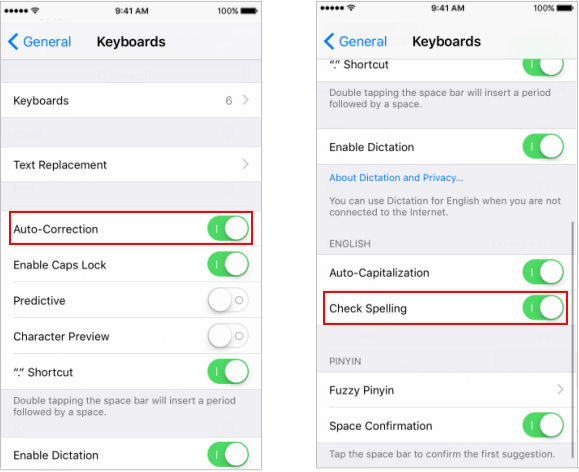
Step 2: Go to Settings > General > Keyboard > Keyboards.
Step 3: Turn on Auto-Correction, then scroll down to turn on Check Spelling.

The iPhone will correct commonly misspelled words automatically using the Auto-Correction and Check Spelling.

Leaving the Auto-Correction and Spell Checker feature on, in some cases, it becomes quite embarrassing. Since it can automatically replace the correct word with the odd phrase and the misspelled word. To fix this problem, you have to temporarily turn off auto-correction and check spelling, and then reset your keyboard to factory settings.
Step 1: Open the Settings app.
Step 2: Go to General > Keyboard > Keyboards.
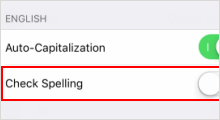
Step 3: Then turn off Auto-Correction, and then Spell Checking.

Step 1: Open the Settings app.
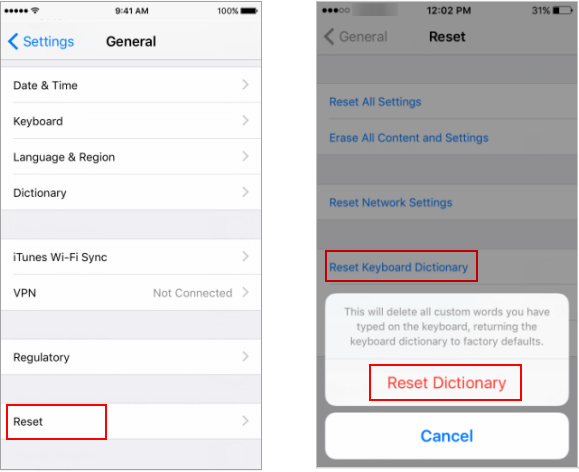
Step 2: Go to General > Reset > Reset Keyboard Dictionary.
Step 3: Enter your passcode, then confirm to reset keyboard dictionary.

Tips: With this setting, it will ease all custom words for the keyboard.