Sometimes you may need to transfer photos back and forth between your computer and iPhone. We have written before about how to transfer photos from iPhone to PC. Now, in this article, we will teach you how to do the opposite, namely how to transfer photos from PC to iPhone.
If you have important photos stored on your computer and you want to transfer them to your iPhone but have no idea how to do it, this article will help. We'll show you several simple and effective ways to transfer photos from PC to iPhone with or without iTunes. Without further ado, let's get started.
When it comes to managing iPhone files on your computer, the first idea that comes to mind is to use iTunes. iTunes does allow you to easily transfer photos from your PC to your iPhone with just one click. The steps are as follows.
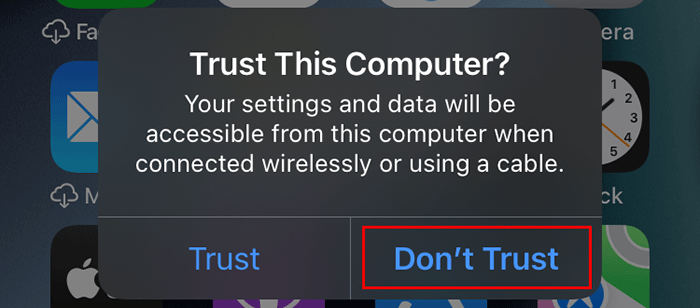
Step 1: Connect your iPhone to your PC using a USB cable, and then tap Trust on your iPhone if prompted.
Step 2: Open the iTunes app on your PC, then click the phone icon displayed in the iTunes window. You may need to click the phone icon again to display your iPhone's information.
![]()
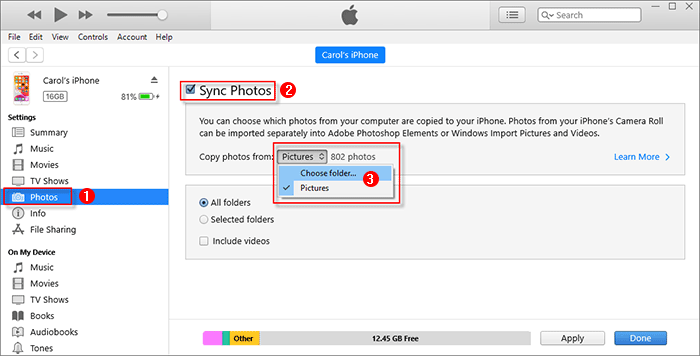
Step 3: When your iPhone is displayed in the iTunes window, select Photos on the left, and then check the Sync Photos check box on the right. After that, click the button next to "Copy photos from", then select "Choose folder" from the drop-down menu.
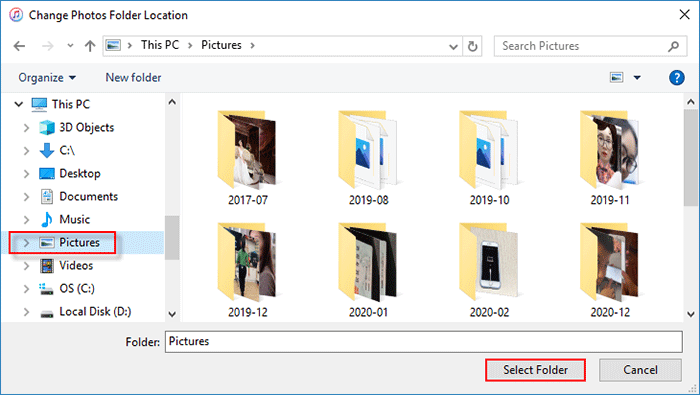
Step 4: When the "Change Photos Folder Location" dialog opens, select the folder on your PC that contains the photos you want to transfer to your iPhone, and then click Select Folder.
Step 5: Click Apply in the lower right corner of iTunes and iTunes will immediately start copying the photos from your PC to your iPhone.

Step 6: Keep the iPhone connected to the PC and wait for the photo transfer to complete. This will take a few minutes, depending on the number of photos to be copied. You can see the progress of the copy at the top of the iTunes window.

Disadvantage: iTunes is actually not an idea method to transfer photos from PC to iPhone. Because photos transferred from iTunes cannot be deleted directly on your iPhone. To delete the photos, you have to connect your iPhone to iTunes again, uncheck the Sync Photos check box and click Apply.
Since iTunes is not the best choice, let's check out several ways that you can transfer photos from PC to iPhone without iTunes.
With just one iCloud account, you can transfer photos between your computer and iPhone. To transfer photos from PC to iPhone, you just need to upload photos on your PC to iCloud.com, and then the photos will be automatically synced to your iPhone when it is connected to Wi-Fi.
1. Open iCloud.com using any web browser on your PC, then sign in with your Apple ID.

2. After you are signed in, click the Photos icon to access the iCloud Photos app.
![]()
3. Select Photos on the left, and then click the Upload Photos button in the upper right corner.

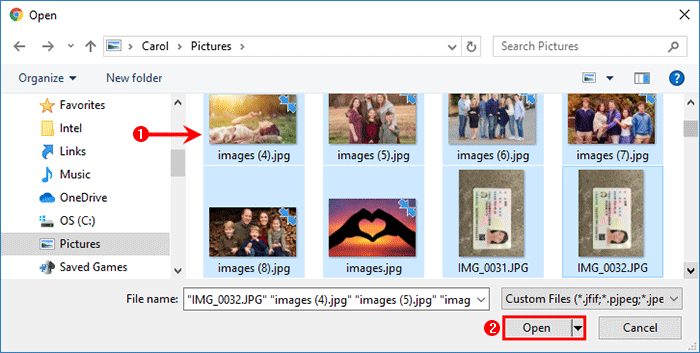
4. When the "Open" dialog appears, select the photos on your PC you want to transfer to your iPhone, and then click Open. The selected photos will be uploaded to iCloud.com.
1. Make sure your iPhone is connected to a stable Wi-Fi, then go to Settings > Apple ID name > iCloud > iCloud Photos and turn on iCloud Photos.
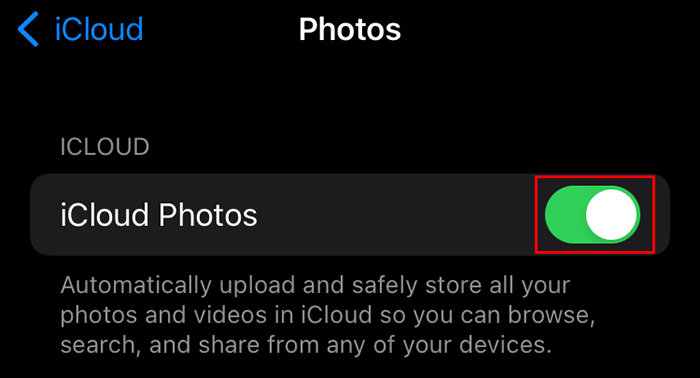
2. Open the Photos app on your iPhone and you will see that the PC photos you just uploaded to iCloud.com have been synced to your iPhone.
Another option is to install iCloud for Windows on your PC, and then follow these steps.
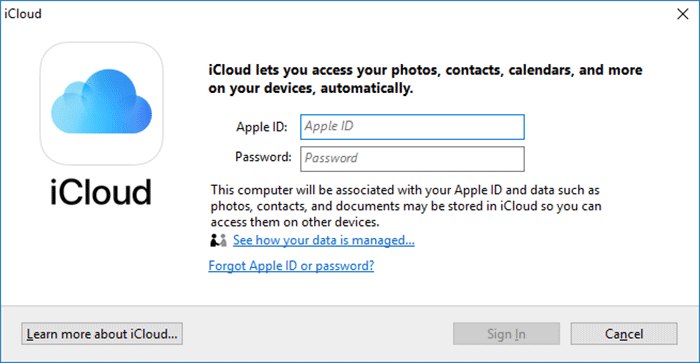
1. Open the iCloud app on your PC and sign in with your Apple ID (if not already).
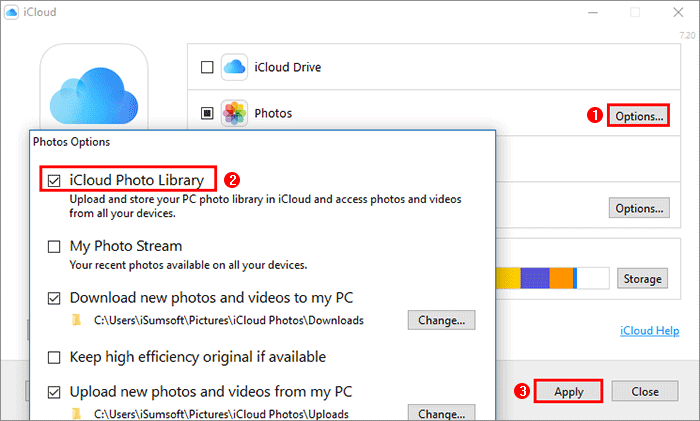
2. Click Options next to Photos, then make sure iCloud Photo Library is selected, and then click Apply. This will create an iCloud Photos folder in your Windows File Explorer, which allows you to transfer photos between your PC and iPhone.
1. Open File Explorer in your Windows PC, and then select iCloud Photos under This PC in the left pane. Then you will see two folders on the right: Downloads and Uploads.
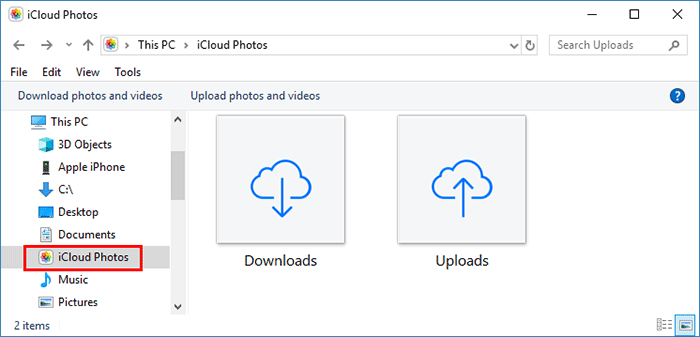
2. Open another File Explorer window and navigate to the folder that contains the photos you want to transfer to your iPhone. Select the photos you want to transfer and drag them into the Uploads folder of the iCloud Photos folder.
Once you have added the photos on your PC to the iCloud Photos folder, you can access these photos on all your Apple devices, including your iPhone. You just need to make sure that iCloud Photos in your iPhone Settings is turned on, and you will see the photos in your Photos app.
Besides Apple's iCloud, there are some other cloud storage services that make it easy to transfer photos between computers and mobile phones, and Microsoft OneDrive is one of them. Here is how to use OneDrive to transfer photos from your PC to your iPhone. All you need is a Microsoft account, and then follow the steps below.
1. Open File Explorer on your PC, and then click the OneDrive folder on the left pane.
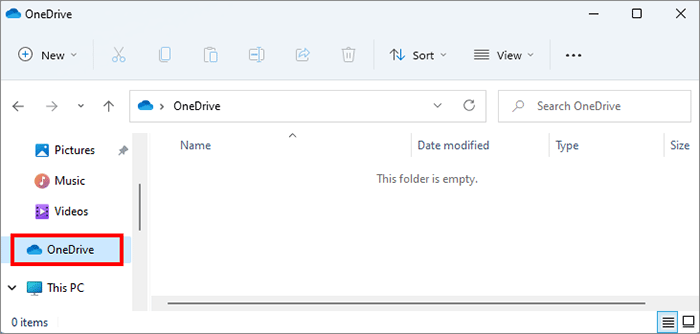
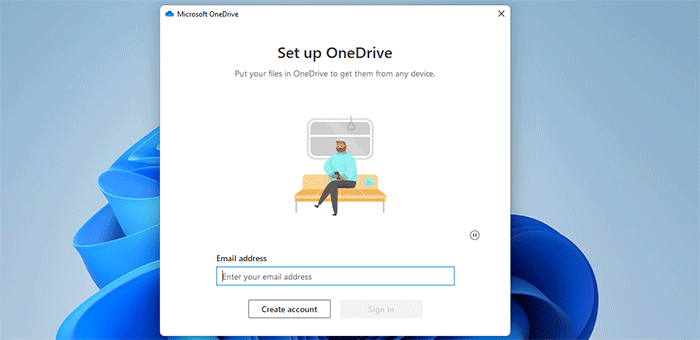
If you have not set up Microsoft OneDrive, you need to log in with your Microsoft account and follow the on-screen prompts to set up the OneDrive folder on your PC.
2. Open another File Explorer window and locate the photos you hope to transfer to your iPhone. Then copy the photos to the OneDrive folder.
1. Make sure the OneDrive app is installed on your iPhone. If it is not installed, just install it from the App Store.
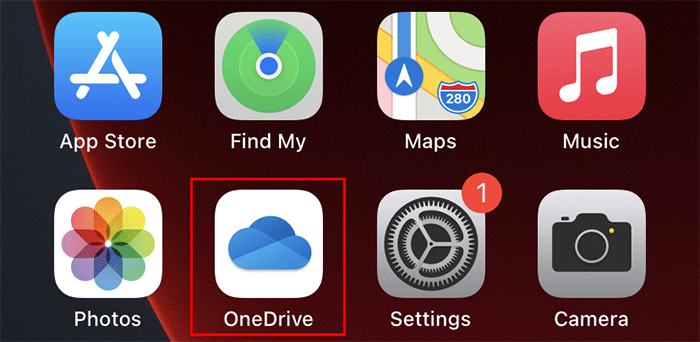
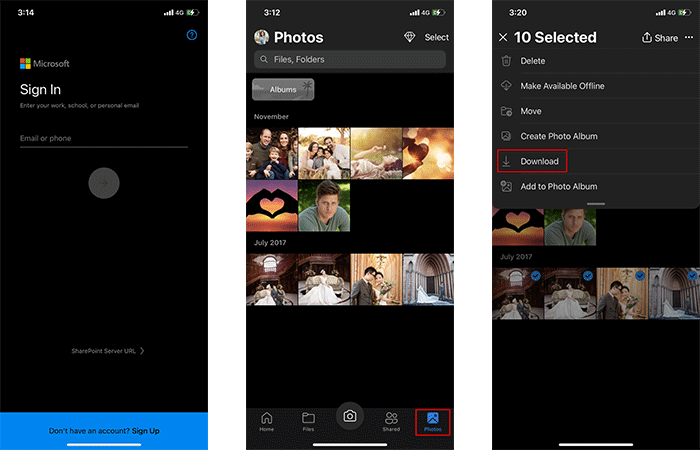
2. Open OneDrive on your iPhone and log in with your Microsoft account. After you log in, select Photos in the lower right corner and you will see the photos uploaded from your PC.
3: Tap Select in the upper right corner and check all the photos you want to save on your iPhone. Then click the three-dot icon in the upper right corner and tap Download in the drop-down menu to save the photos to your iPhone's Photos library.
Finally, you can use Google Photos to transfer pictures from your computer to your iPhone. All you need is a Google account, and then follow the steps below.
1. Open Google Photos page using a web browser on your PC, then click Go to Google Photos, and then sign in with your Google account (if you are not already logged in).

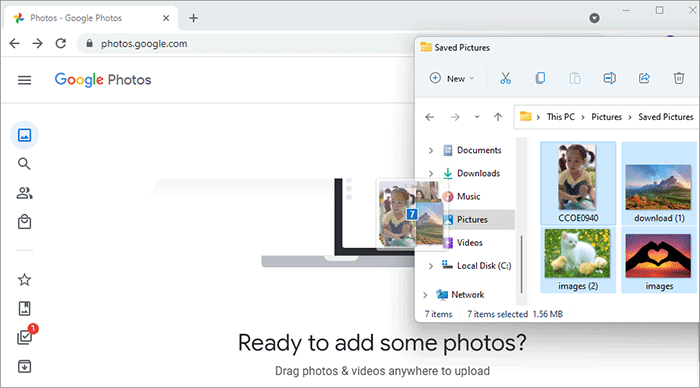
2. You will get into the Google Photos page. Open File Explorer on your PC and locate the photos you want to transfer to your iPhone. Then, drag and drop the photos anywhere on the Google Photos page to upload.
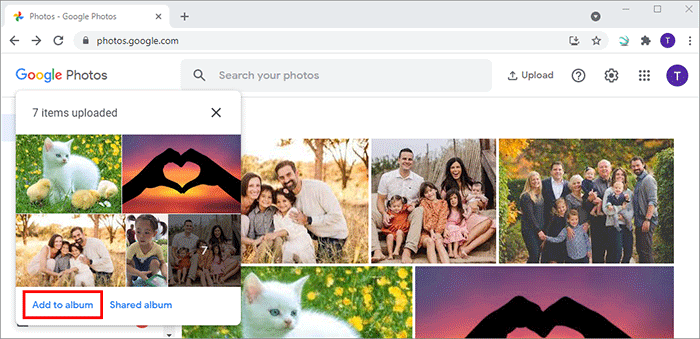
3. After the photos have been uploaded, you can click Add to album to add them to a new album.
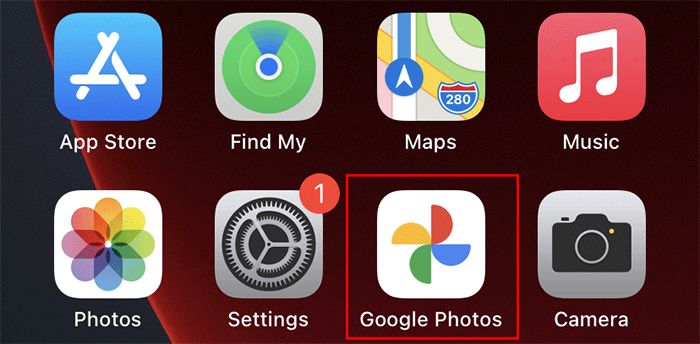
1. Make sure you have the Google Photos app installed on your iPhone. If it is not installed, just download it from App Store.
2. Open the Google Photos app, log in with your Google account, and then you will see the photos uploaded from your PC.
3. Download the photos and save it on your iPhone's Photos library. That's it!
So far, we have introduced four effective ways to transfer photos from PC to iPhone without iTunes. In a word, cloud storage services like iCloud, Google Drive, and OneDrive are the most effective ways. And they are all free to use. The only downside is that they provide only a few GB of free storage space. So, if your cloud storage space is full, it won't sync files on your devices, and you need to remove unnecessary files to make space.