iCloud Photo Library automatically keeps all your photos in its original size you take on your iOS devices to be uploaded to the iCloud, so you can access them on your iPhone, iPad, Mac, and Windows PC. This tutorial will show you how to set up iCloud Photo Library on all of your devices.
You can import photos or videos from your iPhone/iPad to iCloud Photo Library, as long as you turn on the iCloud Photo Library on iPhone/iPad.
Step 1: Open Settings app.
Step 2: Then tap iCloud tab.
Step 3: Tap Photos.
Step 4: Turn on iCloud Photo Library. Check Download and Keep Originals.
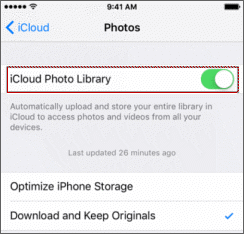
When connecting to wi-fi, the photos on your iPhone/iPad will upload to iCloud so that you can access them on all of your devices. The photos or videos that you keep in iCloud Photo Library, use your iCloud storage, you can get more iCloud storage for your Apple device if necessary.
You can transfer photos and videos from your iPhone/iPad to your Windows PC after enabling iCloud Photo Library.
Step 1: Download iCloud for Windows.
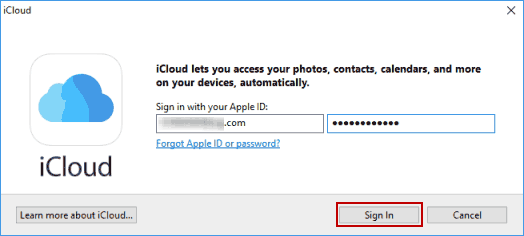
Step 2: Open iCloud, then sign in with your Apple ID.
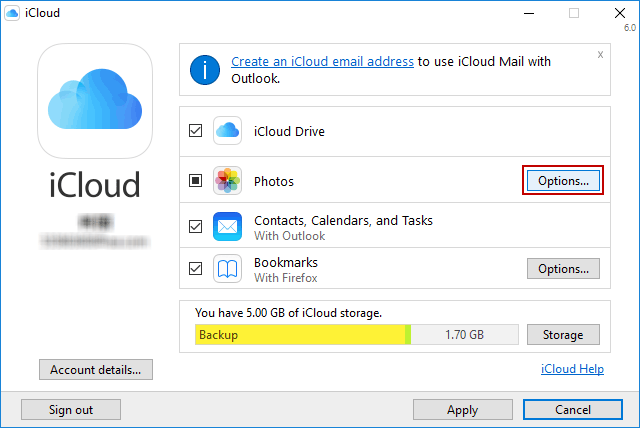
Step 3: Select Photos, then click Options.
Step 4: Select iCloud Photo Library.
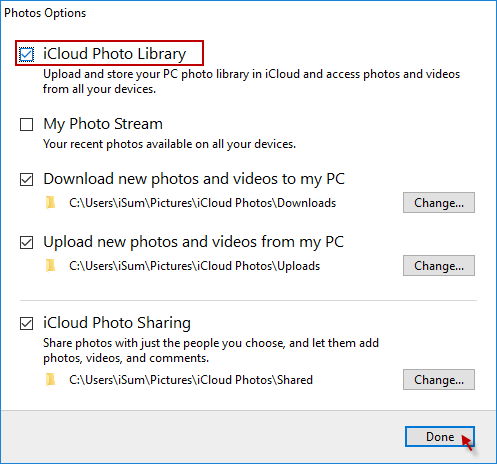
Step 5: Click Done, then click Apply.
After you turn on iCloud Photo Library, you can upload/download your photos and videos from your PC to iCloud Photo Library when you follow these steps:
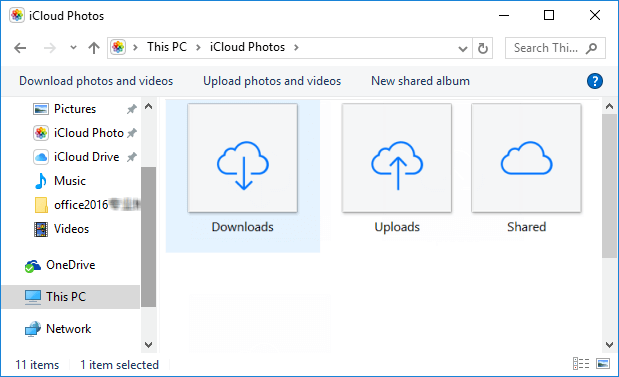
Step 1: Open a File Explorer window, click iCloud Photos.
Step 2: Click Upload Photos or Download Photos.
Step 3: Choose the photos and videos, you want to upload/download and click Open.
The steps below will show you how to setup iCloud Photo Library on Mac:
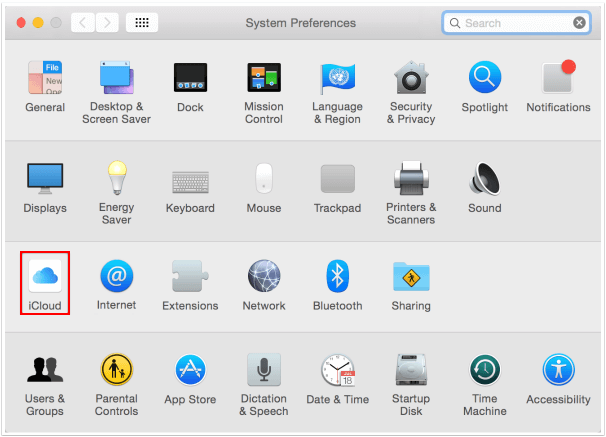
Step 1: On your Mac, go to System Preferences > iCloud.
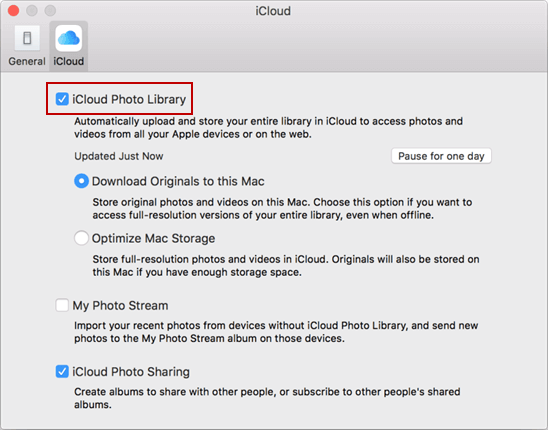
Step 2: Click the Options button next to Photos.
Step 3: Check to enable iCloud Photo Library. Then click Download Original to this Mac option.
More ways to transfer photos and videos, see Import Photos and Videos from iPhone/iPad to My Computer.