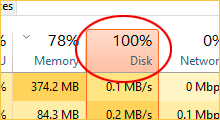
When we install an operating system, the C: drive is usually designated as the system disk. It's essential because it holds the operating system, virtual memory, and software cache, which can consume a lot of space. If the C: drive turns red, indicating low free space, it can cause issues like stuttering, restarts, or blue screens.

As we download software and files—most of which install on the C: drive—this space can fill up quickly. Windows will then alert you about the low space. So, how can you resolve this? Follow my tutorial to find out!
1. Insufficient Space Allocation
When partitioning your disk, you may not have allocated enough space to the C : drive. It is generally recommended to allocate 100-150 GB for the C : drive. If you install software on a dedicated partition, you can adjust this based on your needs, but it is advisable to keep at least 60 GB for the C : drive.
2. Accumulation of Temporary Files
Temporary system files and recycle bin files can take up significant space on the C : drive. If you haven't cleaned your C : drive in a long time, this accumulation can lead to insufficient space.

Understanding these reasons can help you choose an appropriate solution to address the problem. If your C : drive has more than 150 GB but is still running out of space, follow these steps to free up space and restore your C : drive to normal.
Step 1 Find and open the "Disk Cleanup" app on your PC.

Step 2 Choose your C : drive and click OK.

Step 3 Select the files you want to clean up on your computer and click OK.

Tips:
Step 4 Click the Delete Files option.

Then go back to check the status of your C : drive. However, if the capacity of your C: drive is still insufficient after cleaning, you can try to expand your C: drive. Follow solution 2 below to increase the capacity of your C: drive!
So how do you expand your C : drive? Disk management varies for different users. Here are three ways to handle different situations. First, right-click your Start button and open Disk Management. Then, follow the instructions based on your situation.


Step 1 Format the disk next to the C : drive (if there are important data on this disk, please back up your data before formatting).

Step 2 After formatting, delete this disk. Right-click the disk in Disk Management and click "Delete Volume."

Step 3 Right-click the C : drive and select "Extend Volume" to expand the capacity of your C : drive.


Step 1 Click here to download Disk Genius software.
Step 2 After installing Disk Genius, open it and find the recovery zone.

Step 3 Right-click it and select the "Delete Current Partion" option and Save all.

Step 4 Then right click the free space and click Allcoate free space to the next drive.

Step 5 Click start, once done, your disk management should look like Situation A. Then, format the disk and extend your C : drive.
This is an early disk partitioning method. If you find that your Disk Management looks like the image below, it can be a little troublesome. You may need to first back up and delete all the files in the green area of the disks, and then follow the steps in Solution A.

This article shares reasons and solutions for when the C: drive turns red and provides different solutions for various situations readers may encounter. By following this tutorial, you can manage your C: drive space more effectively and ensure your computer runs smoothly. Hope this article can solve your problems.