"After upgrading to Windows 10, I find the Sleep option disappeared from the Power options menu. Is there any way I can fix the problem and add the Sleep option to the Power menu?"
By default, the Windows 10 Power button menu (or Shut down menu) contains Sleep, Shut down, and Restart options. If the Sleep is missing from the Power options menu, it would be not convenient when you want to force your computer into Sleep mode. In this post, I will show you how to add Sleep option to Power menu in Windows 10.
Step 1: Open Windows 10 Control Panel by pressing Win + X and then selecting Control Panel.
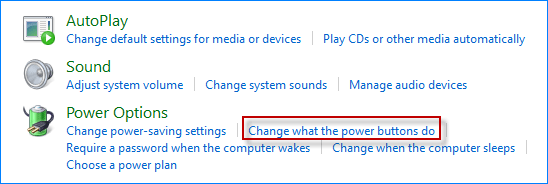
Step 2: Click "Hardware and Sound", and then click "Change what the power buttons do" under "Power Options" section.
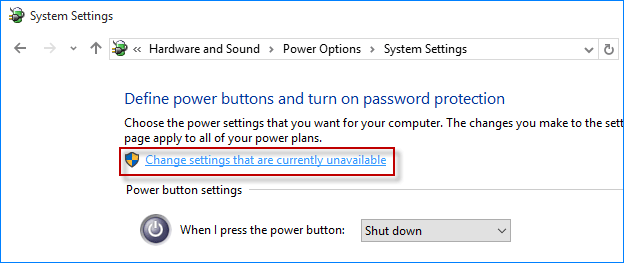
Step 3: Click the "Change settings that are currently unavailable" link.
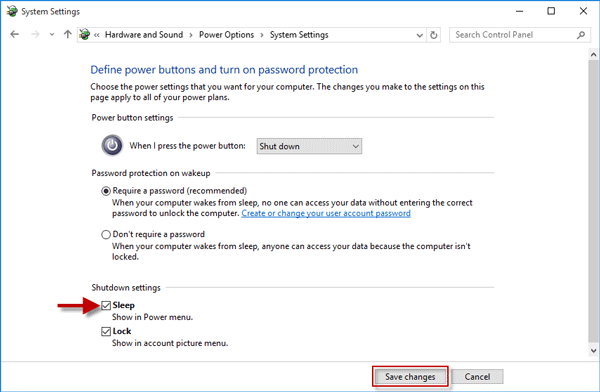
Step 4: Check the Sleep box under the "Shutdown settings" section, and click "Save changes" button. That's it. Changes will take effect immediately.
Step 5: Now bring up the Start menu, click the Power button, and check if the missing Sleep option is back to the Power options menu.
Step 1: Open the Local Group Policy Editor, through typing "gpedit.msc" (without quotation marks) in the Start menu Search box.
Step 2: Expand "Computer Configuration", expand "Administrative Templates", expand "Windows Components", and then click on "File Explorer". With the "File Explorer" selected on the left-side pane, locate the setting labeled "Show sleep in the Power options menu" on the right-side pane, and double-click it to configure it.
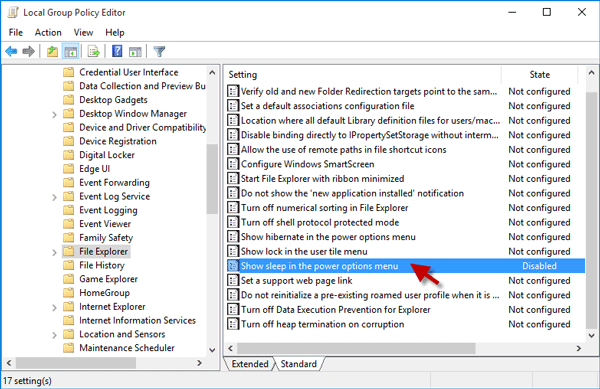
Step 3: Select Not Configured or Enabled, and click Apply followed by OK.
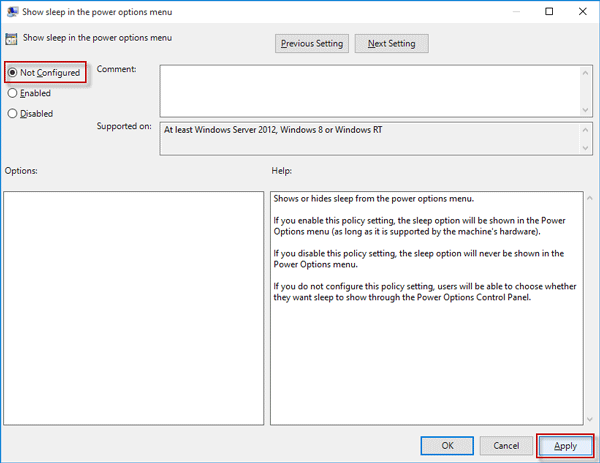
Step 4: Changes would take effect immediately. You can click the Power button in the Start menu to check if the Sleep option is in the Power menu. If you find the Sleep option is still missing, continue Step 5.
Step 5: Navigate to Computer Configuration > Administrative Templates > System > Power Management > Sleep Settings. With the Sleep Settings selected, locate the "Allow standby states (S1-S3) when sleeping (plugged in)" and "Allow standby states (S1-S3) when sleeping (on battery)". Double click each of them.
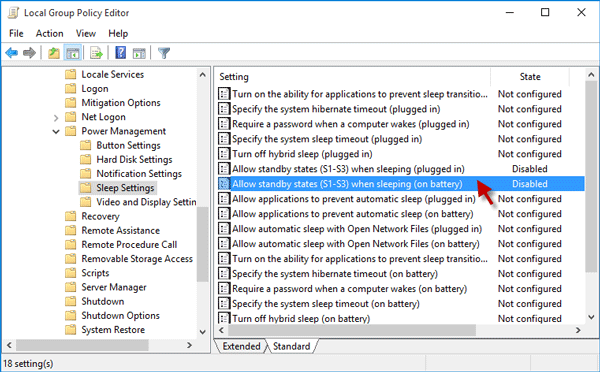
Step 6: Set each of them to Not Configured, and click Apply followed by OK.
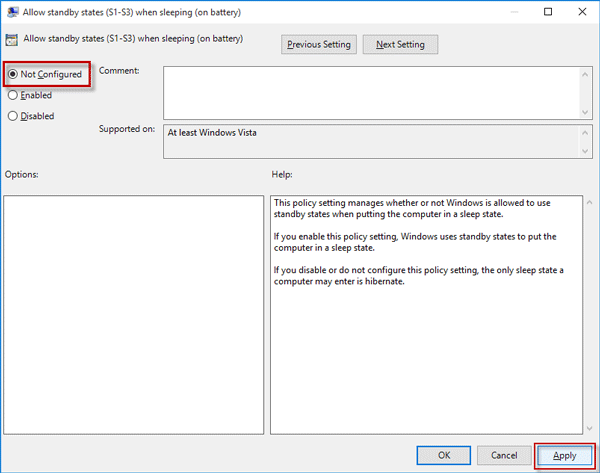
Step 7: Restart the Start menu, click the Power button and check if the missing Sleep option is back to the Power menu.
Notes: Using the two methods above, if the Power option is still missing from the Power options menu, the reason probably has to do with the display driver on your computer. Make sure you have installed the latest display driver from your computer's manufacturer website.