iOS 11 comes with a screen recording tool built-in. It takes a short video of your screen activity. This guide will show you how to use Screen Recording on iPhone or iPad.
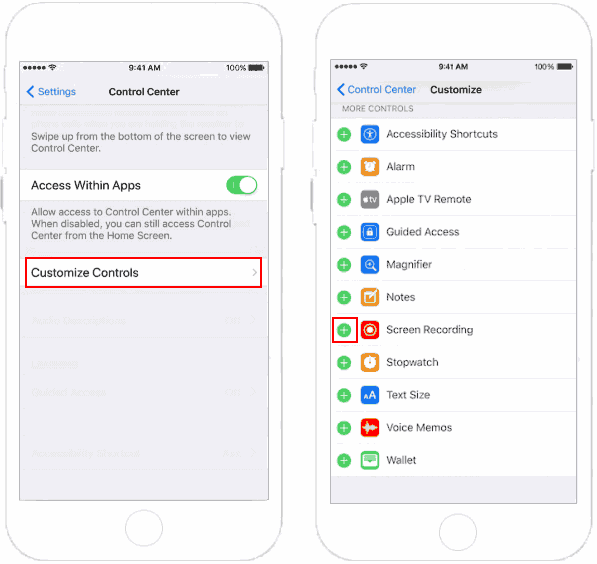
Step 1: Open Settings app.
Step 2: Tap on Control Center.
Step 3: Tap Customize Controls, which will take you to the Customize menu.
Step 4: Tap the green plus button next to Screen Recording under the More Controls section.

Now, Screen Recording should be included in Control Center.
Turn on No Disturb Mode or set your device into Air Plane Mode can stop visual interruptions in your recording.
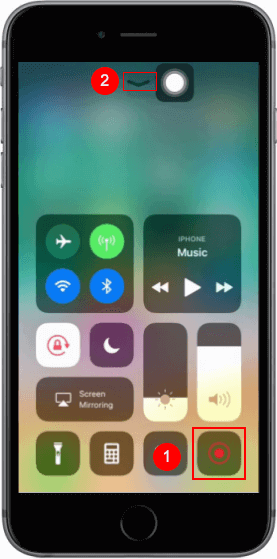
Step 1: Swipe up from the bottom of the screen to access Control Center.
Step 2: Tap on Recording icon, it will change from white to red. It starts recording.
Step 3: Exit Control Panel by tapping the down-facing arrow at the top of the screen.

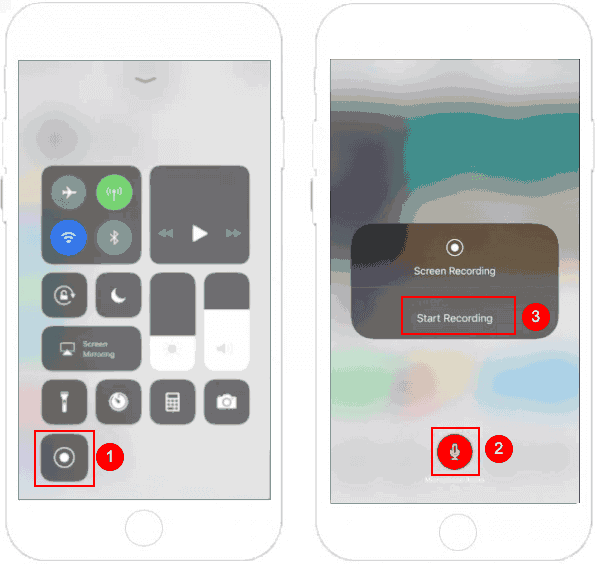
Tips: To record the screen with sound, simply touch and hold on the recording button (Apply 3D Touch). Then, tap on the microphone icon in the shortcut menu (Button with turned Red). Tap Start Recording to start thing off.

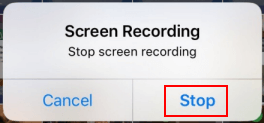
Step 4: Tap on the blue bar of the screen. A popup will appear on the screen. Tap on Stop button. The video file will be saved in the Photos app.

The screen recording on iOS 11 records everything you do, it'll also capture those moments when you close Control Center or stop a recording. Good news is that you can trim the first and last seconds of the video in the Photos app.