"Mouse and keyboard not working after installing drivers or software, or reinstalling the system?" The most common causes are incompatible drivers or software, driver conflicts or installation errors. This post will show you an effective and quick way to solve mouse and keyboard not working in Windows 10.

Step 1: Plug a USB driver into another computer which is running properly.

Step 2: Type "Create a recovery drive" in the search box on the dock, then select the best match.

Step 3: Enter Yes to allow this app to make changes to your device.

Step 4: Uncheck "Back up system files to the recovery drive", then click Next.

Step 5: Select the connected USB driver and click Next.

Step 6: You will be prompted that all the data on the drive will be erased, click Create to proceed.

Step 7: The recovery drive is being created.

Step 8: Click Finish to close the window.

Step 1: Reconnect the USB driver to the computer where the keyboard and mouse are not working.
Step 2: Reboot your computer, during which press F8/F12 key quickly to access Boot Menu, then use Up or Down key to select the USB driver and press Enter for WinRE system. Click here to check your computer's hotkeys for Boot Menu.

Step 1: Select US > Select Troubleshoot > Command Prompt, and you will be brought to command prompt.

Step 2: Type diskpart and press Enter.

Step 3: Type list volume and press Enter, which will list all the volumes in the computer. As shown in the panel, volume Windows 11 is labeled as C.

Step 4: Type exit and press Enter.

Step 5: Type C: and hit Enter.

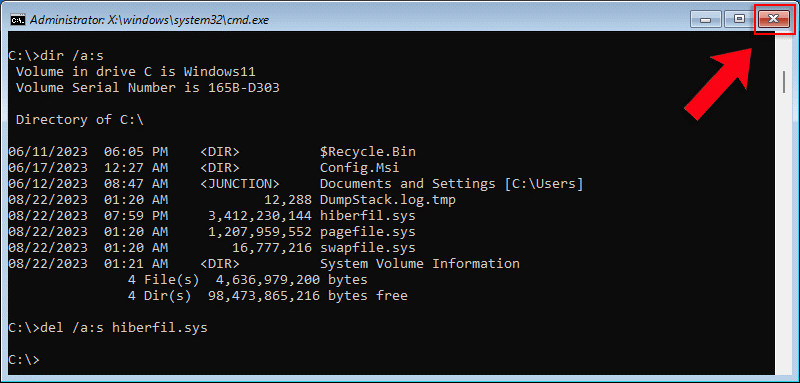
Step 6: Type dir /a:s and hit Enter, then locate hiberfil.sys.

Step 7: Type del /a:s hiberfil.sys and press Enter to delete it, then close the window.

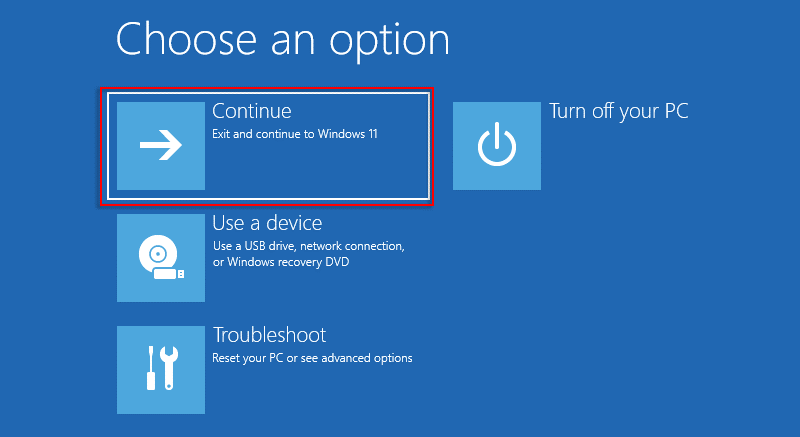
Step 8: Select Continue to access the current Windows system, then restart your computer to fully repair your keyboard and mouse.
