Have the Internet connection problem? Facing DNS error? Unable to load the webpage? Maybe you need to flush DNS Cache. If you are running into a lot of Page Not Found errors and you know you are connected to the Internet, you could try flushing your DNS cache to have your computer request new information. Clearing the DNS Cache to some extent can fix your internet connection problem. Here's how you can flush the DNS cache on Mac and Windows PC.
Mac users need to run the Terminal command to flush the DNS cache, but the command will vary depending on the macOS version.
Step 1: Open the terminal application.
Open the launchpad from the Dock or use the keyboard shortcut Fn + F4. Enter "terminal" in the search box at the top. When the Terminal icon is displayed, click it.
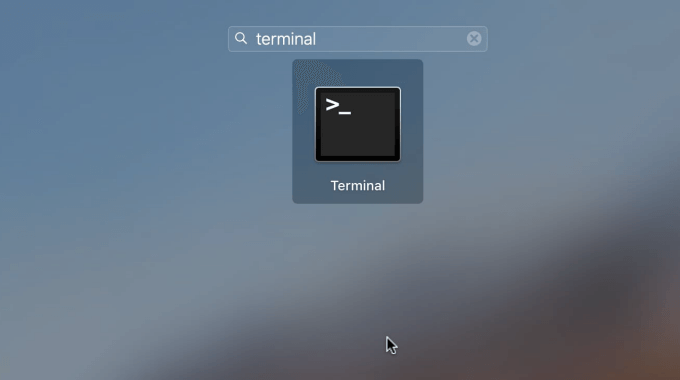
Alternatively, you can press Command + Space to open Spotlight and search for "Terminal". Press Enter to open it.
Step 2: Enter the following command syntax as you need, and then press Enter key to process.
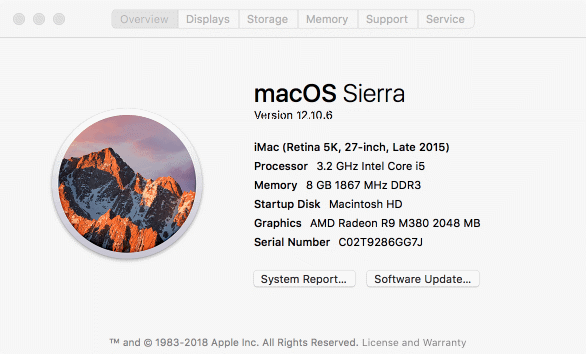
In my case, due to my computer is an iMac running macOS Sierra, I use the following command:
sudo killall -HUP mDNSResponder;sudo killall mDNSResponderHelper;sudo dscacheutil -flushcache;say MacOS DNS cache has been cleared
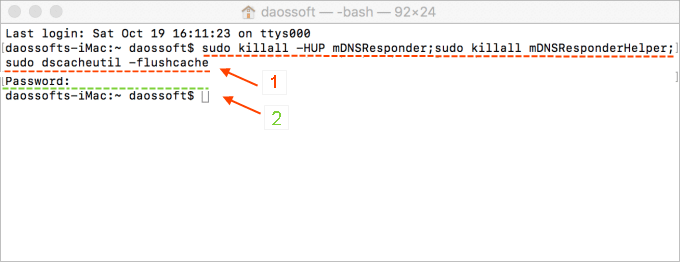
From OS X Lion to macOS Sierra, most of the latest versions of macOS use the following commands.
sudo dscacheutil -flushcache;sudo killall -HUP mDNSResponder
If you are using OS X 10.10.1, 10.10.2 or 10.10.3, you will need to run the following command:
sudo discoveryutil udnsflushcaches;sudo discoveryutil mdnsflushcaches
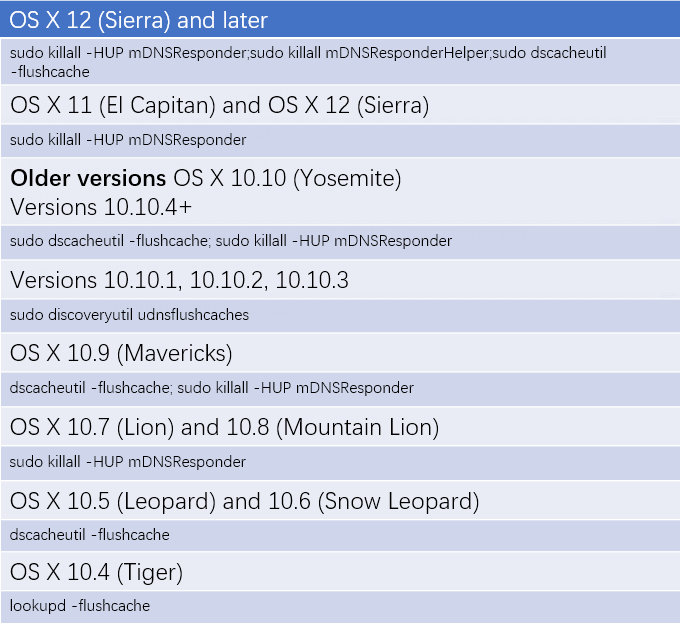
Step 3: Enter the system password and press Enter / Return.
You won't see a success message for any of the commands, but you can check the site in question and see if it resolves the issue. If not, you must proceed with additional troubleshooting methods.
In Microsoft Windows, you can use the ipconfig /flushdns command in the command prompt to refresh the local DNS cache. When you see that the Windows IP configuration successfully refreshes the DNS resolver cache or successfully refreshes the DNS resolver cache message, it knows it works. You can review the following detailed steps:
Step 1: Open a Command Prompt as administrator.
Click the Windows logo in the lower left corner of the screen. In the search box, type "cmd" and then select Run command prompt as administrator in the results.
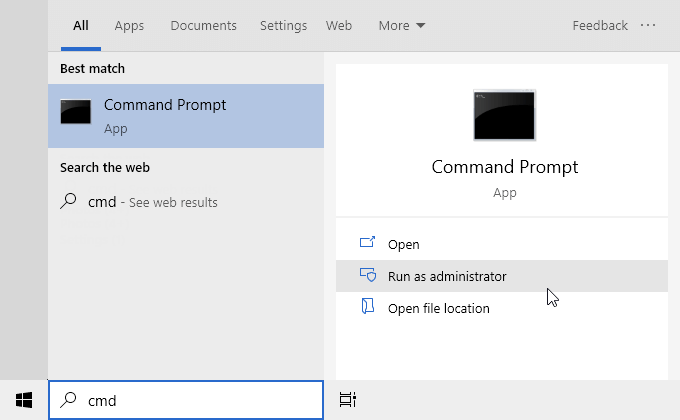
Step 2: In the Command Prompt window, type the following command:
ipconfig / flushdns
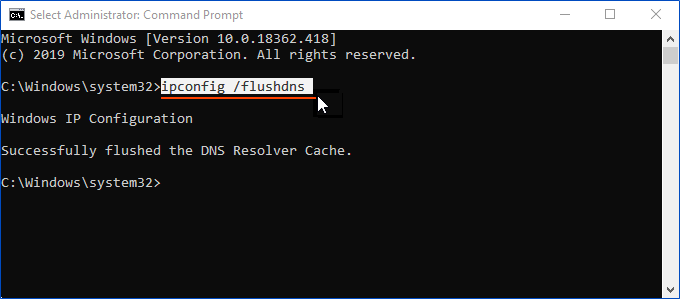
After pressing Enter, the DNS resolver cache will be cleared immediately. Windows will begin to create new and up-to-date DNS records for any websites you visit later.