Updating BIOS help resolve bugs, fix hardware issues, update security patches and improve system stability. Depending on the manufacturer, there are several ways to update the BIOS in Windows 10: Using a bootable USB drive, BIOS Installer, or WinFlash. OEM manufacturers such as Lenovo, HP, Dell, Asus, and Acer have utilities that can help you easily update BIOS, firmware, and drivers. Search for your computer model and download the BIOS upgrade app from the official website. This is the safest way to update the BIOS.
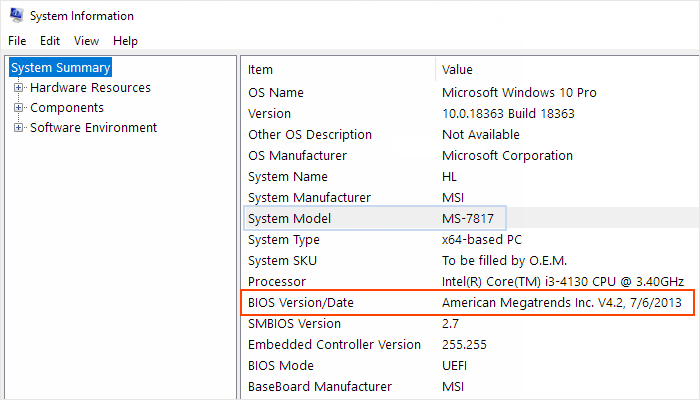
1) Check the system model and BIOS version from the System Information.
You have to type msinfo32 into the search and press Enter. Once the System Information Tool opens, you can check your system model and the BIOS version number.
2) Make sure your computer is plugged into a reliable power source and keep it connected during the update process.
3) If you are using BitLocker to encrypt your hard drive, disable it, to allow the BIOS to install.
4) Also, temporarily disable Real time protection in Windows Defender.
5) Plug a blank USB flash drive into your computer.
Step 1: Open your BIOS manufacturer's support site and search for your motherboard model in the "Find Product" box. Generally, the easiest way to do this is by typing your computer's manufacturer name, your computer's model name, and "BIOS" into Google and then selecting the proper link.
Step 2: Find the BIOS update file and download the latest available BIOS update to the Desktop.
Step 3: Extract the the downloaded .zip file and copy the BIOS update file to a bootable USB flash drive.
Step 1: Restart your PC. At the MSI logo screen, press the Del key to enter the BIOS setup.
Step 2: Select USB Storage device from the setup menu and press Ente to start the updating process.
Step 3: Follow the onscreen instructions and complete the update process.
1. Go to the Acer support site. Search for your product by Model, select BIOS/Firmware, and click the Download link for the BIOS update file that you want to download.

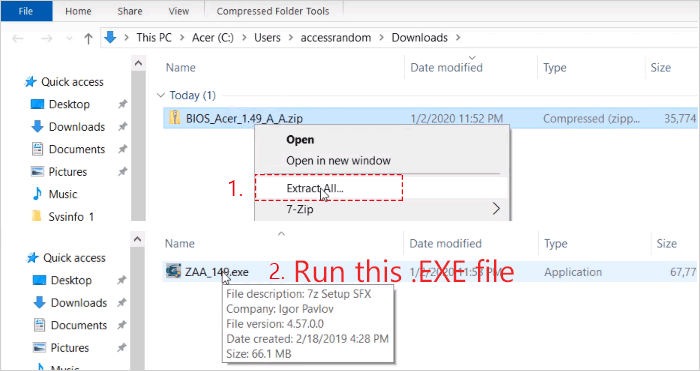
2. Once the download is complete, you can see the file itself is zipped, right-click and Extract All to a location of your choice. After the extraction is completed, double-click it, revealing the executable file that will actually perform the upgrade.
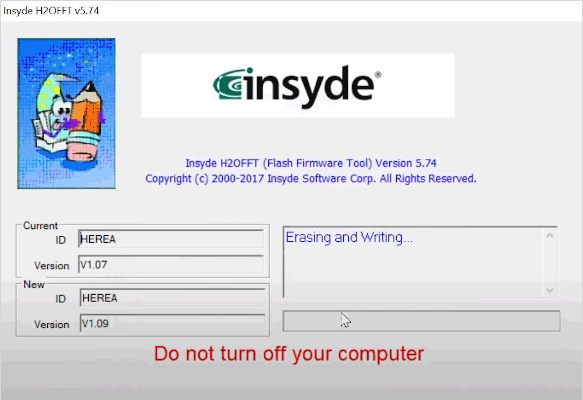
3. The computer will auto-reboot and continue the BIOS update process. Make sure the AC adapter is plugged in when updating BIOS. Also, do not force shut down during the update process to prevent any issues.
4. Once the update is complete, you'll be presented with a blank screen, then the familiar Acer logo will appear, and then, finally, Windows.
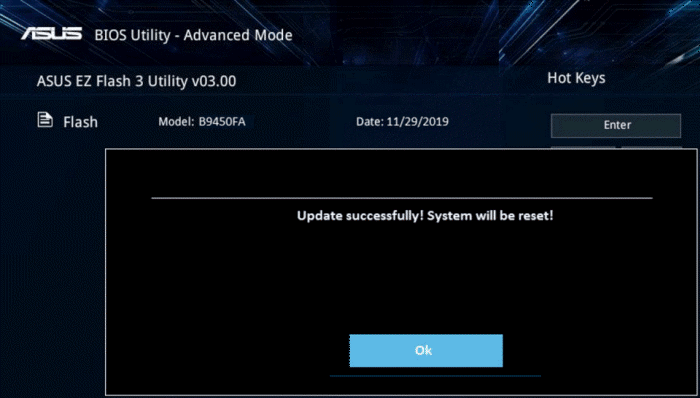
1. Go to the ASUS support site with your laptop's model name.
2. Search for BIOS Installer which is located in the BIOS category. Please click Download.

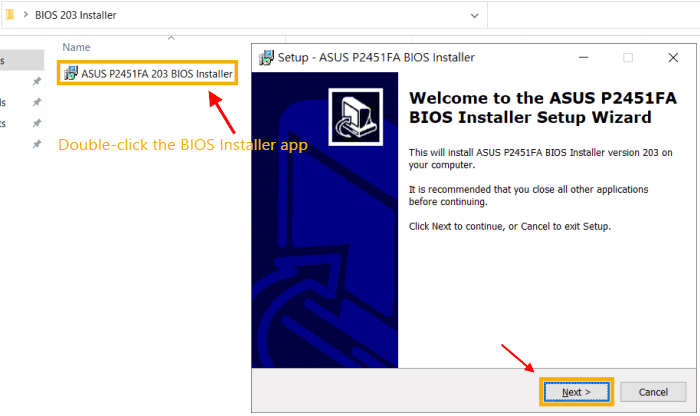
3. Extract the downloaded BIOS Installer file. Go to the folder and double-click the BIOS Installer application.
4. The setup wizard will guide you to start the BIOS update process. Click Next.
5. The computer will automatically restart and complete the installation of the BIOS update. Make sure the AC adapter is plugged in when updating BIOS. Also, do not force shut down during the update process to prevent any issues.
6. After the computer gets into Windows that means the BIOS has been successfully updated.
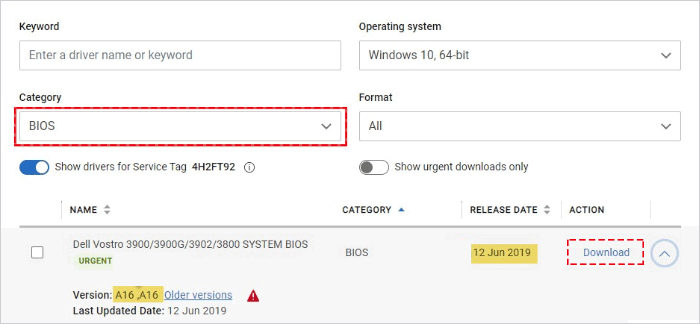
Step 1: Go to Dell Drivers & Downloads page, and enter the serial number and then start searching.
Step 2: Scroll down to the search results, and select BIOS under Category. Then it will display the available BIOS version for you. Check its RELEASE DATE and Version to make sure it's the new version compared to your current one, and click Download.
Step 3: Open the downloaded file. Follow the on-screen instruction to start the updating process.
Step 1: Go to HP Customer Support page, and select your product.
Step 2: Enter the serial number or your laptop's model name and start searching.
Step 3: Expand the BIOS section, and check its version and date then click Download.
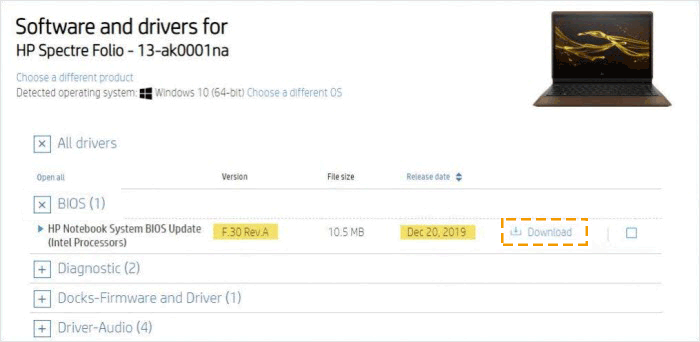
Step 4: Double-click the downloaded BIOS update file to start the installation.
Step 5: On the InstallShield Wizard window, click Next.
Step 6: Select Update, and then click Next to prepare the update.
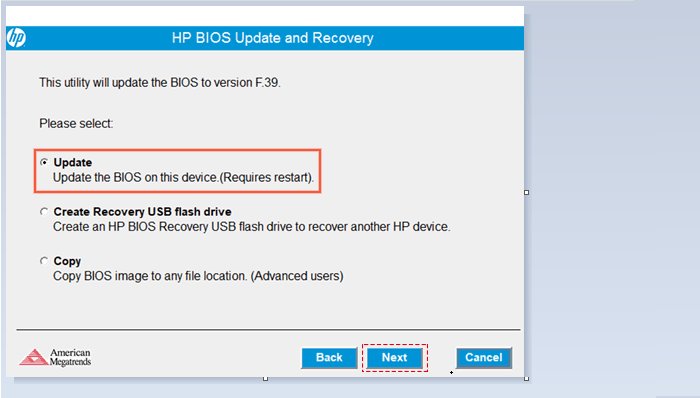
Step 7: Click Restart Now to install the update.
Step 8: On the HP BIOS Update screen, click Apply Update Now, or wait for the update to start automatically.
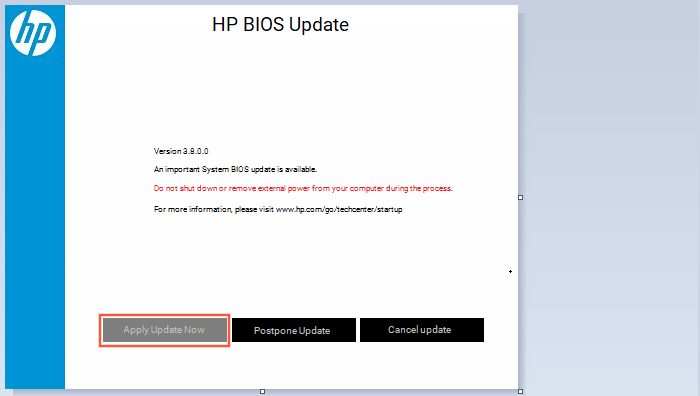
Step 9: Wait while the BIOS update installs. Clicking Continue Startup.
Step 10: When the lock screen displays, sign in to your computer after a successful BIOS update.
1. Open Lenovo support website.
2. Enter the system machine type or product name.
3. On the product page, click Drivers & Software.
4. Filter by BIOS/UEFI, and choose the corresponding OS information.
5. Download and install the latest BIOS to the Windows Desktop.
6. Right-click the BIOS flash package and choose Run as administrator.
7. Windows will display a self-extracting window, click the Install button.
8. Click the Flash BIOS button.
9. A warning window will be displayed to remind the user to connect the system power outlet and to provide other flash information.
10. Click the OK button. The BIOS update flashing program will run automatically.