
'There was an error connecting to the Apple ID server' error occurs when you cannot sign in with your Apple ID on your iPhone. Also, if you try logging into your Mac with your Apple ID, you might experience the 'error connecting to Apple ID server'. Don't worry! iSumsoft will guide you to fix the 'There was an error connecting to the Apple ID server' on iPhone and Mac.

Knowing the cause is the best way to fix the problem. Here are some common reasons why you cannot connect to the Apple ID server.
• Poor Internet connection. A weak network is mainly to blame for the Apple ID server error, you can try to use stable Wi-Fi or cellular data instead.
• Incorrect date & time. If your system's date and time do not match the current time, you may also experience problems connecting to the Apple ID server.
• System issues. There are some system issues on your devices that need to be repaired.
'There was an error connecting to the Apple ID server' on iPhone may be caused by system corruption. You can use iSumsoft iOS Refixer to perform system repair to fix this issue. You can not only use this effective tool to repair the system but also use it to easily upgrade or downgrade the iOS version.

iSumsoft iOS Refixer
Let me show you how to use iSumsoft iOS Refixer to fix Apple ID server error without data loss.
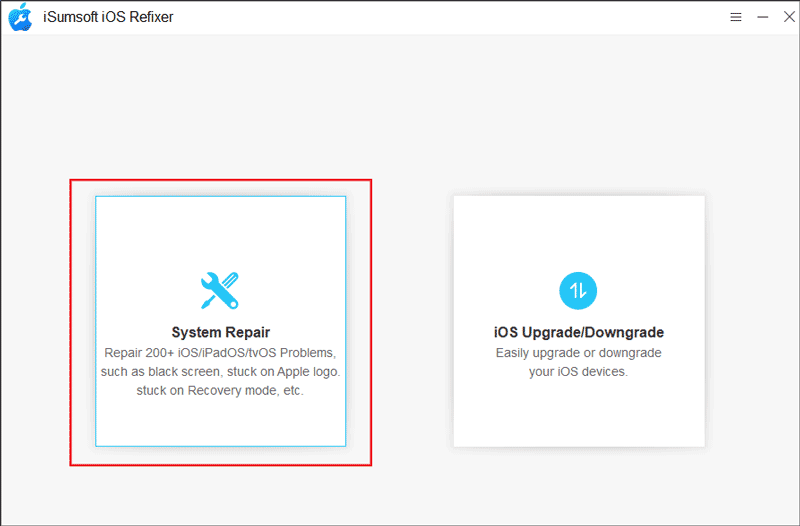
1. Open iOS Refixer;
2. Select System Repair and connect your iPhone to your PC with a USB cable;
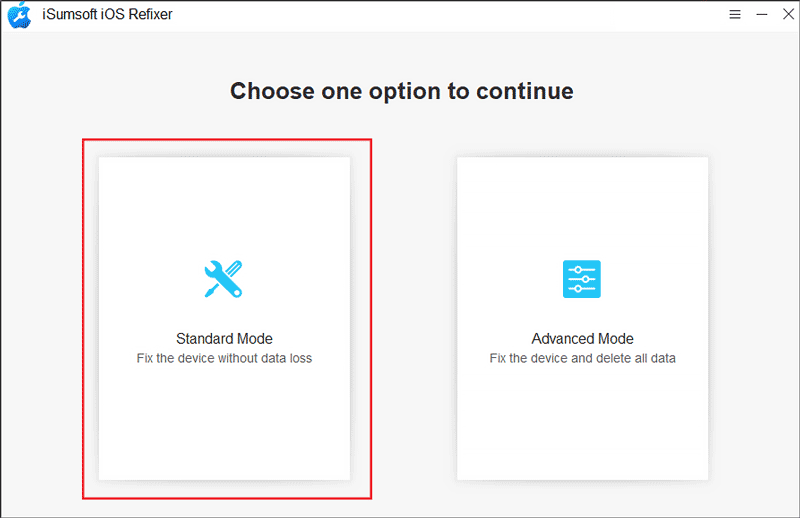
3. Select Standard Mode; (PS: If you choose Advanced Mode, you will get deep repair but erase all the data on your iPhone.)
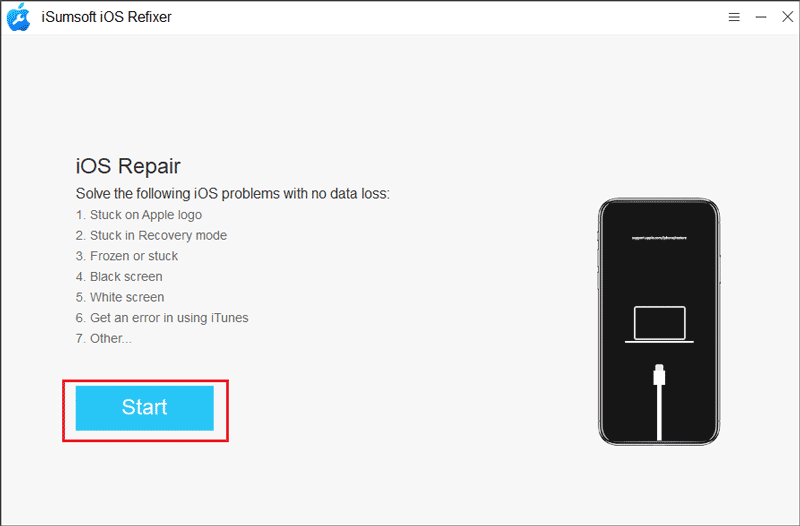
4. Click Start;
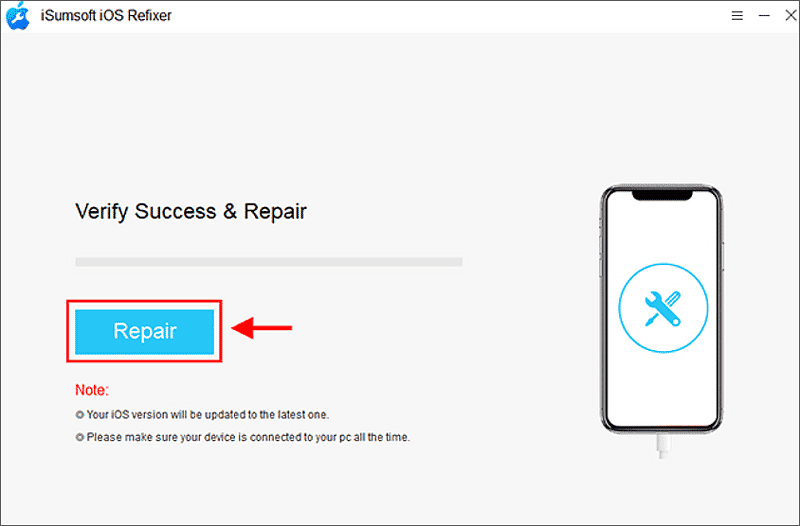
5. Download the firmware package;
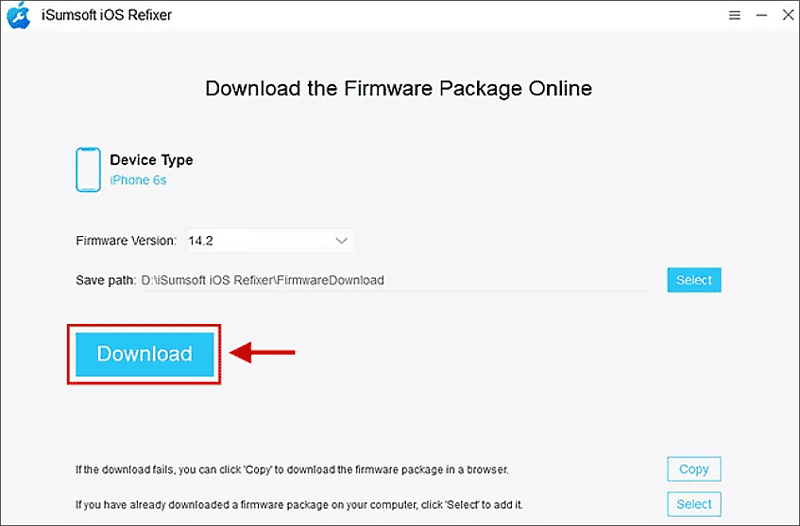
6. Click Repair to begin the repair process. When you see “Repair Successfully”, check if ‘There was an error connecting to Apple ID server on iPhone’ has been fixed.
A restart can help resolve most issues, so you can try restarting your iPhone first to resolve the "There was an error connecting to the Apple ID server". If a normal restart does not work, you can force a restart of your iPhone.
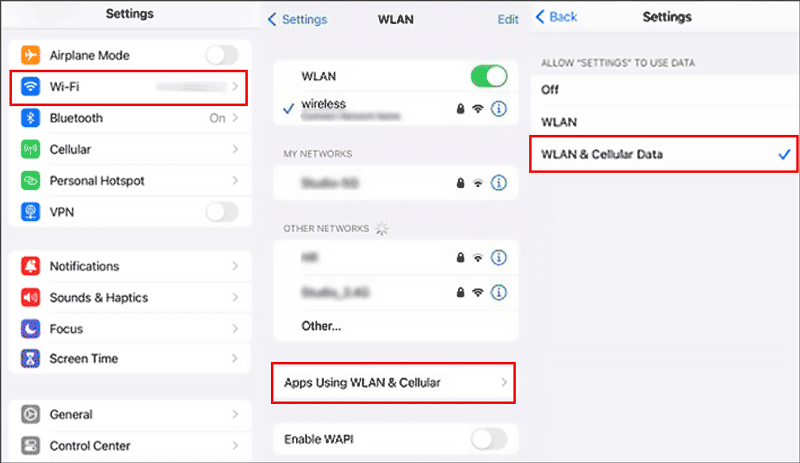
There is a possibility that your settings app isn't networking. You can follow the steps to check if the WLAN & Cellular feature is enabled.
Step 1: Go to Settings and click the WLAN feature;
Step 2: Click Apps Using WLAN & Cellular;
Step 3: Select Settings and tap WLAN & Cellular Data;
Due to the Poor network connection, you may not connect to the Apple ID server. Go to speedtest website to check the internet speed. If it is weak, you can try to change to another stable Wi-Fi or cellular data. Furthermore, you can reset network settings for a better connection.
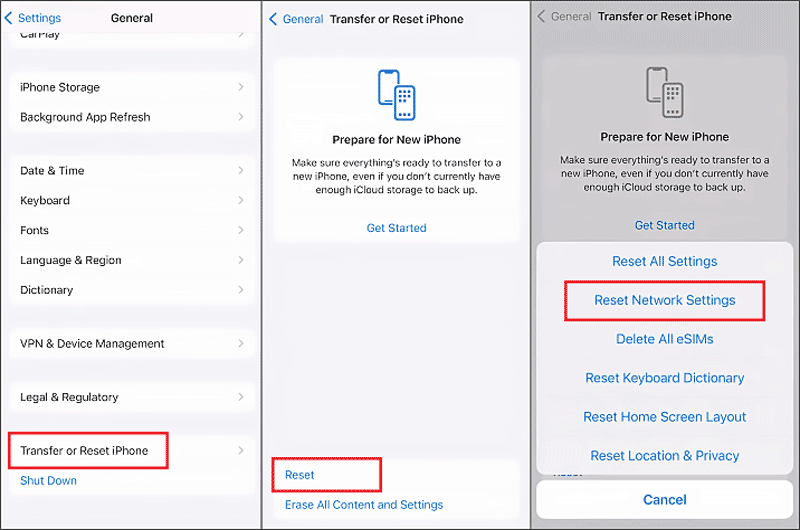
Steps to reset network settings:
Step 1: Open Settings app;
Step 2: General → Transfer or Reset iPhone → Reset → Reset Network Settings; Then log in to Apple ID again to check if the error connecting to the Apple ID server has been repaired.
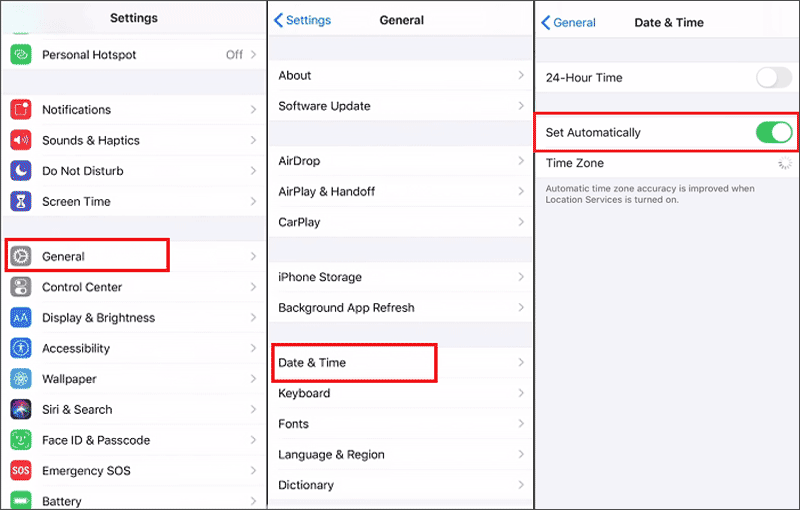
'There was an error connecting to the Apple ID server' may also be caused by an incorrect Date & Time. If your iPhone hasn't been in use for a long period, you can do this.
Step 1: Go to Settings → General;
Step 2: Click Date & Time;
Step 3: Toggle the "Set Automatically" option to off, then toggle it back to on;
Maybe your Apple ID login expired, you can try re-logging the Apple ID to troubleshoot the 'error connecting to Apple ID server'.
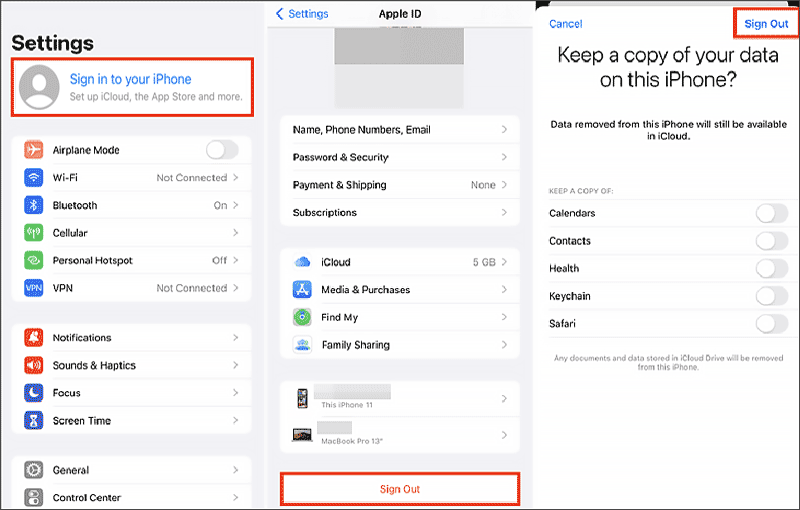
Step 1: Go to Settings and tap on your profile;
Step 2: Scroll down to the bottom;
Step 3: Click Sign Out, and enter your Apple ID and password to turn off Find My;
Step 4: Tap Sign Out again;
Step 5: Then tap your profile again to log in to Apple ID;
To fix ‘There was an error connecting to the Apple ID server’, you can use a new Apple ID passcode to log in.
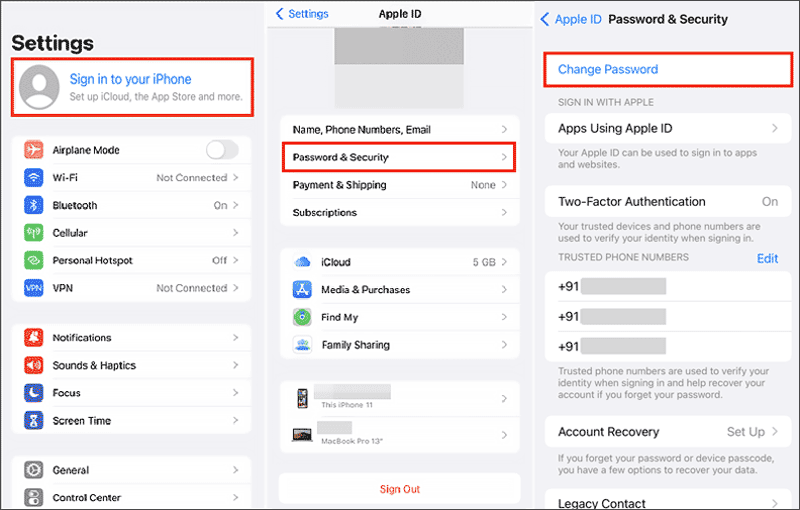
Step 1: Open Settings → Tap your profile;
Step 2: Tap Password & Security → Change Password;
Step 3: Enter the old passcode and then enter the new passcode;
Step 4: Sign in to Apple ID with the new passcode;
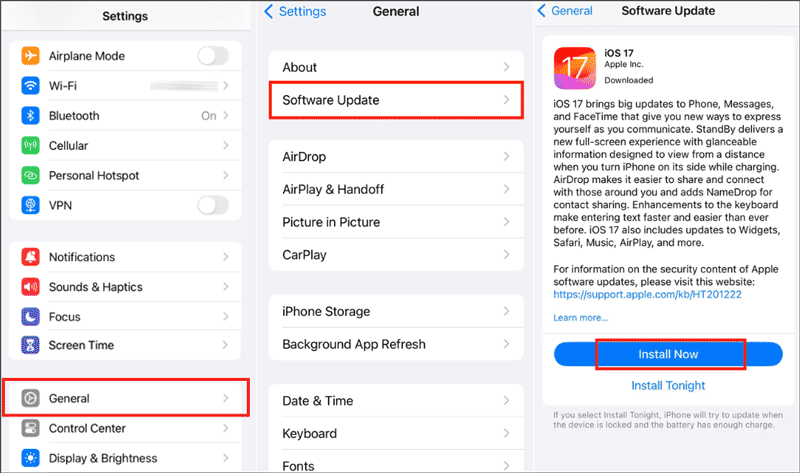
You can fix the iPhone won’t connect to the Apple ID server by updating the iOS version. Here are the steps to run the software update:
Step 1: Go to Settings → General;
Step 2: Software Update → Download and Install → Install Now;
Fixing ‘There was an error connecting to Apple ID server’ on Mac is almost the same as the methods for iPhone. The troubleshooting steps are detailed in this part.
You can click the Apple icon in the upper left corner and click Restart. If your Mac still won't restart, you can press Ctrl + Command + Power at the same time to force restart your Macbook. Then, log in using your Apple ID to see if the problem connecting to the Apple ID server has been resolved.
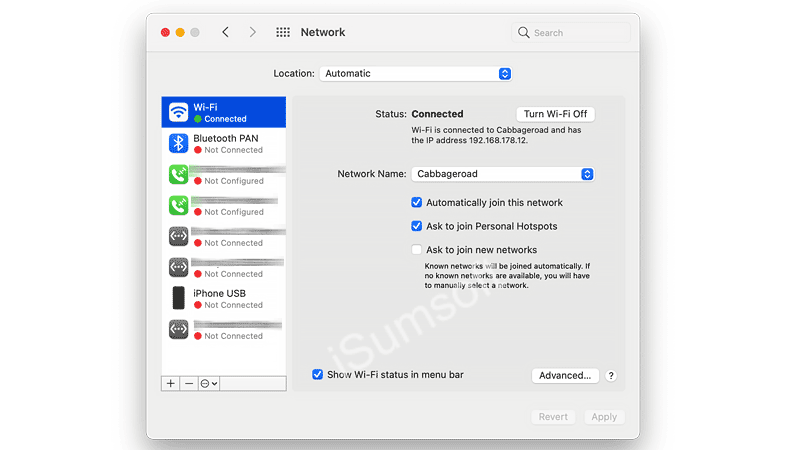
Step 1: Click the Apple icon → Choose System Preferences → Network;
Step 2: Click on another stable Wi-Fi to connect;
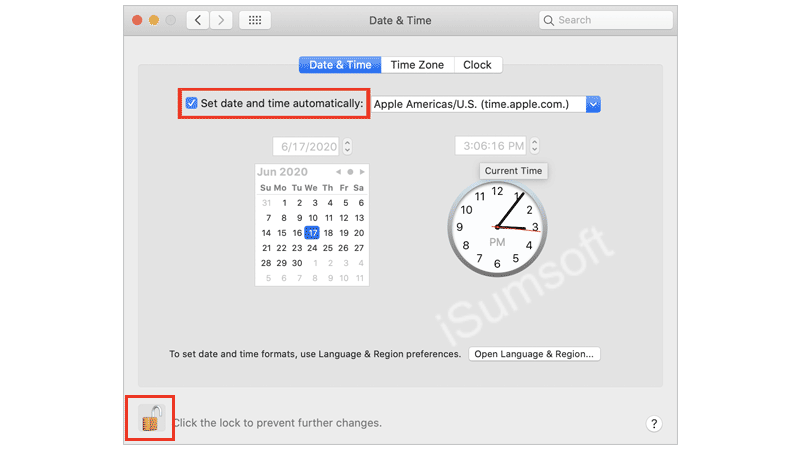
Step 1: Go to Apple menus → System Preferences → Date & Time;
Step 2: Click the lock to make changes;
Step 3: Tick "Set date and time automatically";
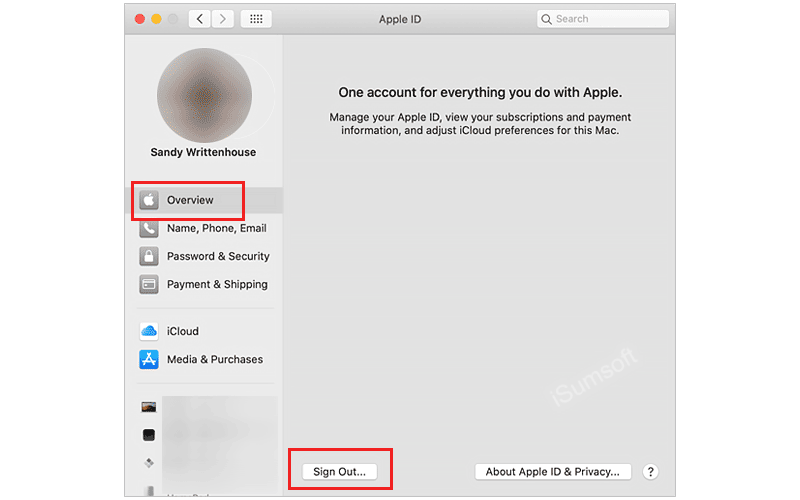
Step 1: Open Apple menu → System Preferences → Apple ID;
Step 2: Select the Overview tab and click Sign Out;
Step 3: Then click Sign in;
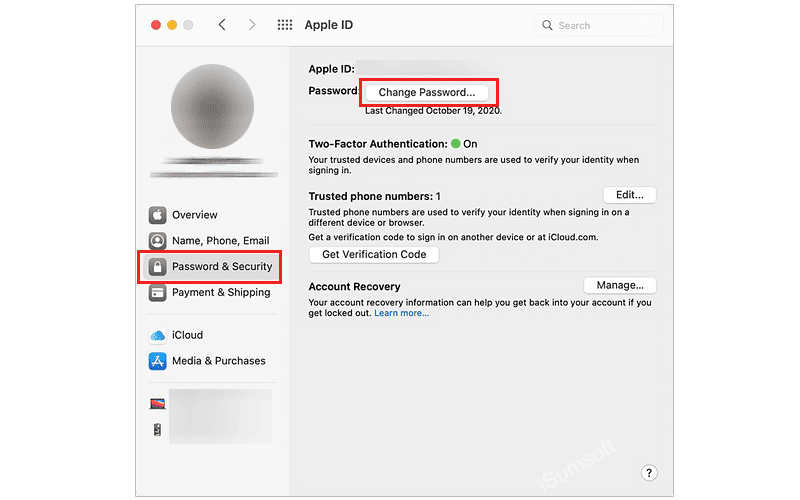
Step 1: Open Apple menu → System Preferences → Apple ID;
Step 2: Select Password & Security tab → Change Password, enter the old password, then you can type the new password.
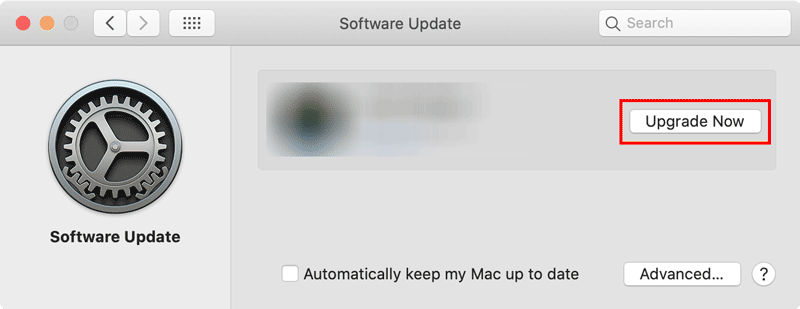
Step 1: Open Apple menu → System Preferences → Software Update;
Step 2: Click Upgrade Now.
As mentioned above, you can reset the Apple ID passcode to fix 'There was an error connecting to the Apple ID server', which requires the old Apple ID passcode. What if you forget your Apple ID passcode and want to reset it? You can use iSumsoft iPhone Passcode Refixer to remove the Apple ID without a password.
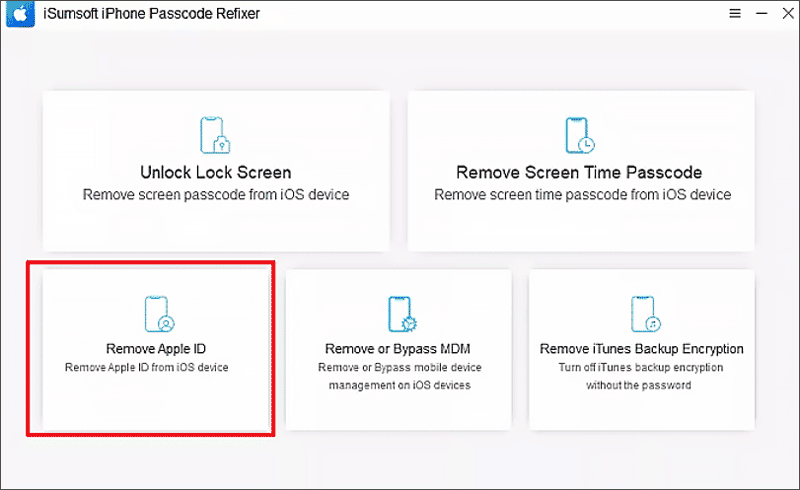
Here are the steps to bypass Apple ID without a password using iSumsoft iPhone Passcode Refixer:
Step 1: Go to Settings → Tap your name → Find My → Set the Find My iPhone toggle to off;
Step 2: Open iPhone Passcode Refixer and connect your iPhone to your computer;
Step 3: Select Remove Apple ID function;
Step 4: Click Start;
Step 5: Download the firmware package;
Step 6: Click Remove; wait for 5 – 10 minutes and then your Apple ID will have been removed;
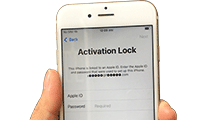 Forgot Apple ID and Password to Activate iPhone, What to Do?
![[9 Tips] How to Fix Update Apple ID Settings Stuck 2023](../images/ios-issues/update-apple-id-settings-stuck/fix-update-apple-id-settings-stuck-s.webp) [9 Tips] How to Fix Update Apple ID Settings Stuck 2023
[9 Tips] How to Fix Update Apple ID Settings Stuck 2023 3 Ways to Reset Forgotten Apple ID Password on iPhone
![How to Remove Apple ID from iPad without Password [4 Ways]](../images/unlock-iphone/remove-apple-id-from-ipad-without-password/remove-apple-id-from-ipad-without-password-s.webp) How to Remove Apple ID from iPad without Password [4 Ways]
How to Remove Apple ID from iPad without Password [4 Ways]![[Solved] The Apple ID Cannot Be Used to Unlock This iPhone](../images/unlock-iphone/the-apple-id-cannot-be-used-to-unlock-this-iphone/apple-id-cannot-be-used-to-unlock-this-iphone.png) [Solved] The Apple ID Cannot Be Used to Unlock This iPhone
[Solved] The Apple ID Cannot Be Used to Unlock This iPhone![Apple ID Locked for Security Reasons [SOLVED]](../images/unlock-iphone/apple-id-locked-for-security-reasons/apple-id-locked-for-security-reasons.png) Apple ID Locked for Security Reasons [SOLVED]
Apple ID Locked for Security Reasons [SOLVED]

