Gmail is convenient, whether for work or life. You can sync with the same account on any device. However, many iPhone users have reflected recently that Gmail is not working on iPhone when iOS updates to the latest version. Don't worry; in this article, we will figure out how to fix Gmail not working after the iPhone update.

If your phone has updated to iOS 17, some apps may not be supported due to the incompatibility. So, you may try to update the Gmail app to the latest version.
Steps: Click on App Store > Search for Gmail > Open Gmail app page and click Update.

Restarting iPhone is a useful method suitable for most issues. Restarting can clear temporary files, cache, and unnecessary data on your device and then recover to normal operating status.
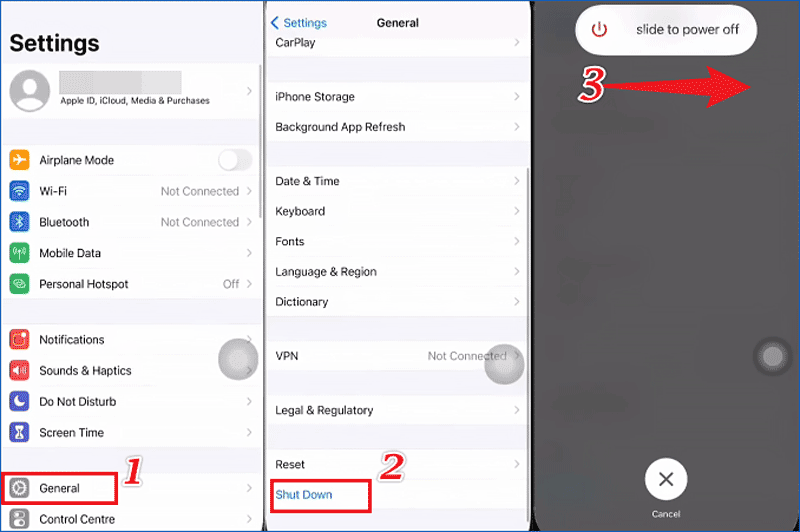
Steps: Settings > General > Scroll down and find Shut down option. Wait a few seconds and start your iPhone. Then check if the Gmail not working issue has been fixed.
When encountering the Gmail not working problem, one of the effective ways to fix it is to delete Gmail on your iPhone and then add it again.
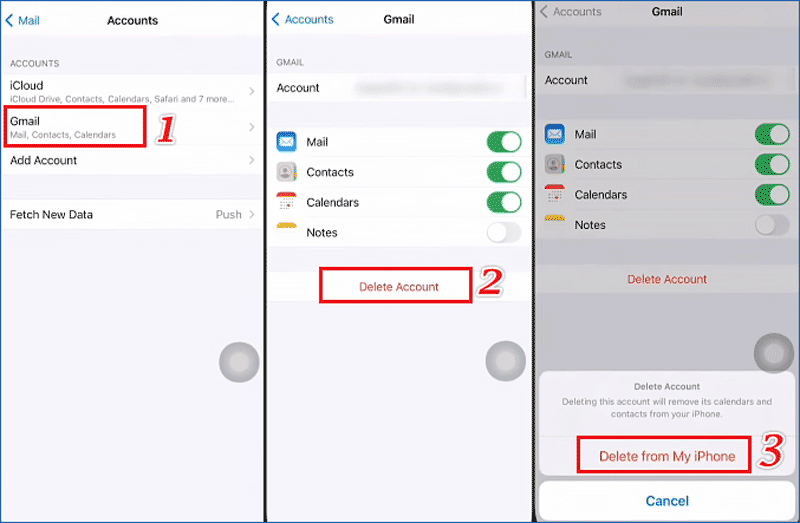
Step 1 (Delete your Gmail account): Settings > Mail > Accounts > Gmail > Delete Account > Delete from My iPhone.
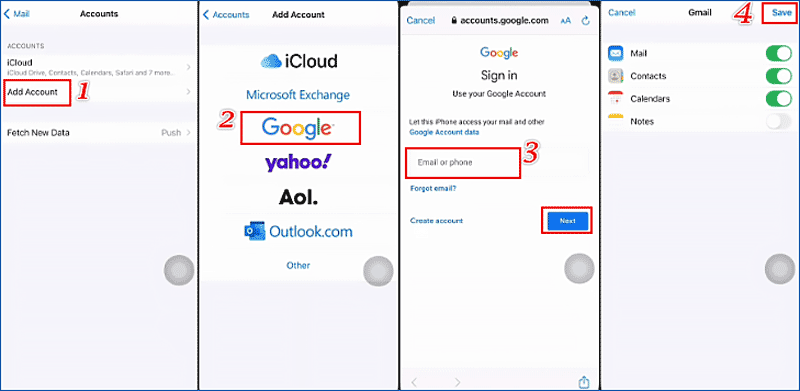
Step 2 (Add your Gmail account): Settings > Mail > Accounts > Add Account > Google > Enter your email and password, then click Next > Click the Save button in the top right corner.
IMAP (Internet Messaging Access Protocol) allows you to sync your operations from an email client to the server. So, try to check the IMAP in your iPhone whether is enabled.
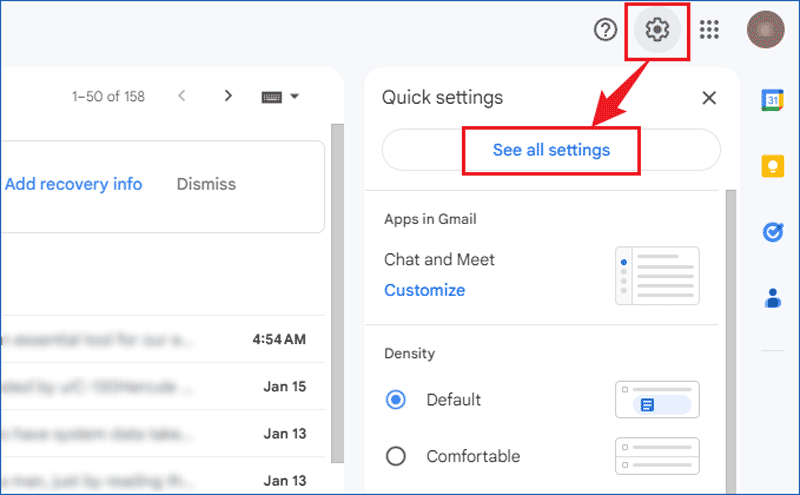
Step 1: Log in to your Gmail on your computer > Click the setting icon in the right top corner > See all settings.
Step 2: Select Forwarding and POP/IMAP tab > Find IMAP access and tick Enable IMAP, then click Save Changes.
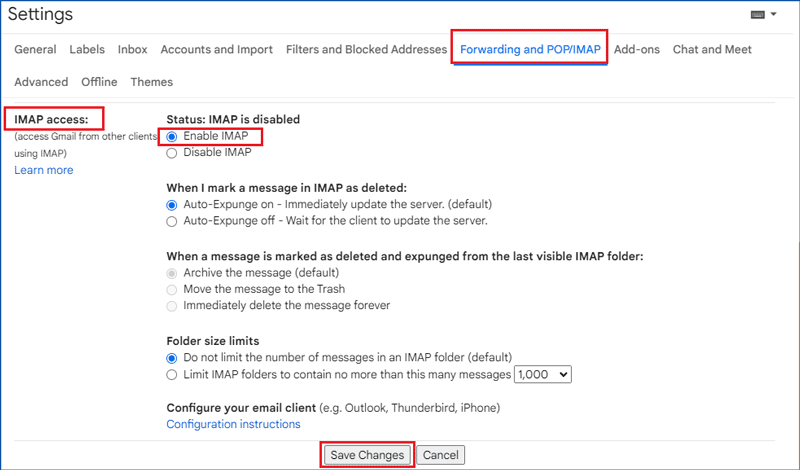
After finishing the IMAP settings, log in to the Gmail app on your phone again to check if the Gmail app not working issue has been repaired.
If none of the methods mentioned above work for you, try to perform iSumsoft iOS Refixer to repair the iOS system without data loss. You should first connect between your iPhone and computer with a USB cable.
Step 1: Download and run the iOS Refixer tool.

iSumsoft iOS Refixer
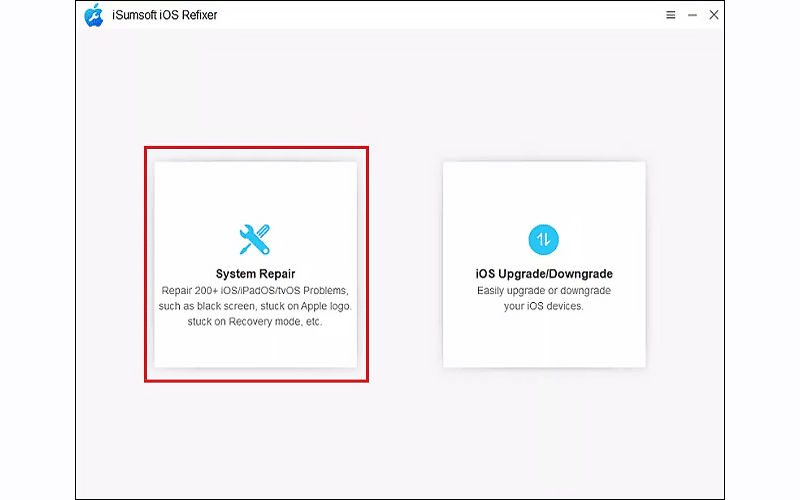
Step 2: Select System Repair.
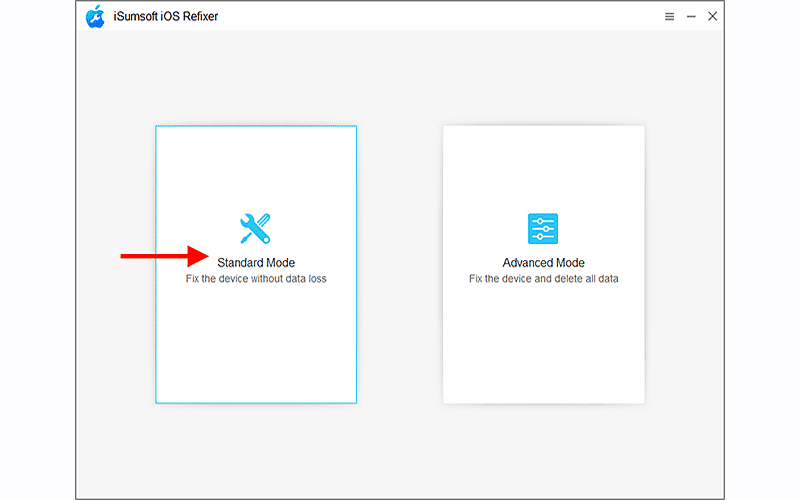
Step 3: Select Standard Mode.
Step 4: Click Start on the iOS Repair page.
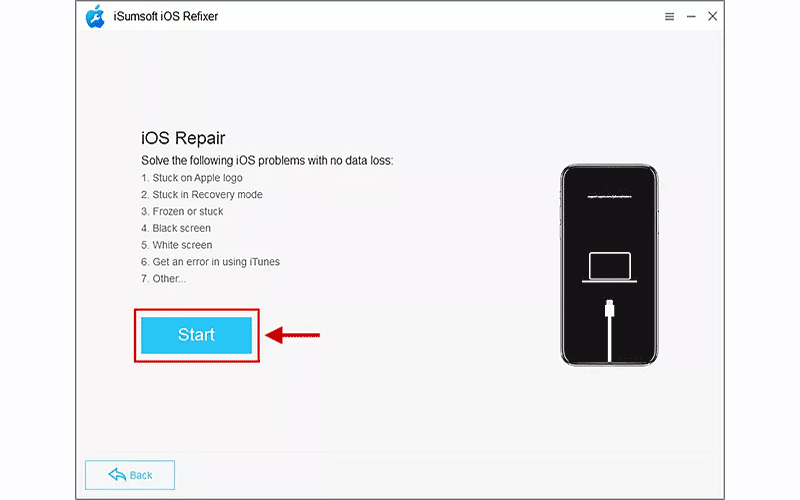
The software will detect your iOS device when you click Start, if cannot be detected, follow the guides to run into recovery mode for better detection.
Step 5: Download the Firmware Package.
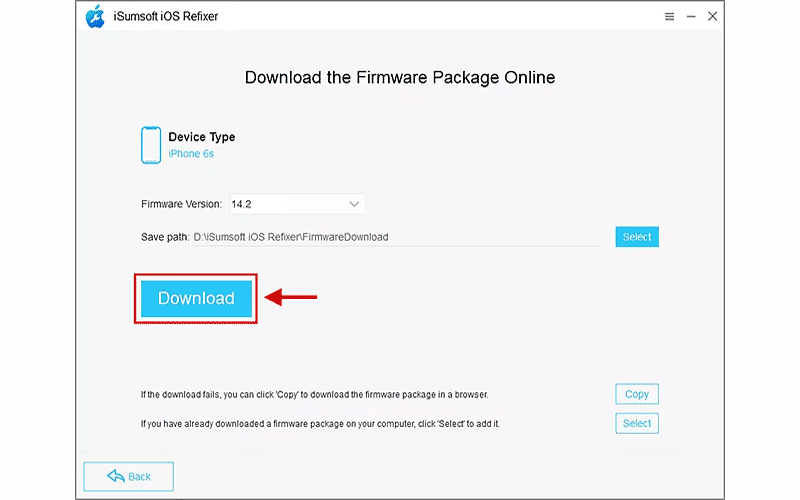
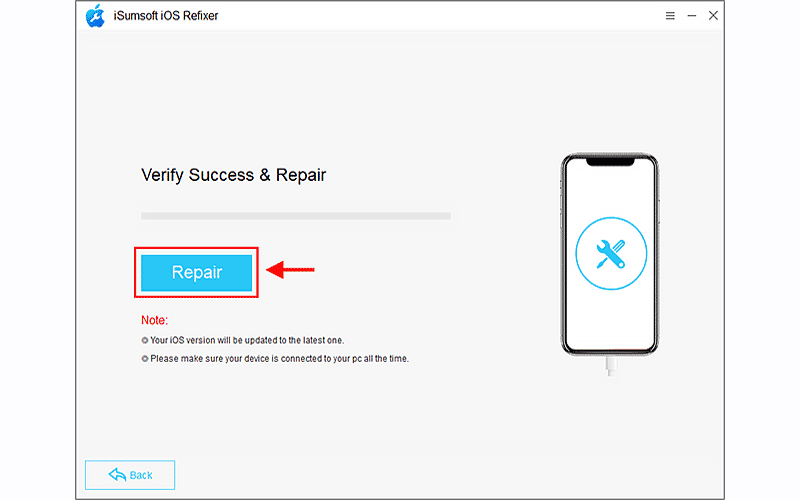
Step 6: When the firmware package is downloaded, you will enter the Verify Success & Repair page, just click Repair. Waiting for the repair process to be finished, restart your phone to check if the Gmail can run normally.
