After migrating a website DNS to Cloudflare, some users find their emails stop working. If you can’t send or receive emails from your customers, don’t panic! Let's troubleshoot with a few steps and fix it.

If MX records weren’t copied correctly during migration, emails won’t work.

Cloudflare proxies web traffic, but emails don’t work through it. MX records should be DNS only (gray cloud).
If your DNS is split between Cloudflare and your registrar, MX records might need to be updated in both places.
Cloudflare proxy mode (yourdomain.com) does not support email services. To avoid disruptions, create a dedicated mail subdomain like mail.example.com and ensure it is set to DNS only (gray cloud).
These records help verify email legitimacy, but incorrect settings may cause delivery failures or spam filtering.
Already stuck in the mud? Don't worry, those following steps may help you out.
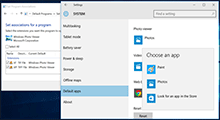
Step 1 Go to Cloudflare Dashboard > DNS Settings.
Step 2Add the correct MX records (pointing to your mail server (mail.yourdomain.com) rather than your main domain).

Step 1 If DNS is still partly managed by your registrar, also add the MX records there.

Step 2 Verify records using tools like MXToolbox/DNSDumpster.

Step 1 Check MX records in Cloudflare.
Step 2 If they have an orange cloud, switch them to gray cloud (DNS only).
Step 1 Add an A record for mail.example.com, pointing to your mail server.
Step 2 Set it to DNS only (gray cloud in cloud flare dashboard) to avoid proxying issues.
Step 1 Add or correct your SPF (Sender Policy Framework) record to allow your mail server to send emails.
Step 2 Set up DKIM(DomainKeys Identified Mail) and DMARC(Domain-based Message Authentication, Reporting, and Conformance) to improve email authenticity.

Step 3 Send a test email to verify if the issue is resolved.
Likely due to missing MX records, Cloudflare proxy settings, or incorrect SPF/DKIM configurations.
Using tools like MXToolbox/DNSDumpster.
Nope. Email services should always use DNS only (gray cloud in cloud flare dashboard) mode.
Check and properly configure SPF, DKIM, and DMARC records.
If emails stop working after switching to Cloudflare, check MX records, proxy settings, and authentication records. Follow the steps above, and you’ll be back to receiving/sending emails to your business in no time!