Built-in Microphone doesn't work in Windows 10? If your PC has no sound ![]() , follow this tutorial, it will show you exact solutions to help you fix this problem:
, follow this tutorial, it will show you exact solutions to help you fix this problem:
You can use these steps below to check Device Manager, then reinstall and update the audio driver.
Step 1: Press the Windows key + X shortcut, then select Device Manager from Win + X menu.

Step 2: Double-click on Sound, video and game controllers to expand that section. Locate your audio driver Realtek High Definition Audio. Then double-click to open its Properties, select the Driver tab, click Update Driver.

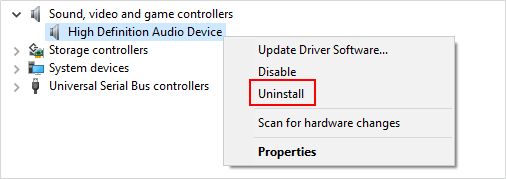
Step 3: Uninstall and re-install your audio driver.
On Device Manager, right-click the audio driver, and select Uninstall.
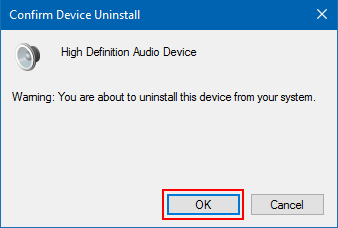
Step 4: Click on OK to confirm uninstall the audio driver. When finished, restart your computer.
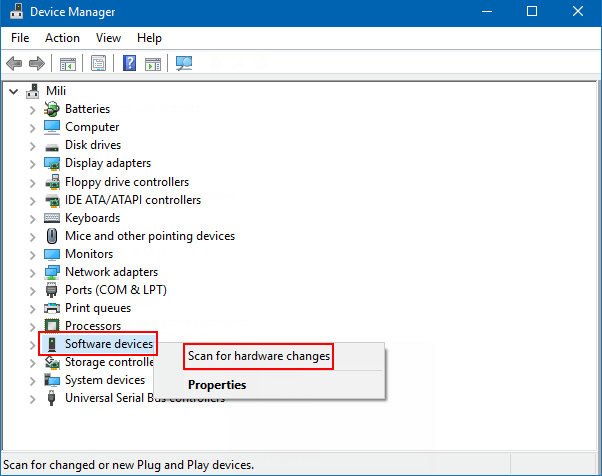
Step 5: Open Device Manager, right-click on Software device > Scan for hardware changes. Windows will attempt to reinstall sound and audio drive.
If you're connecting to an audio device using USB or HDMI, you might need to set that device as the default
Step 1: Right-click on the Speaker Icon at the bottom right corner.
Step 2: Select Recording devices from the context menu.
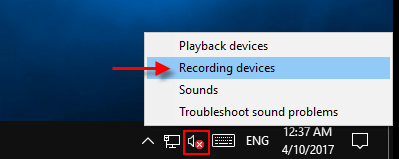
Step 3: In the Sound dialog, click on the Recording tab. Make sure the Microphone is enabled. If not, right-click to enable it, and then click Set Default button to set it as default.
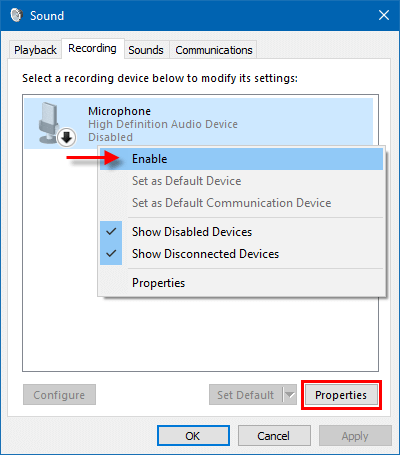
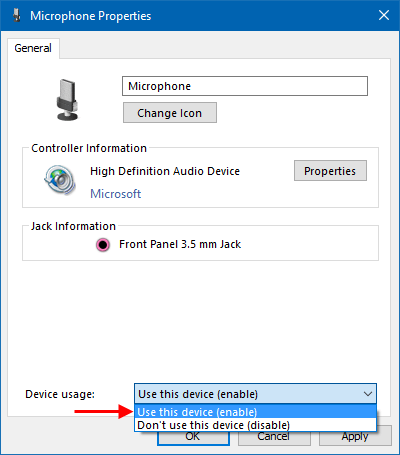
Step 4: Then click on Properties and choose the Use this device (enable) option under the Device usage drop-down list, click Apply and then OK.
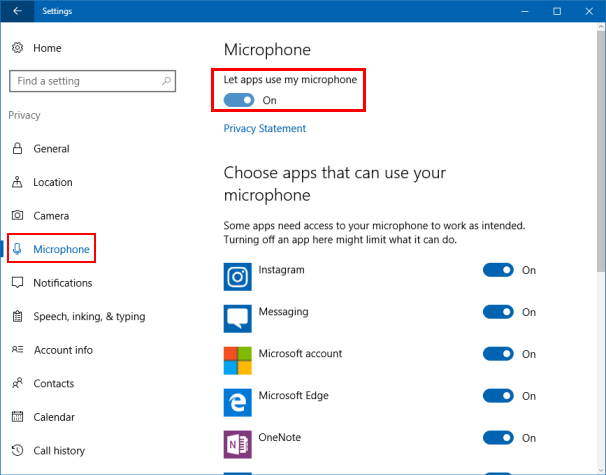
You can easily turn on Windows 10 Microphone in Privacy Settings.
Step 1: Open Settings app by pressing Windows logo+ I keys. Click Privacy.
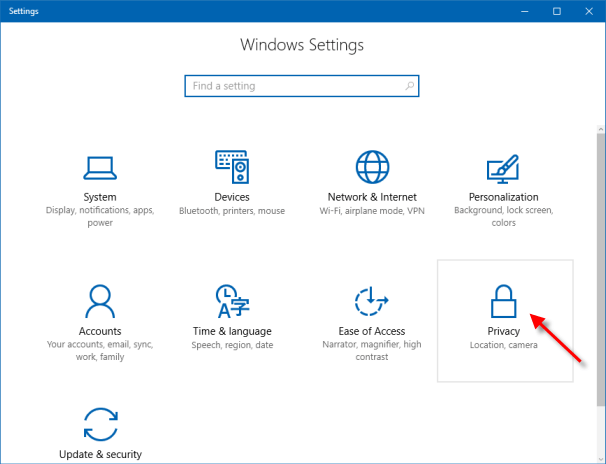
Step 2: Choose the Microphone in the left pane. You'll see an option that says "Let apps use my microphone". Slide the toggle to On and select which of the apps underneath can use your microphone.
