Google Chrome has been commonly-used by so many people due to its some features including speed, simplicity, and security in their own work. There is no doubt that if you haven't installed a Google Chrome browser yet on your computer, you can download Google Chrome browser firstly.
However, if you get some errors and unable to run it on your computer, you can also remove it. In this post, we show you how to install and uninstall Google Chrome in Windows 7.
Google Chrome is an easy and powerful tool that appeals to the wider customer so that they would like to download and install it. Here we provide 3 steps of downloading and installing Google Chrome in Windows 7.
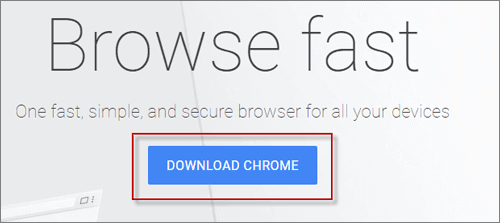
Step 1: Go to the Google Chrome website, click DOWNLOAD CHROME button.
Step 2: In terms of service window, confirm whether you want Chrome as your default browser and then choose ACCEPT AND INSTALL button to open next window.
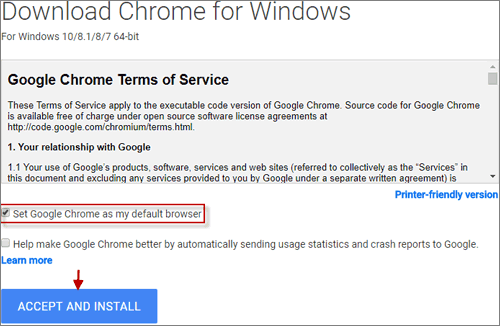
Note: If you want to set it as the default browser, you can tick in the front.
Step 3: Save Chrome browser on your computer by pressing Ctrl+S keyboards at the same time. This means that you have installed the Google Chrome in your computer.
As a result of slow performance, error message, and so on, Google Chrome cannot open. At this moment, you might have to remove Google Chrome. But, before deleting Google Chrome, please back up your personal information stored on Google Chrome. Here are steps to uninstall Google Chrome in Windows 7.
Step 1: Remove Google Chrome on your computer.
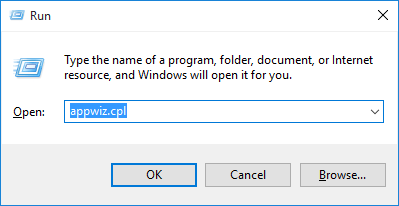
1. Press Win+R keyboards, then pops up Run window, type appwiz.cpl and click OK.
2. In the Programs and Features dialog box, select Google Chrome in the menu. Tap Uninstall option.

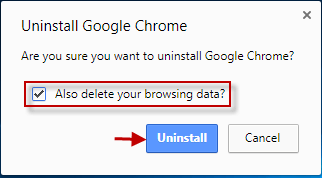
3. Choose the box of Also delete your browsing data and hit Uninstall button to delete Google Chrome from your computer.
Tips: Similarly, you can also use other ways to uninstall Google Chrome as follows: Click Windows logo on the taskbar, choose Control Panel > Programs and Features.
Step 2: Enable view to hide files.
1. Click windows logo ![]() > Control Panel.
> Control Panel.
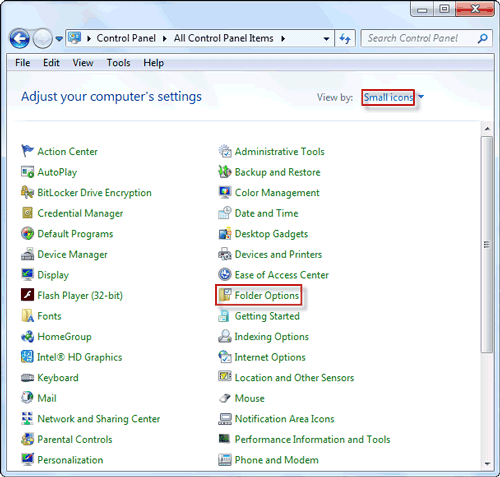
2. In the Control Panel window, choose View by > Small Icons > Folder Options.
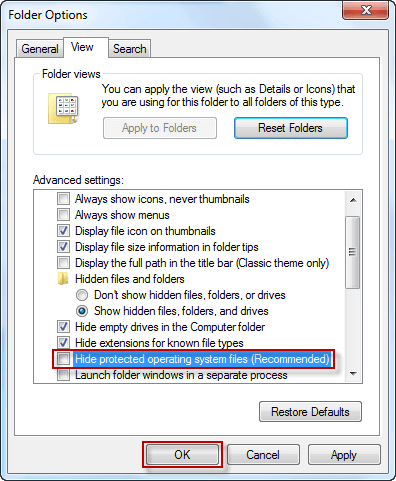
3. Click View option, select the Show hidden files, folders and drives option and press OK.
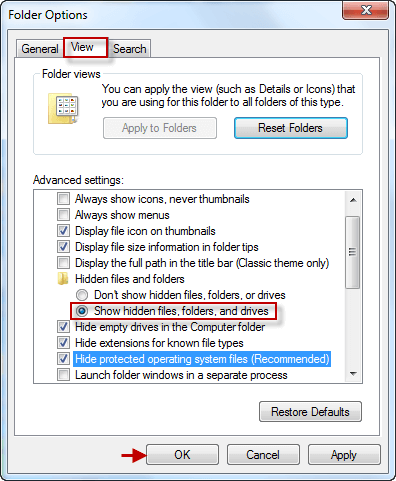
4. Definitely, you can also unselect the Hide protected operating system files option. Press OK button.
Note: When you complete the work of hiding files, it is better to reset the hidden file view settings to the default settings to avoid unexpected system modifications.
Step 3: Delete Chrome folder from your computer.
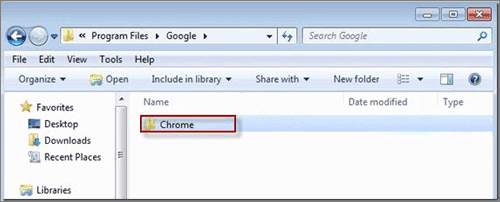
Navigate to the locations C:\Program Files\Google\Chrome on your computer and delete Chrome folder thoroughly.
