Windows Defender Security Center provides the Virus & threat protection area to help you scan for threats on your device. If you're already using Windows Defender Antivirus as your antivirus program, use the Scan now feature in Windows Defender Security Center to make sure that specific files or folders are safe.
Windows Defender Security Center is a new home of Windows Defender Antivirus in Windows 10 Creator Update. Here's how to scan for potentially harmful threats on Windows 10 PC.
Step 1: Open Windows Defender Security Center app.
You can also quickly open it by clicking the shield icon in the taskbar.

Step 2: Click on the Virus threat protection tile on the left menu bar. Click Quick scan.
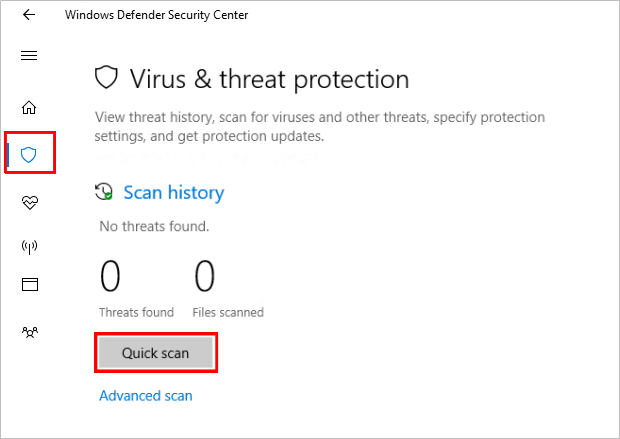
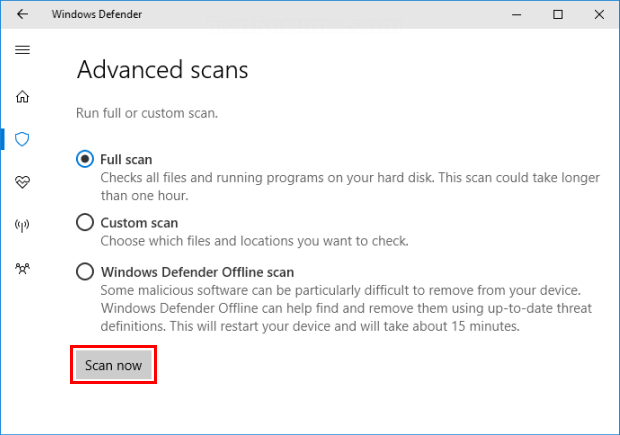
Step 3: Or click Advanced scan to specify different types of scans, such as a full scan. And click Scan now button to check all file and running programs on your PC. The process always takes several hours to complete.
If the scan finishes and the app shows There may be threats on your device message, click the Clean threats button to remove those detected items, or click See threat details link to review them.
It is easy to use Windows Defender to find out viruses and malware with some files. Here's how:
Method 1
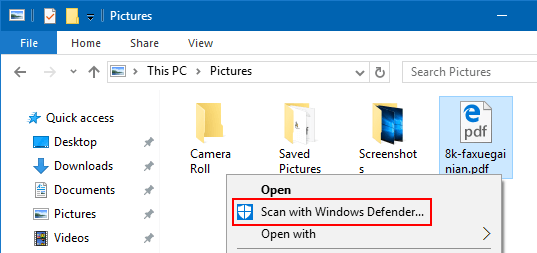
To scan specific files or folders, select the ones you want, right-click them, and then select Scan with Windows Defender Antivirus option from the menu.
Method 2
Step 1: Open Windows Defender Security Center.
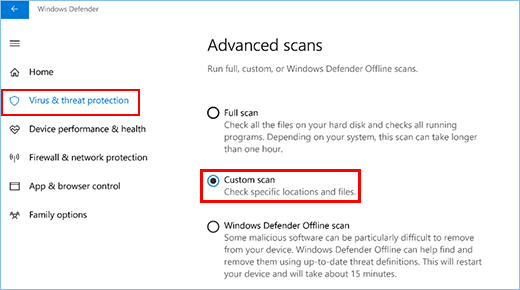
Step 2: Click on Virus & threat protection tile on the left menu bar, click on Advanced scan.
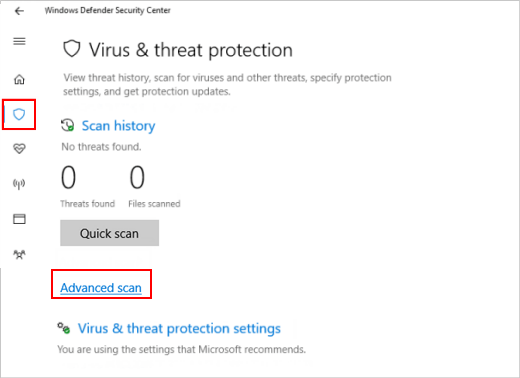
Step 3: Click on Custom scan > Scan now, and then select the file or folder that you want.
Both scans will notify you immediately if any threats are found. Where can I find scan results?
To see the Windows Defender Offline scan results, open Windows Defender Security Center > Virus & threat protection > Scan history > See full history.