Ten days after you upgrade to Windows 10, your previous version of Windows will be automatically deleted from your PC. If your drive is low in space, you can manually delete the previous version of Windows installation. This article describes 3 ways to delete Windows installation files on Windows 10 PC.
Deleting your previous version of Windows installation(s), here is how:
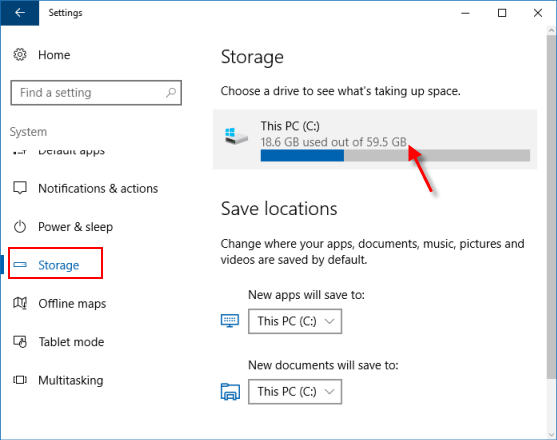
Step 1: Open Settings app, click System > Storage.
Step 2: Click on This PC and then scroll down the list and choose Temporary files.
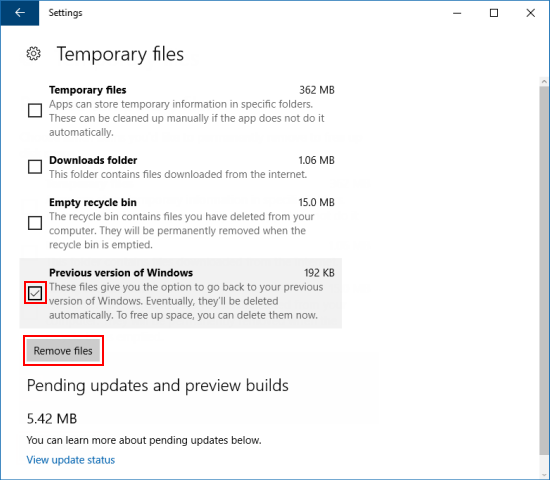
Step 3: Under Remove temporary files, select the Previous version of Windows check box and then choose Remove files.
Windows .old folder contains a copy of the previous Windows installation in C: disk, and it takes up much of storage. It can free up several GBs of disk space by using the Remove previous Windows installations option in Disk Cleanup Tool.
Step 1: Open the Disk Cleanup tool in the Run.
Press Win+R to open Run dialog, type cleanmgr, and then hit Enter key.

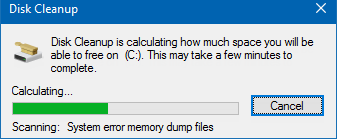
Wait while the system is calculating the amount of the used space.
Step 2: Once the tool opens, click Clean up system file button.
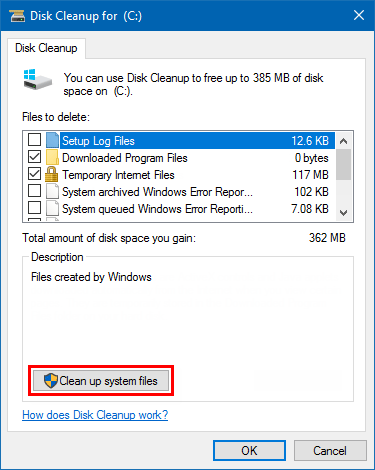
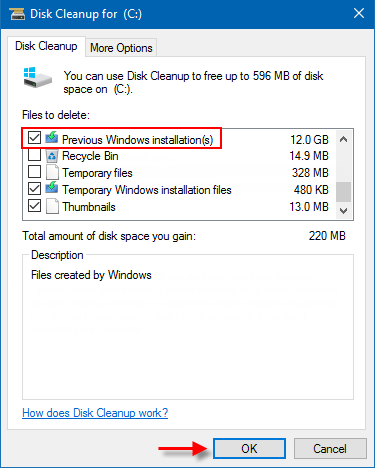
Step 3: Scroll down till you see Previous Windows installation(s). Check this option and click on OK.
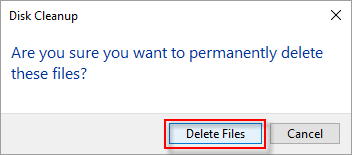
Step 4: Click on Delete Files to complete the task.
While there you may also want to delete these upgrade & installation files:
If you can't remove the Windows .old folder and other related files with the above options, you can try to remove Windows .old Folder using Command Prompt.
Step 1: Open Command Prompt as administrator.
Press Windows logo + X shortcut keys, then hit A key on the keyboard.
![]()
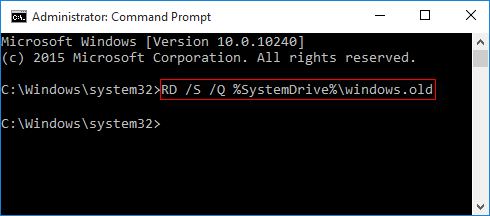
Step 2: In Command Prompt window, execute the delete command below, and press Enter.
RD /S /Q %SystemDrive%\windows.old
Or execute this command step by step if you like:
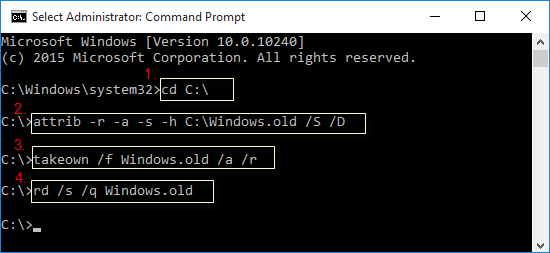
The Windows .old folder will be deleted immediately.
Step 1: You need to open Command Prompt at Boot using Advanced Startup Options in Windows 10.
Step 2: Next is going to Verify the Windows 10 Drive Letter at Boot.
The Windows 10 drive letter may not always be C: at boot like it is while Windows is started, so be sure to verify it's drive letter before doing the command.
1. In the command prompt, type diskpart, and press Enter.
2. Then type list volume and press Enter.
3. From the listed volumes, look for and verify the drive letter of your Windows 10 drive.
4. Finally, type exit and press the Enter key.
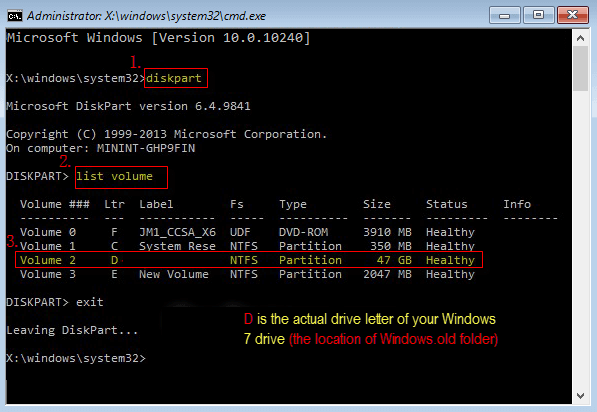
Step 3: Then execute delete the Windows .old folder command as follows:
RD /S /Q "D:\Windows .old"
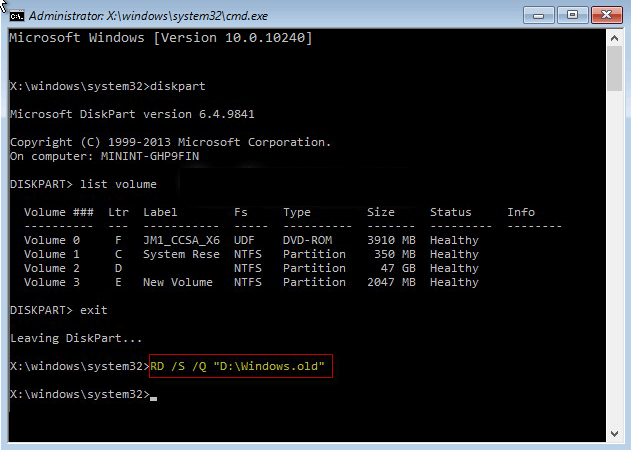
Tips: D is the actual drive letter of your previous version of Windows because it sizes 47GB. Another volume is too small that can't store the system folders.
Step 4: Close the command prompt. Then click Continue to restart the computer to Windows 10.
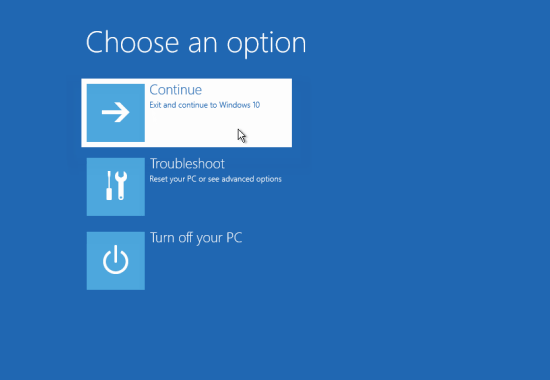
The Windows .old folder will be deleted immediately.