As you continue to use your computer, it accumulates junk files, especially if you don't regularly clean it up. Too many junk files consume valuable hard drive space and can slow down your computer. In this article, we'll show you how to remove junk files from your Windows 10 PC or laptop using six effective methods.
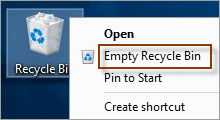
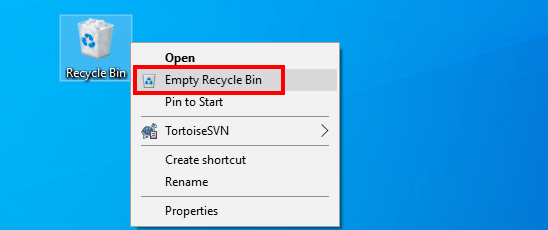
When you delete a file, it's moved to the Recycle Bin, continuing to occupy hard disk space. If you never empty the Recycle Bin, junk files can accumulate, taking up several gigabytes. Regularly emptying the Recycle Bin is an effective way to eliminate unnecessary junk files.
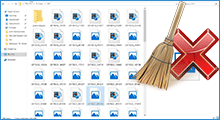
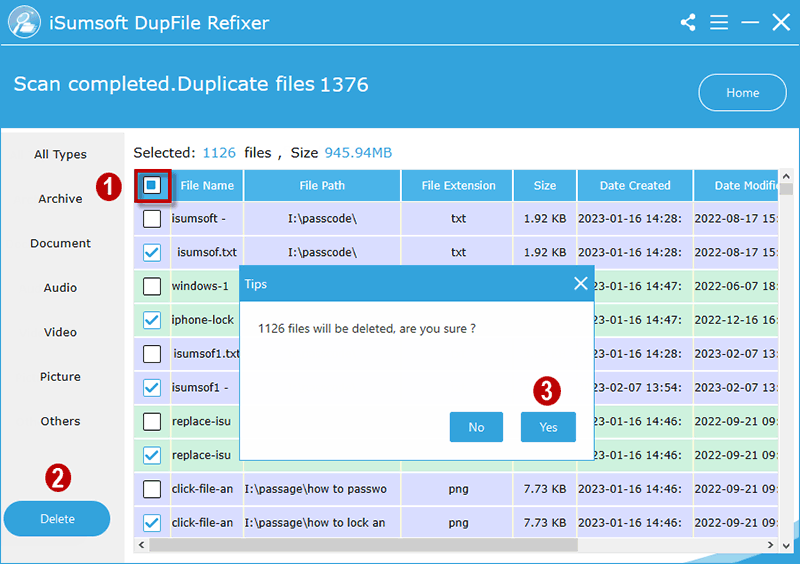
Downloading, saving, or copying the same file multiple times can create duplicate files on your computer, wasting space. To quickly find and delete duplicate files on Windows, use iSumsoft DupFile Refixer, a professional duplicate file finder that automatically identifies and deletes duplicate files.
Download and install iSumsoft DupFile Refixer to remove unwanted duplicate files.
Step 1: Click the Add icon to select a drive or folder to scan for duplicate files, then click Settings.
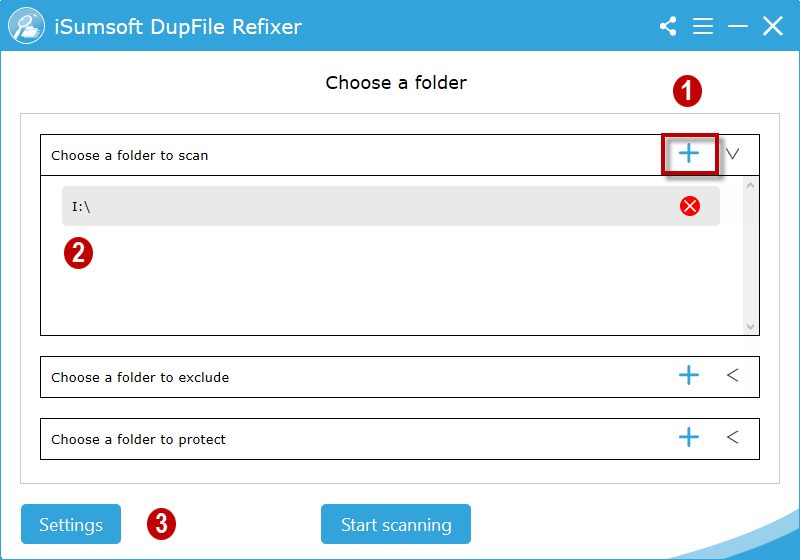
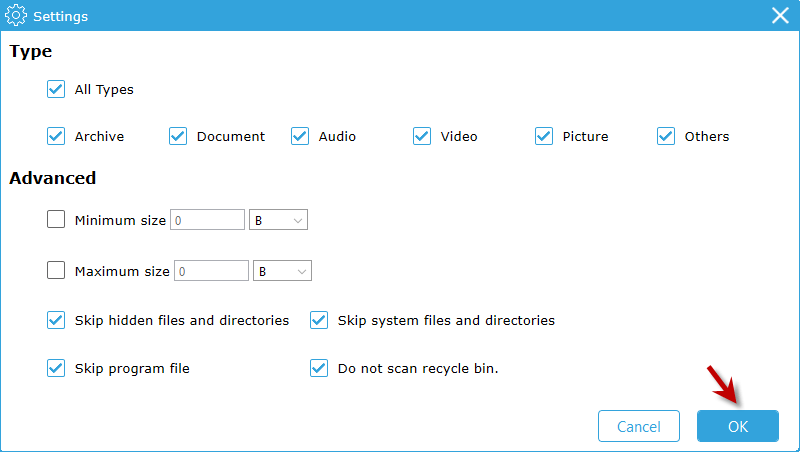
Step 2: Choose the scan file type and size in the scan settings. Click OK and then Start scanning.
Step 3: After the scan, select all duplicate files to delete in one click, freeing up computer space and boosting performance.
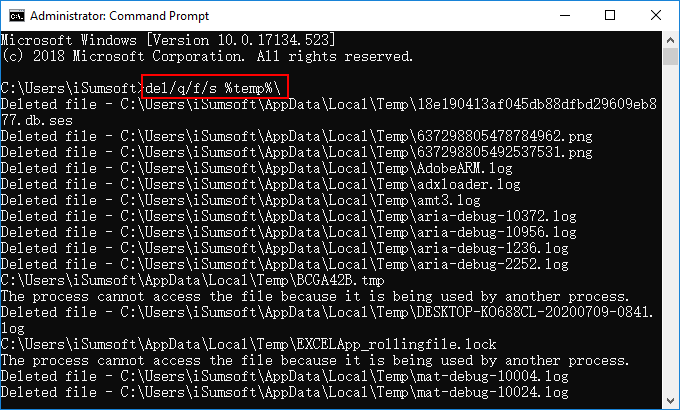
Windows and applications create temporary files that become junk when no longer needed. To delete these files manually, follow these steps.
Step 1: Run Command Prompt as administrator.
Step 2: Type del/q/f/s %temp%\* and hit Enter to delete temporary files not in use.
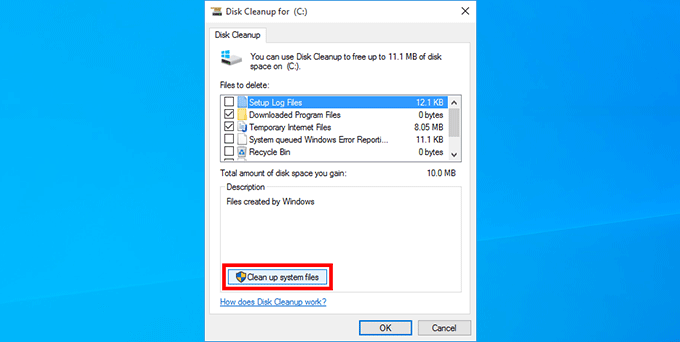
Windows generates various junk files, such as upgrade log files and offline webpage caches. Microsoft's Disk Cleanup tool helps remove these files. Here's how.
Step 1: Type disk cleanup in the taskbar search box and hit Enter to start Disk Cleanup.
Step 2: Select the drive to clean up, typically the OS drive, and click OK.

Step 3: Click Clean up system files in the Disk Cleanup window.
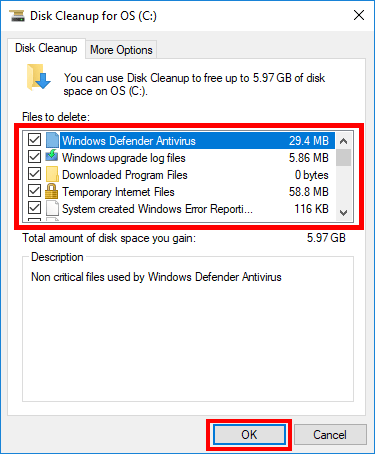
Step 4: Check the file types to delete and click OK to remove them permanently.
Storage Sense is a Windows 10 tool that allows you to set automatic junk file cleanup. Follow these steps.
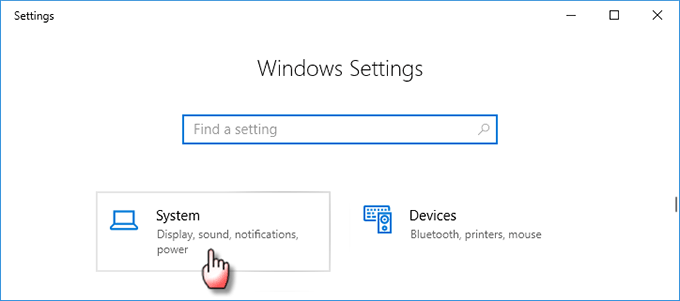
Step 1: Open Settings using Win + I and choose the System option.
Step 2: Select Storage on the left and turn on "Storage sense" on the right. Click "Change how we free up space automatically."
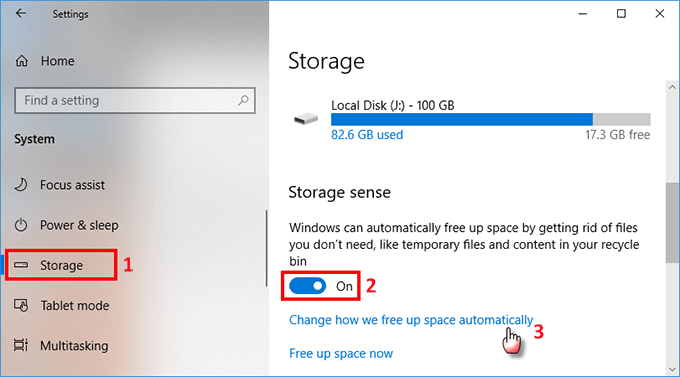
Step 3: Choose how often Storage Sense removes unnecessary files and tick the checkbox under Temporary Files.

For junk files not reached by Disk Cleanup and Storage Sense, such as invalid registry files and font caches, use iSumsoft System Refixer. Here's how.
Step 1: Download and install iSumsoft System Refixer and launch it.
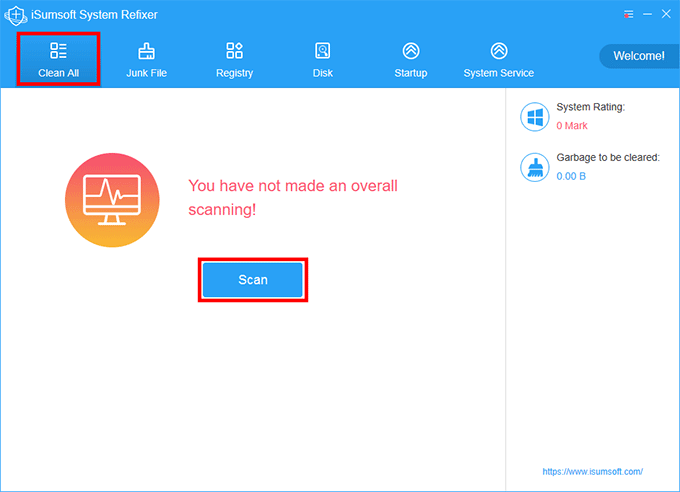
Step 2: Select Clean All and click Scan to find all junk files.
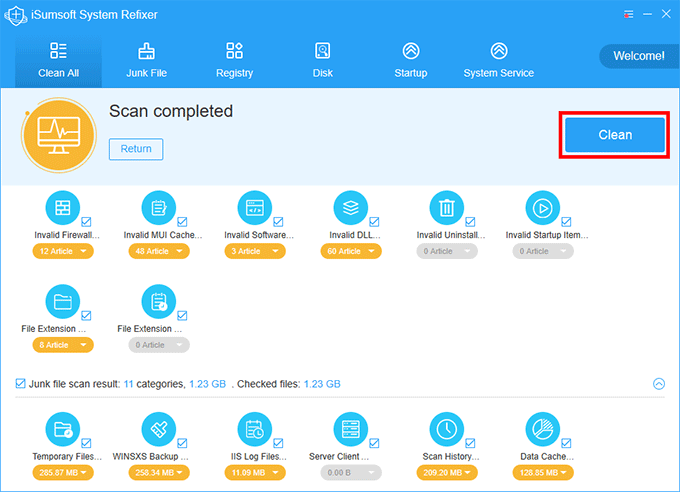
Step 3: After scanning, click the Clean button to remove all junk files.
![[2023] Easily Find and Delete Duplicate Photos Windows 11](../images/windows-tips/find-and-delete-duplicate-photos-on-windows-11/find-and-delete-duplicate-photos-on-windows-11.webp)