If your hard drive stores critical data, you may want to enable full disk encryption in Windows 10 to keep data safe. Fortunately, encrypting a hard drive, regardless of internal or external drives, is not difficult. Windows comes with a BitLocker Drive Encryption tool that allows you to do this easily. Now, iSumsoft will show you how to encrypt a hard drive with BitLocker in Windows 10.
For a start, you need to know that even though Windows 10 has BitLocker encryption, it is only available for Windows Pro, Education, Enterprise, and Server Editions. That is to say, BitLocker doesn't support Windows 11/10/8/8.1/7 Home users. If you want to turn on BitLocker in Windows 10 Hom, switch to Part 2.
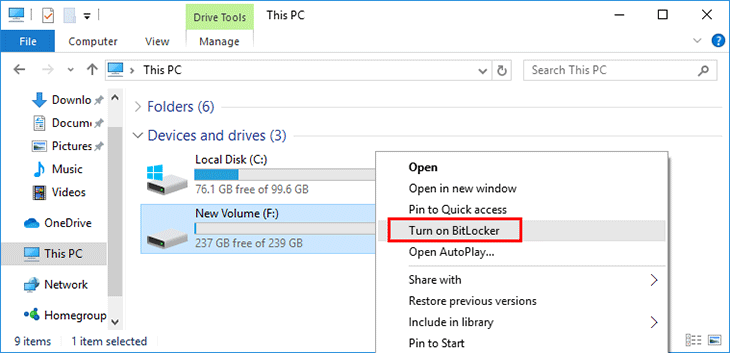
Step 1 Go to This PC, right-click the hard drive or partition you want to encrypt, and then select Turn on BitLocker from the context menu.
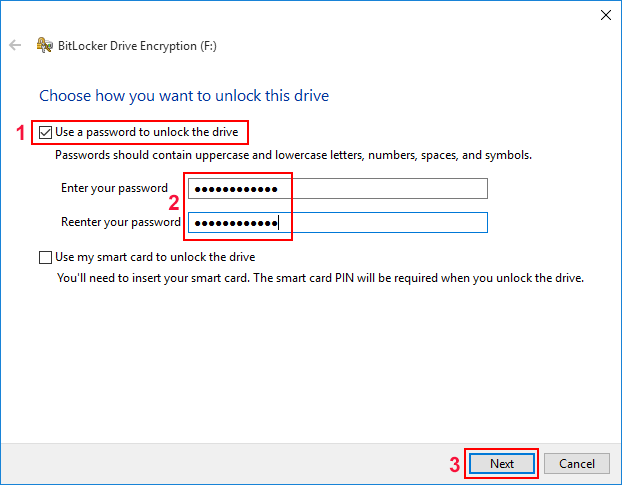
Step 2 The "BitLocker Drive Encryption" window opens, asking how you want to unlock this drive: use a password or a smart card. For convenience, you can choose "Use a password to unlock the drive", then enter a password and click Next.
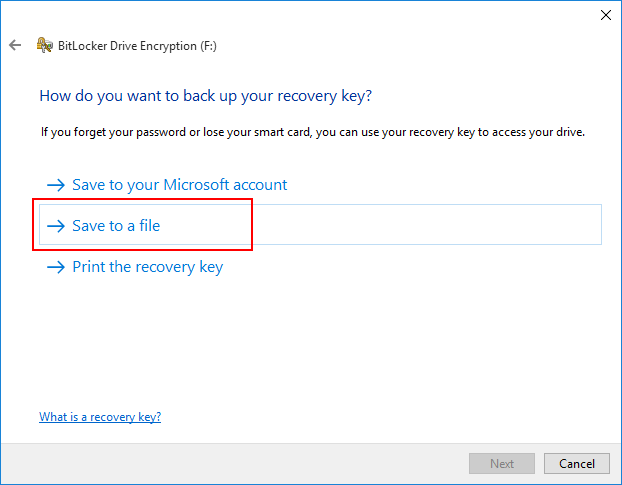
Step 3 Choose how you want to back up your BitLocker recovery key. For convenience, you can choose Save to a file.
Tips:
Step 4 Choose one location to save the recovery key, such as the Desktop or a removable flash drive, and then click Save. When a confirmation dialog box appears, click Yes and the recovery key will be saved successfully.
Tips: It is recommended that you keep more than one recovery key and save each in a safe location, just in case you lose your BitLocker recovery key.

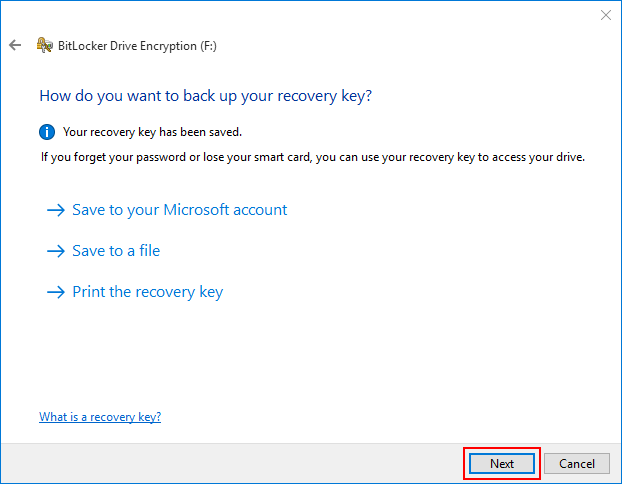
Step 5 Once the recovery key is saved, click Next to proceed.
Step 6 Choose "Encrypt used disk space only" or "Encrypt entire drive", depending on your own situation. Then click Next.
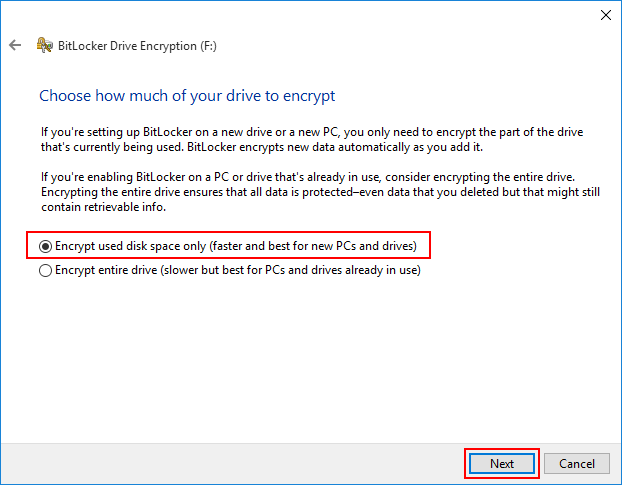
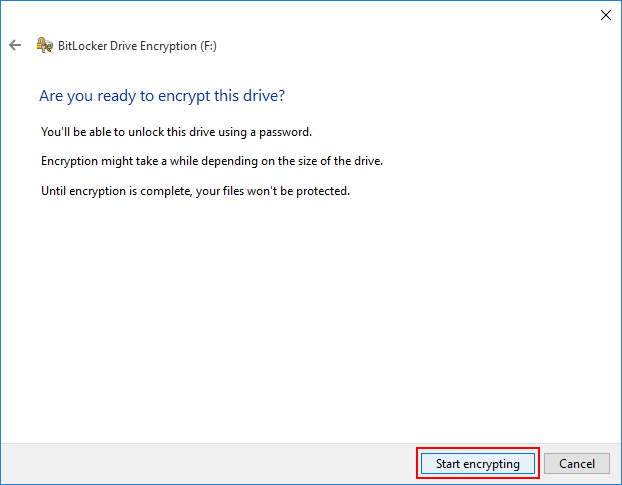
Step 7 When you are ready to encrypt this drive, click Start encrypting.
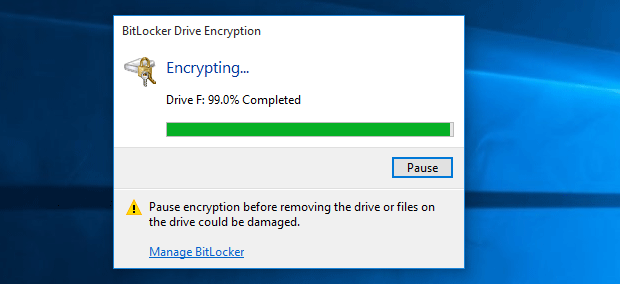
Step 8 Then just wait for the encryption to complete. This takes a while, depending on the amount of disk space to encrypt.
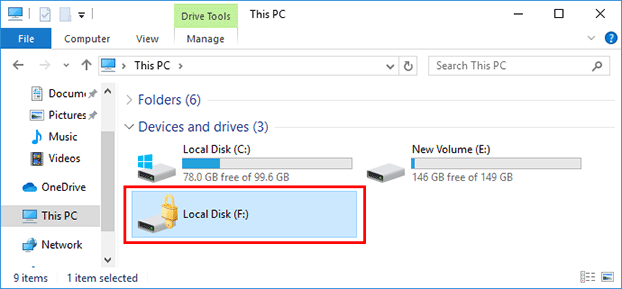
Once encryption is complete, you will see a lock icon on the drive when you open This PC. The BitLocker encrypted drive will be locked each time you start or restart Windows 10, and you need to unlock the drive before you can access it. To unlock the BitLocker encrypted drive, just double-click it or right-click it and select Unlock Drive, then enter your password or recovery key.
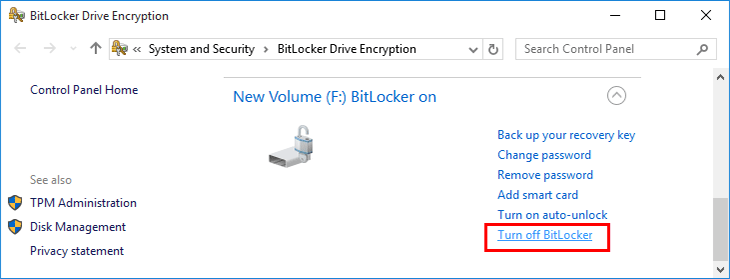
Tips: If you want to unencrypt the drive, go to Control Panel > System and Security > BitLocker Drive Encryption to turn off BitLocker on the drive.
For Windows Home users, BitLocker is not natively supported. iSumsoft BitLocker Reader, however, allows you to enable BitLocker in Windows 11 Home and Windows 10 Home. Beyond just enabling BitLocker, this software also lets you turn off BitLocker, lock and unlock encrypted disks, providing you with a seamless experience similar to the native BitLocker feature.
iSumsoft BitLocker Reader
Step 1 Download and install iSumsoft BitLocker Reader on your Windows 10. After installation, launch this tool. It will display all hard drives and partition information on your PC.
Step 2 Right-click the drive you want to encrypt and click Turn on BitLocker.

Step 3 A dialog opens. Enter a secure password to encrypt the drive, and then click Save to file to save your recovery key as a file on your PC or a removable drive.

Step 4 Once the recovery key is saved, click Encrypt to start encrypting the drive.

Step 5 Wait for the encryption process to complete. When you get the prompt "Encrypt Successfully", click OK to finish.

You will see a lock icon on the drive. Right-click the BitLocker encrypted drive and select Lock Drive so that the drive is immediately locked without requiring you to restart the computer.
Related: 5 Ways to Lock BitLocker Drive without Restarting Windows 10

Tips: