
Virtual memory is a technology of memory management in Windows system. Many problems can be solved through setting virtual memory; for instance, Windows 8/8.1 gets stuck at the Windows logo page when it starts and you can do nothing but pressing the Power button to force it to shut down. Virtual Memory has more uses. All running programs on the computer can’t do without memory. If the executing program takes up too much memory, it will result in insufficient memory, and then cause your computer to run slow. Sometimes, insufficient memory can be the reason why a computer often crashes. To fix these problems, it’s a good idea to set virtual memory. Now this page will show you how to set virtual memory in Windows 8.
How to set virtual memory in Windows 8
Before you perform this task, make sure you’ve logged on as an administrator.
Step 1: Right-click “Computer/My Computer” and select “Properties” to open System dialog.
Tips: If you can’t find “Computer/My Computer” on your Windows 8 desktop, press Win + X key combination and select “Control Panel”. In the “Control Panel”, click on System and Security > System so that you can also open System dialog.
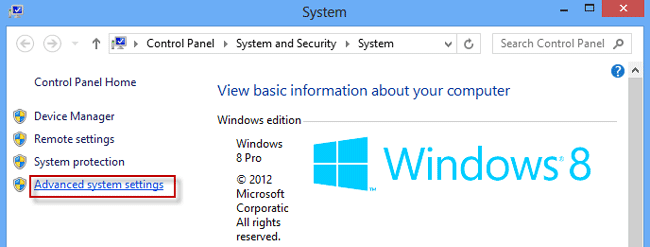
Step 2: Click on the Advanced system settings link.
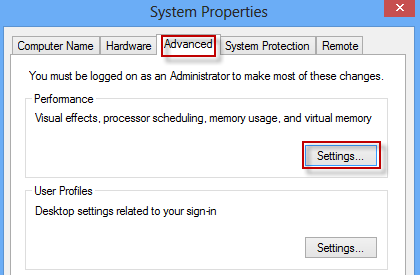
Step 3: Select the Advanced tab and click on Settings.
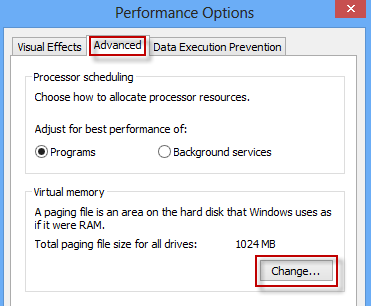
Step 4: In the Performance Options dialog, select the Advanced tab and click on the Change.
Step 5: The Virtual Memory dialog box opens. Uncheck Automatically manage paging file size for all drives. Check Custom size. Type your Initial size and Maximum size. Then click on Set. Finally, click on OK.
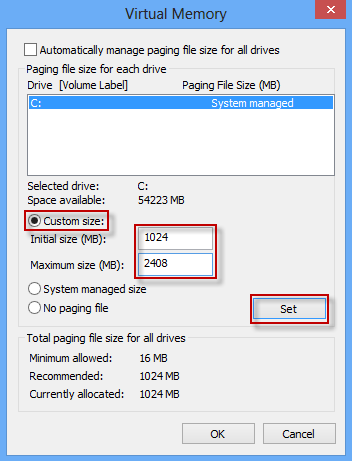
Tips: The virtual memory’s initial size can be set as one to 1.5 times physical memory. And the maximum size can be set as twice to 2.5 times physic memory.
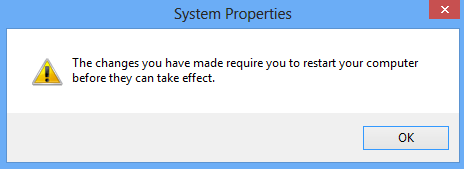
Step 6: Restart your computer when prompted. After computer restarts, the virtual memory you set can take effect in your Windows 8.
Then you will find your system run more smoothly than before, even when large program runs or many programs simultaneously run on your computer.

