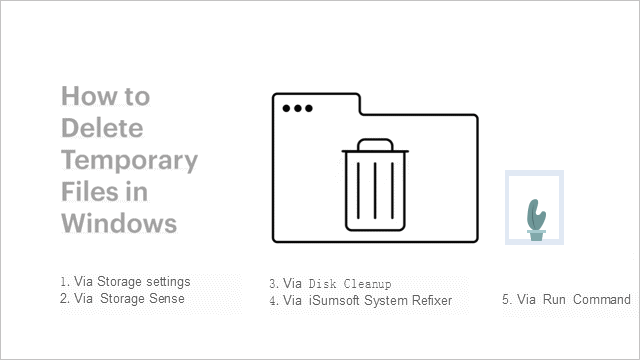
Temporary files are created by Windows services and many third-party software programs. These temporary files may degrade system performance. By deleting these unnecessary temporary files, you can increase disk space and system performance. There are many ways to delete temporary files in Windows 10. You can manually delete temporary files using various methods.
For experienced Windows PC users, the methods covered in this article are simple and easy to use. For those without any technical experience, the computer’s built-in system functions and third-party apps may be of great help to you.
- Way 1: Delete temporary files in Windows 10 Settings
- Way 2: Delete temporary files automatically
- Way 3: Delete temporary files using the Disk Cleanup
- Way 4: Delete temporary files using a System Cleaner
- Way 5: Delete temporary files using the Run command
How to delete temporary files in Windows 10 using Storage Settings
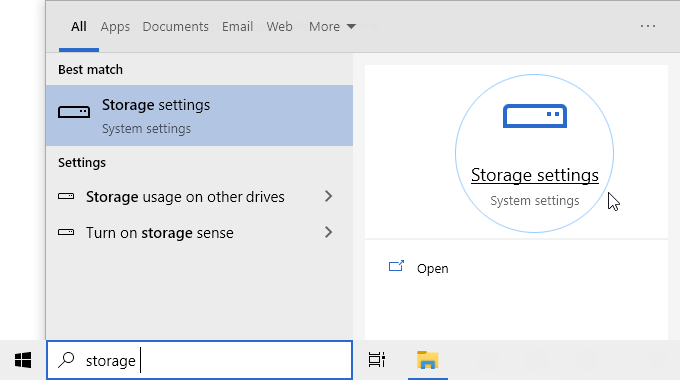
Step 1: Type Storage in the search bar next to the Windows Start button.
Step 2: Then select Storage Settings from the results.
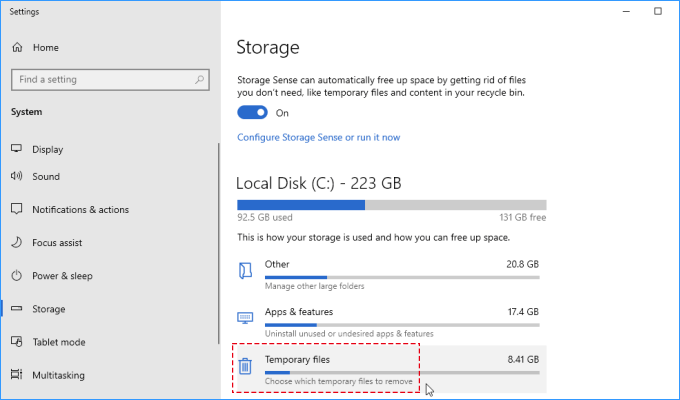
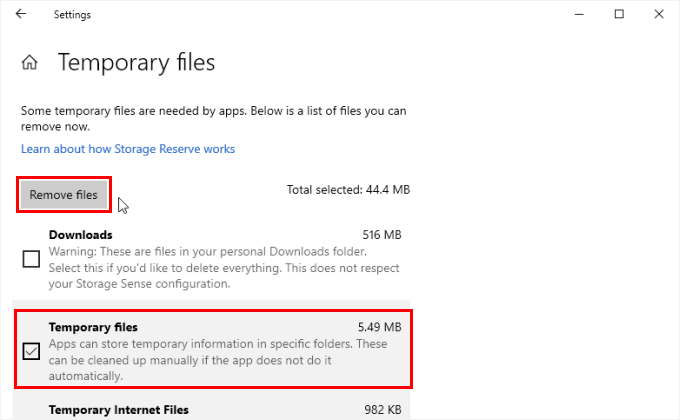
Step 3: On the Storage Usage page, Windows 10 displays the space used by the temporary files, click “Temporary Files“.
Step 4: Next, on the “Temporary Files” page, select the checkbox next to “Temporary Files” and then select the “Remove Files” button to delete all temporary files from your Windows 10 PC.
How to automatically delete temporary files in Windows 10
You can enable Storage Sense from the Storage Settings panel to have it automatically clear temporary files. You can also choose how Storage Sense handles temporary files.
Step 1: Open Settings and go to System > Storage. There, you will find the option named “Storage Sense“. Enable it.
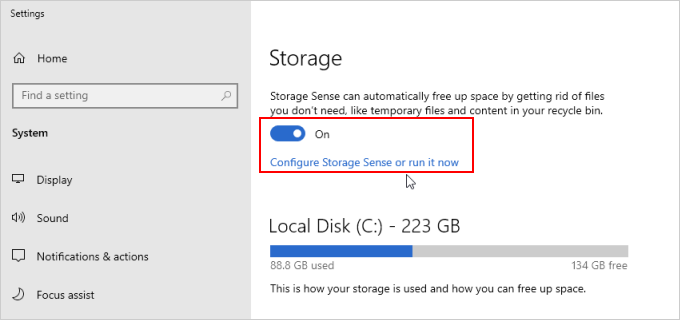
Step 2: Click Configure Storage Sense or run it now link.
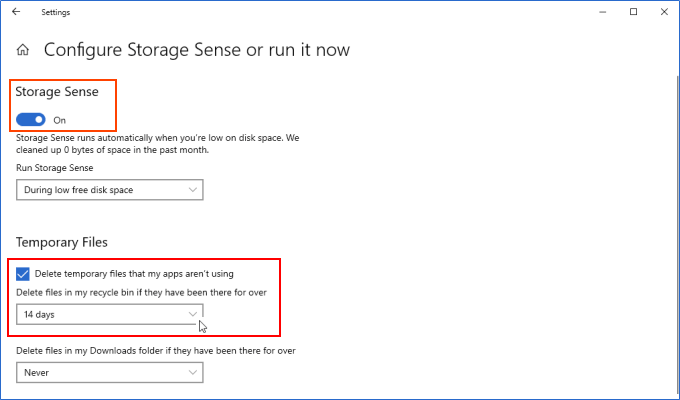
Step 3: Look for the drop-down menu under Delete temporary files that my apps aren’t using and select how often you want to clear them. Choose from:
- Never
- 1 day
- 14 days
- 30 days
- 60 days
How to Delete temporary files in Windows 10 using Disk Cleanup
Disk Cleanup utility is another simple and effective way to clean temporary files.
Step 1: Type Disk Cleanup in the search bar next to the Windows Start button.
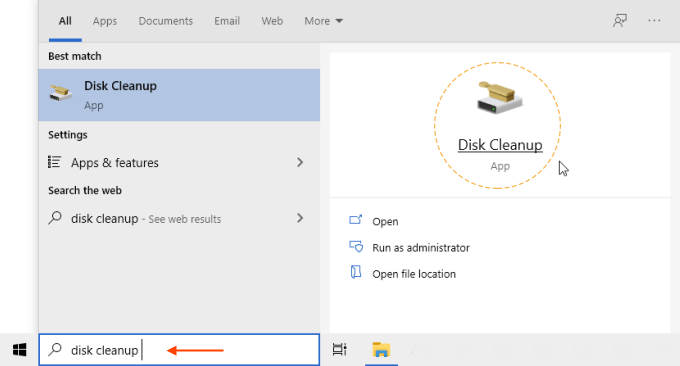
Step 2: Click the application to open it.
Step 3: Select the drive you want to clean then click OK.
Step 4: Disk Cleanup will generate a manifest list.
Step 5: Select the files you want to delete and click OK.
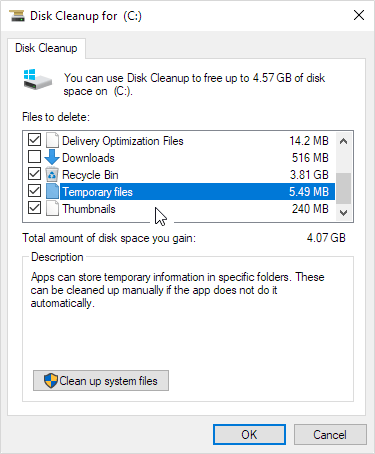
If you want, you can click the Clean system files button in order to remove additional files.
How to safely delete temporary files with a System Cleaner
Nowadays, system optimization services are becoming more common and often include functions for managing temporary files. Although you can easily handle temporary files by yourself, the advantage of free software solutions is always worth to try. iSumsoft System Refixer is an excellent system cleaner that helps you delete some hard-to-find temporary files in Windows 10.
1. Download and install the iSumsoft System Refixer on your Windows PC.
2. Launch the tool and select “Junk Files“. Then it displays all junk files, including temporary files.
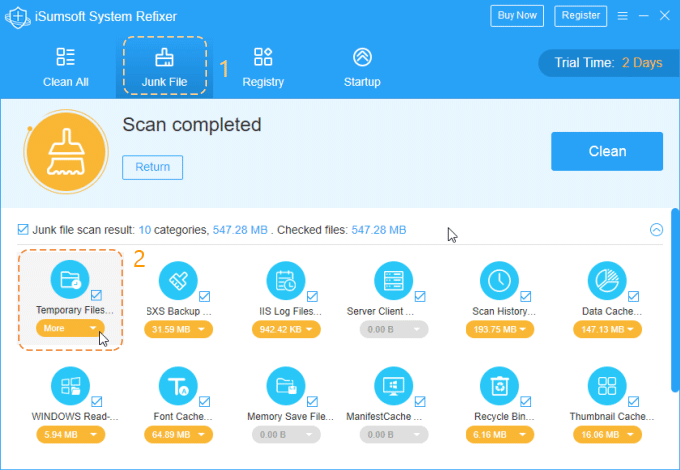
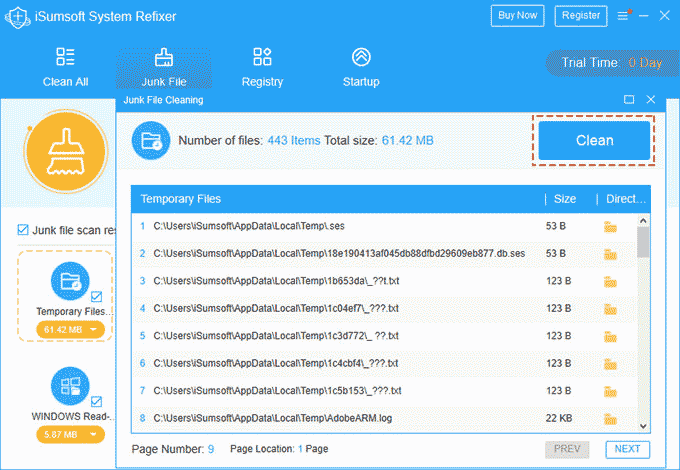
3. You can click to see more details about each temporary file. After that, click Clean to start deleting temporary files.
In addition to deleting temporary files, iSumsoft System Refixer also has a built-in registry cleaner that can remove entries of non-existing applications, keep the Windows registry clean, efficient and help applications run smoothly.
How to delete temporary files in Windows 10 using Run Command
If you want to know how to delete temporary files in Windows 10 using CMD, it’s actually much easier to use Run to do everything at once. This is an effective way to eliminate a large backlog at once, but it is risky because you may delete another program or update a file that is in use.
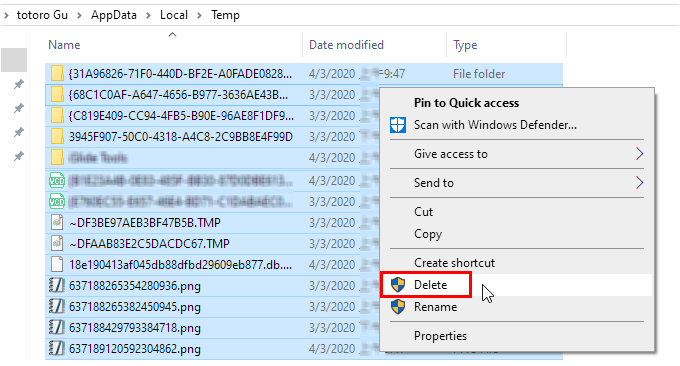
Step 1: Press Windows + R to open Run.
Step 2: Type %temp% into the Open field and hit Enter.
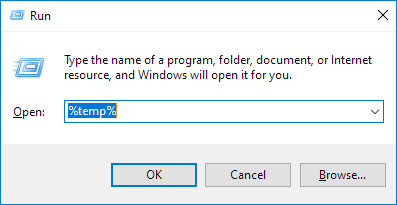
Step 3: Press Ctrl + A to select all the files you want to get rid of and right-click to delete.
