One of the most important built-in features of Windows 10 is the Windows Defender Firewall, which is designed to help prevent hackers or malicious software from gaining access to your PC through the Internet or a network. If you don’t keep it running, that means your computer could potentially be in danger every time you connect to the Internet or other networks. Therefore, it is recommended to have it turned on constantly.
But it has recently been reported that many Windows 10 users are having trouble activating the Windows firewall. That is they are unable to activate Windows Defender Firewall. If you don’t get your Windows Defender Firewall activated right away on your system, this will prevent it from keeping your operating system protected online. Fortunately, there are 5 simple but effective ways to help you fix Unable to Activate Windows Defender Firewall issue as soon as possible on your Windows 10 system.
- Way 1: Perform a Registry Tweak
- Way 2: Change the Value data of Windows Defender
- Way 3: Restart Windows Defender Firewall Service
- Way 4: Reset Windows Defender Firewall Settings
- Way 5: Forcibly Enable Windows Firewall using Command Prompt
Way 1: Perform a Registry Tweak
Step 1: Access Registry Editor in Windows 10.
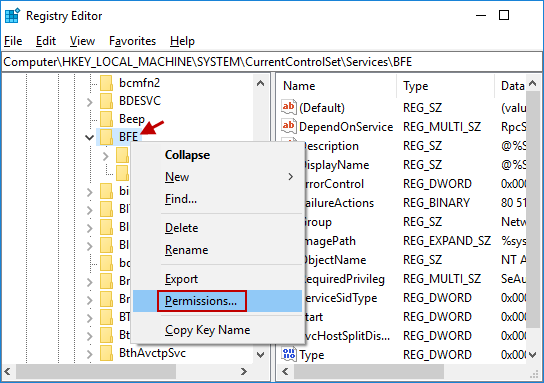
Step 2: In the Registry Editor, browse to the path listed here:
HKEY_LOCAL_MACHINE\SYSTEM\CurrentControlSet\Services\BFE
After navigating to the BFE option, right-click on BFE and choose Permissions… option from the context menu.
Step 3: This will open Permissions for BFE dialog, click Add button.

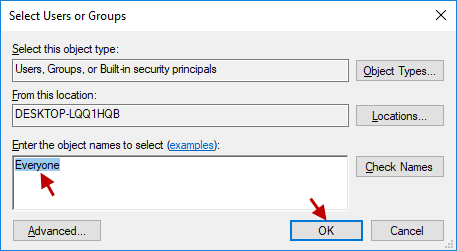
Step 4: In the Select Users or Groups, type Everyone and click OK button.
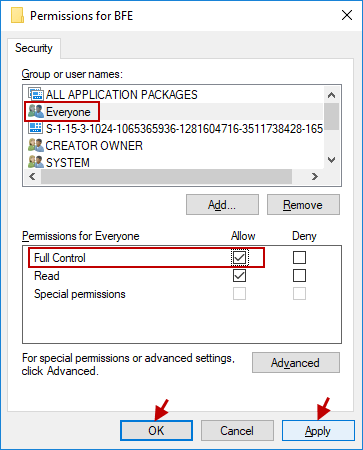
Step 5: Select Everyone under Group or user names and check the Full Control option under Permissions for Everyone. Then click Apply followed by OK.
Restart the PC to save the changes.
It is noticed that this method is suitable for most users, because this method is from Microsoft’s official BBS, so you can look forward to repairing the Unable to Activate Windows Defender Firewall error.
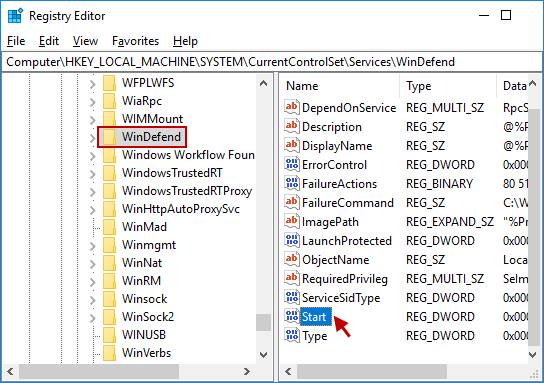
Way 2: Change the Value data of Windows Defender
Step 1: Go to Registry Editor window and locate to the following registry key:
HKEY_LOCAL_MACHINE\SYSTEM\CurrentControlSet\Services\WinDefend
Step 2: Select WinDefend and double-click Start DWORD.
Step 3: Set the value as 2 in the Value data field and click OK button.
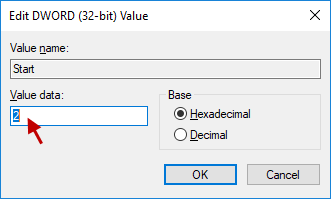
Close the registry editor and restart the PC. You should be able to fix the problem of not being able to activate Windows Defender Firewall.
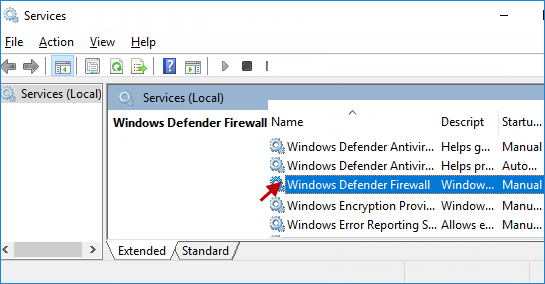
Way 3: Restart Windows Defender Firewall Service
Step 1: Open Services snap-in window in Windows 10.
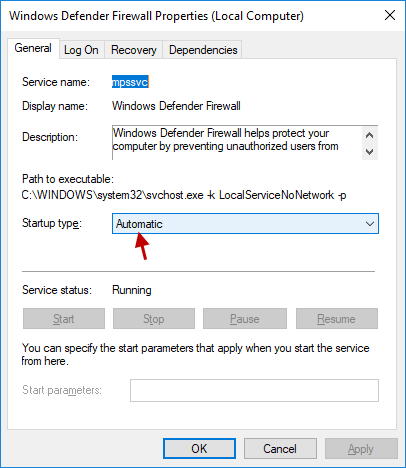
Step 2: Look for and double-click Windows Defender Firewall in the service.msc window.
Step 3: Be sure that the Startup type is set to Automatic. And check whether the Unable to Activate Windows Defender Firewall issue fixes or not.
Way 4: Reset Windows Defender Firewall Settings
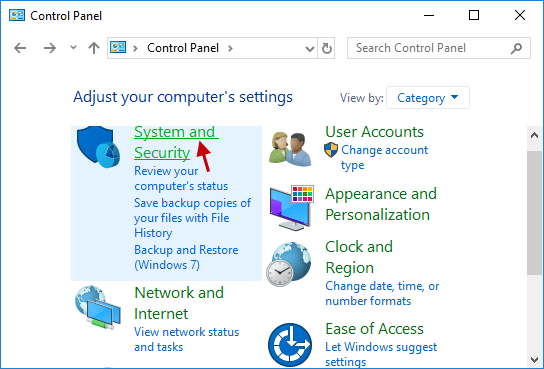
Step 1: Launch Control Panel in Windows 10.
Step 2: In the Control Panel window, select System and Security option.
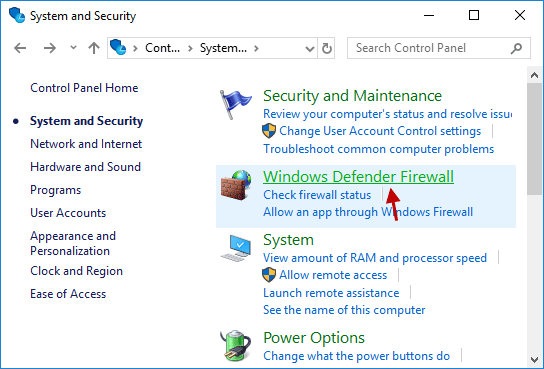
Step 3: Click on Windows Defender Firewall link.
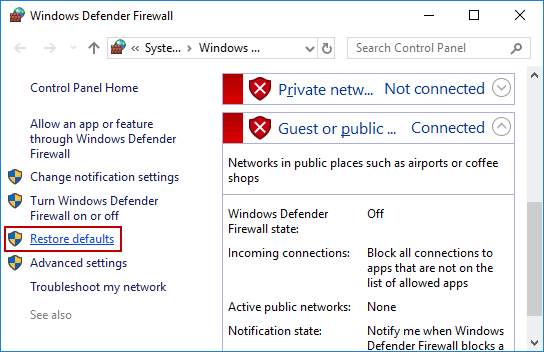
Step 4: Click the Restore defaults link from the left side of the window.
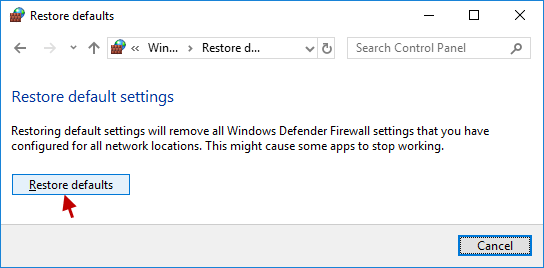
Step 5: Click the Restore defaults button again.
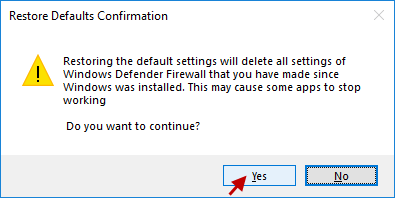
Step 6: Click Yes to confirm the changes. And see if you are able to fix Unable to Activate Windows Defender Firewall issue.
Way 5: Forcibly Enable Windows Firewall using Command Prompt
Step 1: Open Command Prompt as Administrator in Windows 10.
Step 2: In the administrative command prompt, type the following commands and press Enter.
netsh firewall set opmode mode=ENABLE exceptions=enable

Step 3: Close the command prompt and restart the PC to save the changes. The problem should be fixed.
See this video for details: 5 Ways to Fix Unable to Activate Windows Defender Firewall on Windows 10 Issue

