Windows comes with the Magnifier tool. Sometimes you may need to use the Magnifier tool to enlarge the fonts, images, or apps on your computer screen. Now in this post, I will show you eight ways to open the Magnifier in Windows 10.
Way 1: Using the keyboard shortcut
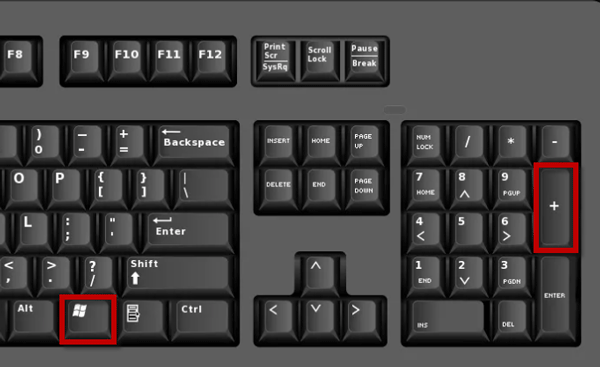
You can quickly open the Magnifier by simply pressing the Windows key and plus sign (+) together on your keyboard.
Way 2: Using the Search box
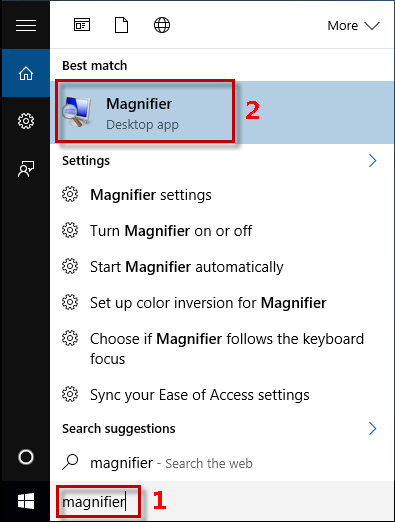
1) Click in the Search box on the left side of the Windows 10 taskbar, and then type in magnifier.
2) When the Magnifier (Desktop app) appears at the top of the search results list, click on it to open the Magnifier.
Way 3: from the Start menu
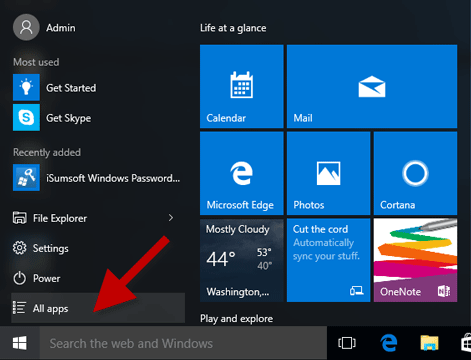
1) Bring up the Windows 10 Start menu by clicking the Windows icon in the lower left corner of the desktop, and then click All apps.
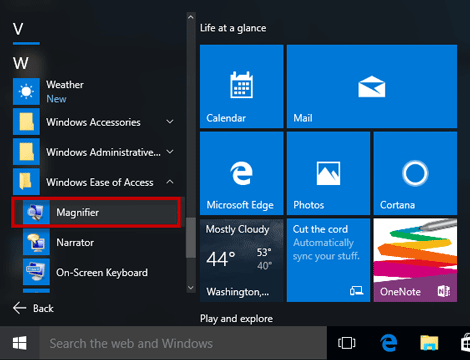
2) Scroll down, click Windows Ease of Access, and then click Magnifier to open it.
Way 4: Open Magnifier using the Run dialog
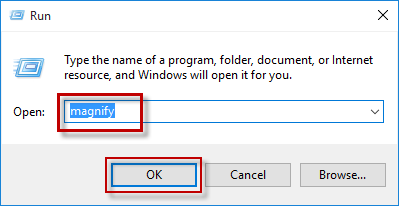
1) Open the Run dialog by pressing Win + R on your keyboard.
2) Type in magnify and click OK.
Way 5: Open Magnifier via PC Settings
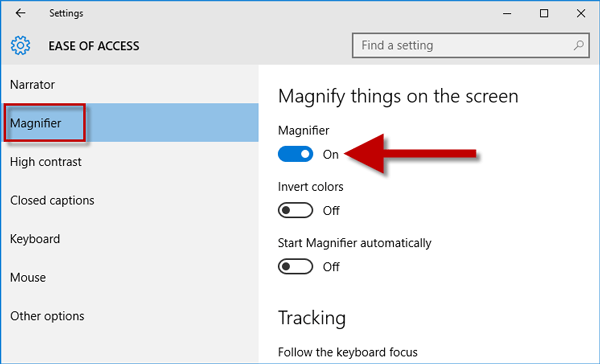
1) Open the Settings app in Windows 10 by pressing Win + I keyboard shortcut.
2) Click Ease of Access.
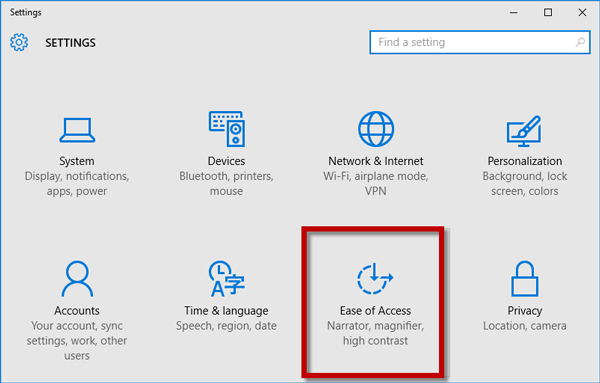
3) Select Magnifier on the left side, and then switch the toggle button under Magnifier to the On position.
Way 6: through Control Panel
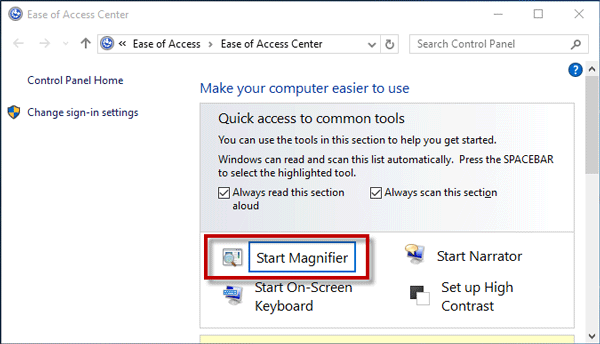
Press Win + U keyboard shortcuts to directly open the Ease of Access Center of the Control Panel, and then click Start Magnifier to open the Magnifier.
Way 7: Open the Magnifier with Command Prompt
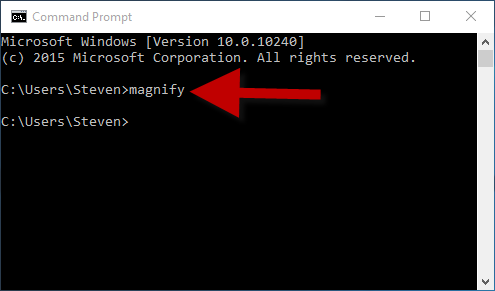
1) Open a Command Prompt window by pressing Win + X and then select Command Prompt.
2) Type in magnify and press Enter.
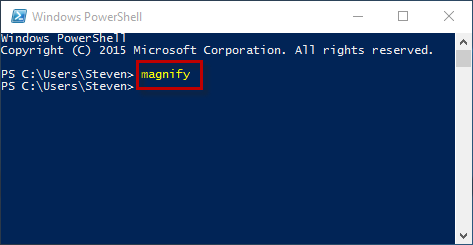
Way 8: with Windows PowerShell
1) Open a Windows PowerShell window. If you can’t find the Windows PowerShell, type powershell in the Search box to search for it.
2) Type in magnify and hit Enter.
