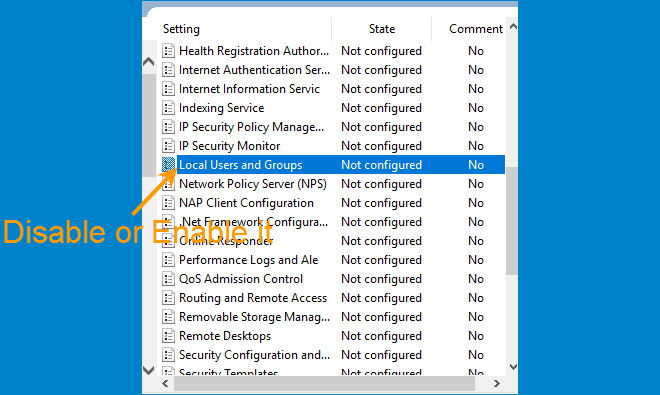
The Local Users and Groups is located in Computer Management, which you can use to manage user accounts and groups on a local computer or assign privileges to users and groups, thus limiting the ability of users and groups to perform some certain actions on the computer.
Although Local Users and Groups is a useful tool built in Windows, occasionally you may want to restrict access to it, especially when you share one computer with others. Now in this page, we will show you how to disable or enable Local Users and Groups in Windows 10. Two methods are available.
- Way 1: disable or enable Local Users and Groups using Group Policy
- Way 2: disable or enable Local Users and Groups using Registry Editor
Way 1: Disable or enable Local Users and Groups using Group Policy
Step 1: Open the Local Group Policy Editor in Windows 10.
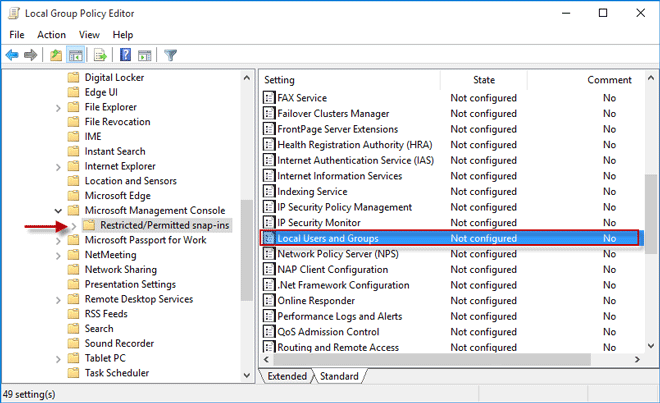
Step 2: On the left side pane of the Group Policy Editor, navigate to the entry: User Configuration -> Administrative Templates -> Windows Components -> Microsoft Management Console -> Restricted/Permitted snap-ins. Then on the right side pane, look for the policy named ”Local Users and Groups”, and then double-click it to configure it, which is not configured by default.
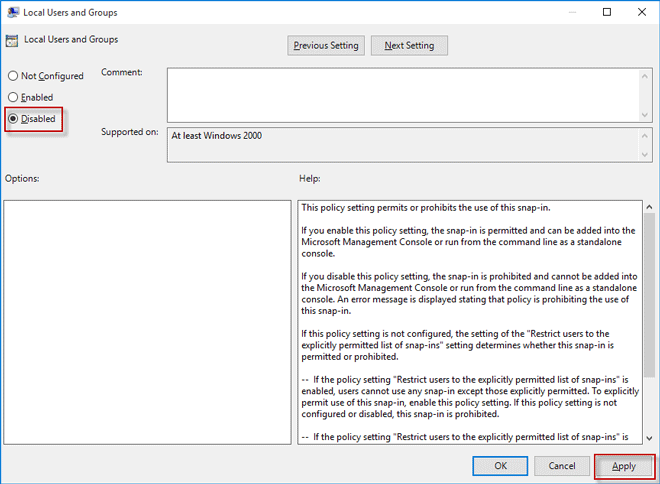
Step 3: Select the Disabled radio button, and click Apply followed by OK. This will disable the Local Users and Groups.
Changes will take effect immediately. From now on, when you try to open the Local Users and Groups using lusrmgr.msc, you will get the error message: ”This snap-in below, referenced in this document, has been restricted by policy. Contact your administrator for details.” You’ll find the Local Users and Groups snap-in also disappears from the Computer Management.

If you need to re-enable the Local Users and Groups, just need to set the policy to ”Not Configured” or ”Enabled”.
Way 2: Disable or enable Local Users and Groups using Registry Editor
Step 1: Open the Registry Editor in Windows 10.
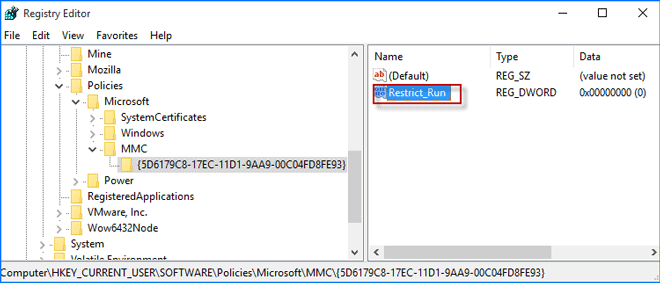
Step 2: On the left side pane, navigate to the key: HKEY_CURRENT_USER\Software\Policies\Microsoft\MMC{5D6179C8-17EC-11D1-9AA9-00C04FD8FE93}. If the ”MMC” as well as ”{5D6179C8-17EC-11D1-9AA9-00C04FD8FE93}” key doesn’t exist in your Registry Editor, create them separately. Right click on the Microsoft key and select New > Key; name the new key as MMC. Next, right click on the MMC key and select New > Key; name the new key as {5D6179C8-17EC-11D1-9AA9-00C04FD8FE93}.
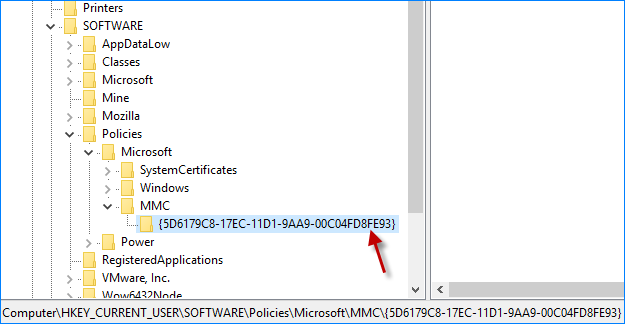
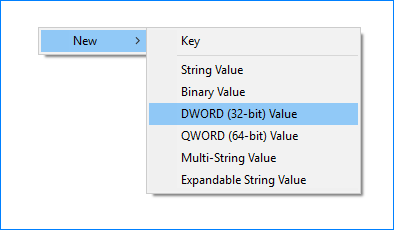
Step 3: With the {5D6179C8-17EC-11D1-9AA9-00C04FD8FE93} key selected, right click on any blank space of the right-side pane and select New > DWORD (32-bit) Value.
Step 4: Now name the newly created value as Restrict_Run, and then double-click it to set its value data, which is not set by default.
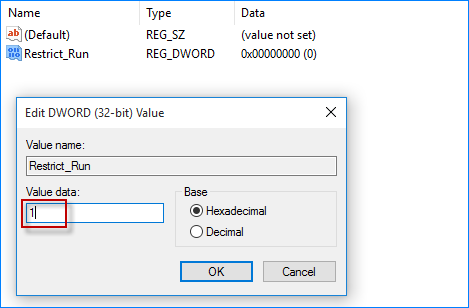
Step 5: Set the Restrict_Run value data to 1, and click OK.
1: Disabled
0: Enabled
Changes also take effect immediately. If changes do not take effect, you’ll need to restart your computer for the changes to take effect. The Local Users and Groups is now disabled and you can’t access it. If you want to re-enable it, set the Restrict_Run value data to 0 or simply delete the Restrict_Run entry.

