
Checkboxes in Excel Sheets are usually used in many scenarios. If you have no idea how to add or delete checkboxes in Excel 2016 cells, follow this guide.
Part 1: How to insert checkboxes in Excel 2016 cells
Steps are as follows.
Step 1: Show the Developer tab on the Excel ribbon
You insert various interactive controls such as a checkbox, list box, button, etc. under the Developer tab on Excel ribbon. However, the Developer tab is disabled and not displayed on Excel ribbon by default. Therefore, you first have to turn on the Developer tab to make it show on the ribbon. That can be done easily with the following steps.
1) Open the Excel file.
2) Click the File tab on the ribbon to bring up the backstage, and then click Options.
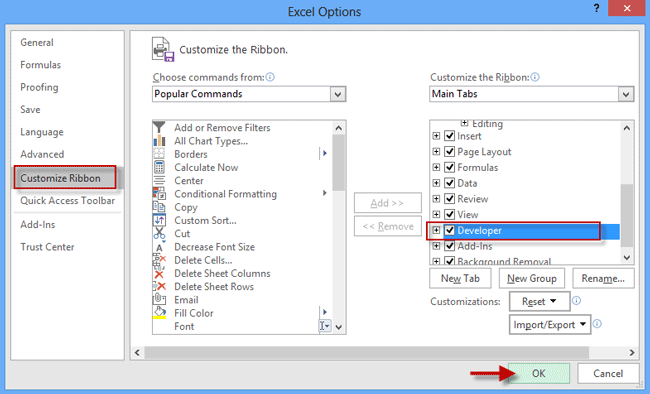
3) After the Excel Options window opens, select the Customize Ribbon tab on the left-side pane, check the Developer check box under the Main Tabs, and then click OK.
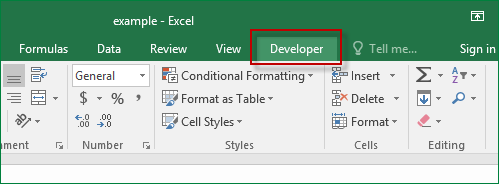
4) Now the Developer tab appears on the Excel ribbon.
Step 2: Insert a checkbox to one cell
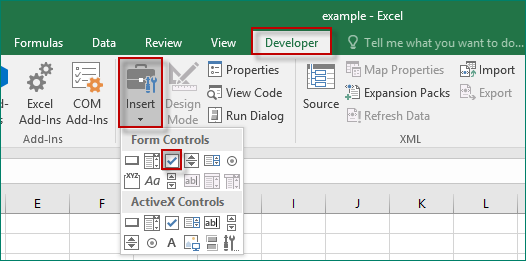
1) Select the Developer tab, click the Insert command, and then select the checkbox option, which looks like a small square with a blue check, from the top row of the Form Controls collection in the drop-down list.
2) After you select the checkbox option, when you hover your mouse cursor over any cell, the cursor changes to a black cross. Click in the cell where you want to insert a checkbox (B2 in my case), so the checkbox control will appear near that cell.
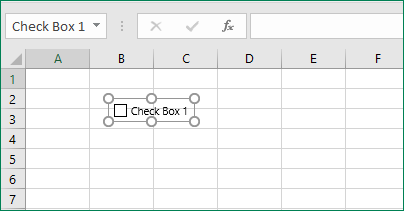
3) To exactly put the checkbox into the cell, hover your mouse pointer over the checkbox, and when the cursor changes to a four-pointed arrow, drag the checkbox where you want it.
Step 3: Insert checkboxes to more cells
After the checkbox is inserted, the check box option is deselected. To insert checkboxes to other cells, you need to repeat step 2, or simply copy the added checkbox to a column or row of cells with the following steps:
Select the cell that contains the checkbox, and hover your mouse cursor over the lower-right corner of this cell. When the mouse pointer changes to a black cross, drag it down (up/left/right) to the last cell where you want to insert a checkbox.
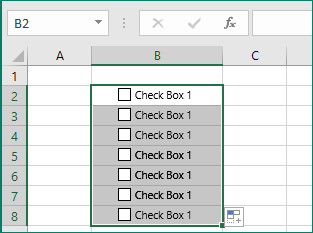
Step 4: Change or remove text from the checkbox
A newly inserted checkbox uses a default text: Check Box 1, Check Box 2, Check Box 3, and so on. If you want to change or remove the text, just need to right click on the checkbox and select Edit Text from the context menu, so that the text is editable.

Part 2: How to delete checkboxes in Excel 2016 cells
1) Right-click on the checkbox you want to delete, and when the context menu appears, click on any area to close the context menu. Then the checkbox is changeable.
2) Press the Delete or Backspace key on your keyboard to delete the checkbox.
3) Repeat the previous steps to delete more checkboxes.

